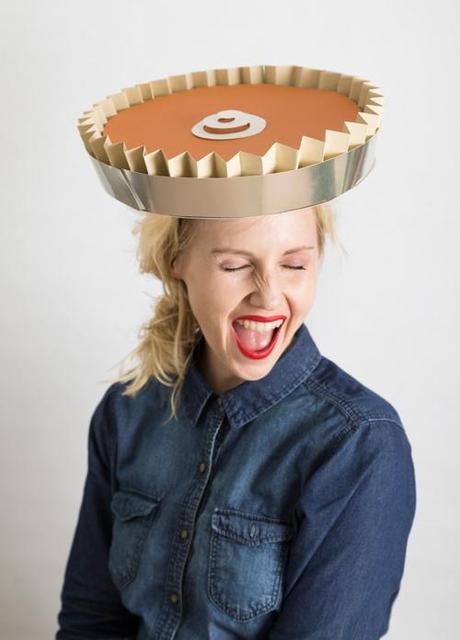
 I was talking with my girl Hillary and she mentioned that in her family they recently started a tradition of making hats the day of Thanksgiving. As you might guess, I was all ears. Hats + holidays = I'm all about it. Not only that, but they draw names and make a hat FOR another person and have to wear it the day of Thanksgiving. Genius! Think of the possibilities with this! Well, we decided that everybody needs to adopt this tradition so we came up with a few ideas of our own. Of course, they are meant to be ridiculous. Think of Aunt Edna sporting a candy cornucopia at the dinner table!
Above, pumpkin pie hat. Below, candy cornucopia.

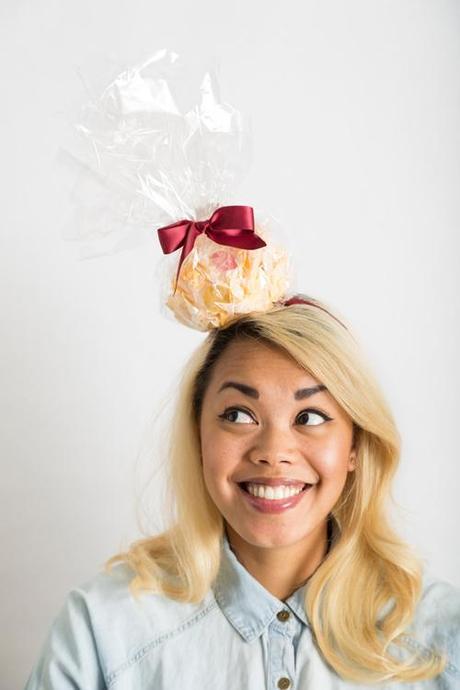
 Above, Brown paper turkey hat. Below, popcorn ball fascinator. Bottom image, pinecone hat.
 See step by step tutorials below.
Photography by Cassidy Tuttle Crafting by Hillary Gallip, Ashley Isenhour, Victoria Riza, Brittany Jepsen
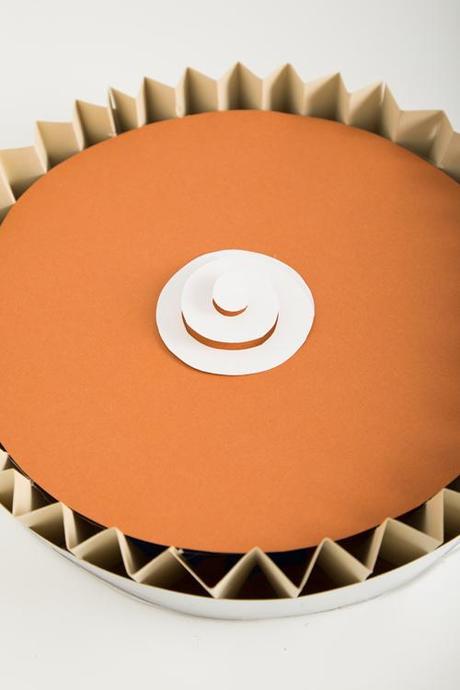
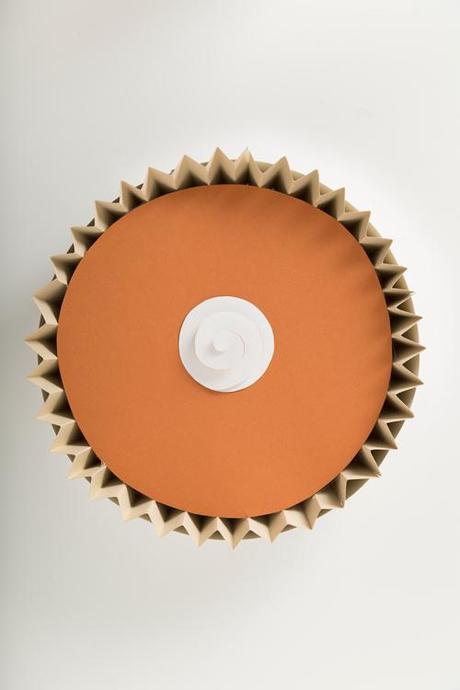
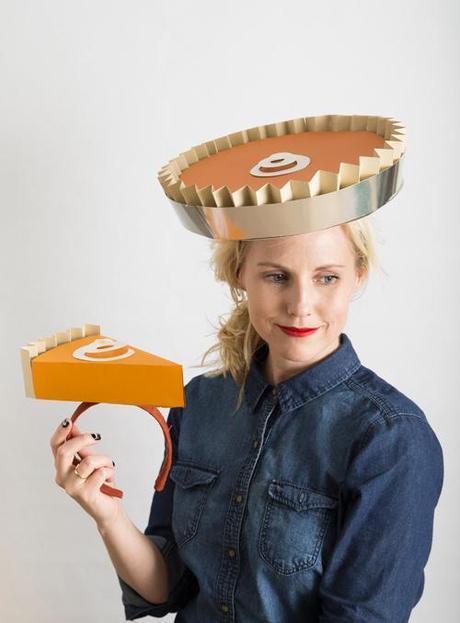 PUMPKIN PIE HAT by Brittany Jepsen:Materials: orange cardstock, white cardstock, beige cardstock, silver mirror paper, glue gun, cardboard, scissors, craft knife
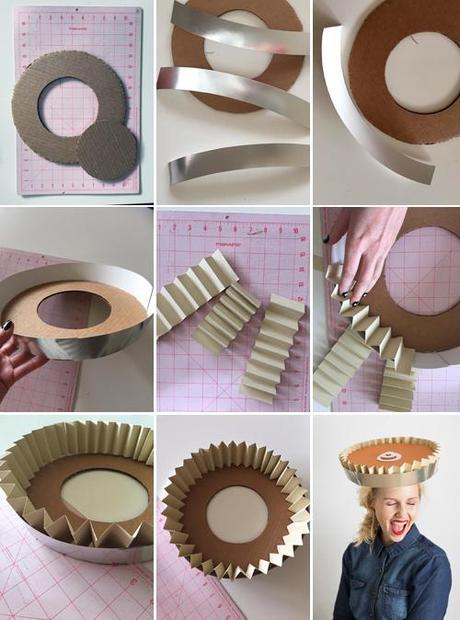
Step 1: Cut out a circle out of cardboard. I made mine 10" in diameter.Step 2: Cut out a smaller circle within that circle. This should fit the size of your head. I would start by making it a bit too small and make it larger if necessary.Step 3: With your silver mirror paper make the perimeter of the "pie tin". My paper wasn't large enough so I had to make 3 strips to go around the whole perimeter. I made mine 2 1/2" tall.Step 4: Glue the strips into place with your glue gun.Step 5: With your beige paper, make strips of paper, 3" tall and accordion fold them about 1/2" wide. This will serve as the crust of the pie. My paper wasn't long enough so I had to do it in a few strips.Step 6: Glue the crust into place by dabbing a big of glue gun onto the accordion folds then onto the pie tin every so often. It's a delicate process.Step 7: Make the top of the pie with your orange piece of paper. Cut it into the shape of a circle slightly smaller than the perimeter of the pie and cut it down if necessary. Glue it into place by putting glue along the bottom so it sticks to the crust.Step 8: Top it off with a dollop of whip cream. Create this by cutting out a circle in white and cutting it into a spiral. Stretch it out a bit so it has some height. Glue in place.
In the picture above I'm holding a single piece of pie. Check out how to create it on Studio DIY.
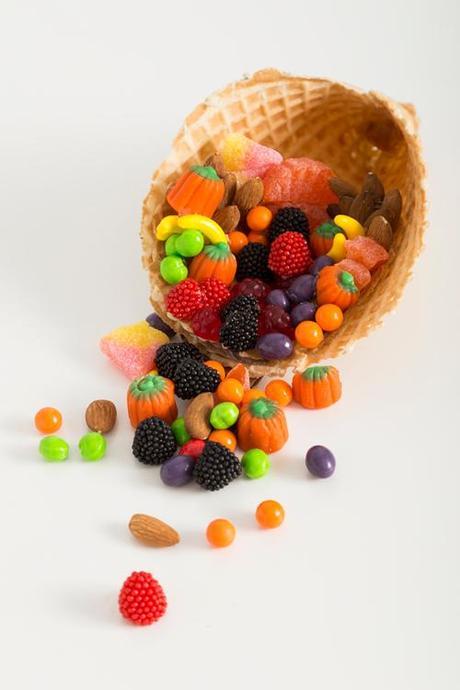 CANDY CORNUCOPIA by Hillary GallupMaterials: waffle cones (I got a few from Cold Stone), candy in fruit shapes, ribbon, glue gunStep 1: Bending the waffle cornucopia is very delicate so that's why I bought several incase I messed up. Step 2: Dip the end of the cone into water for 8-10 seconds to soften the cone , then immediately stick the cone in the microwave for 10 more seconds. Step 3: After you pull the cone out you can manipulate the end how you want. I turned it up a bit to create that cornucopia shape.Step 4: Prop up the end under a marker to support it & let it dry for an hour.Step 5: After gathering all the fruit candies I could find I placed them onto the cone & superglued them in place. Step 6: I attached the cornucopia to a headband supported ribbon & wrapped it around my head.
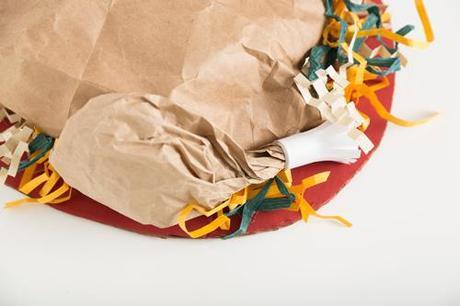
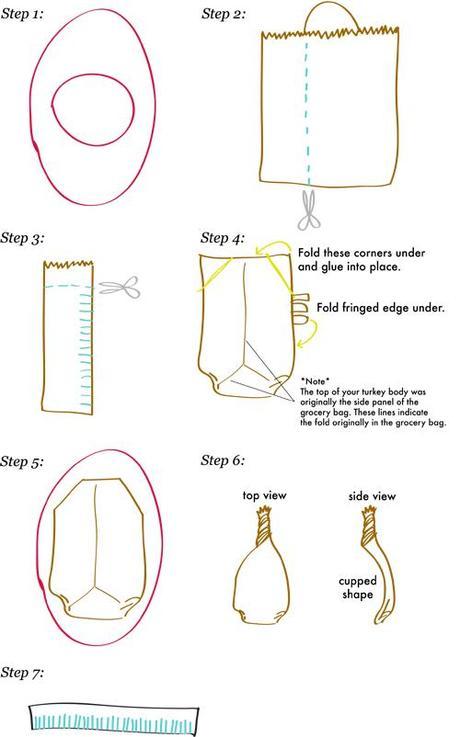
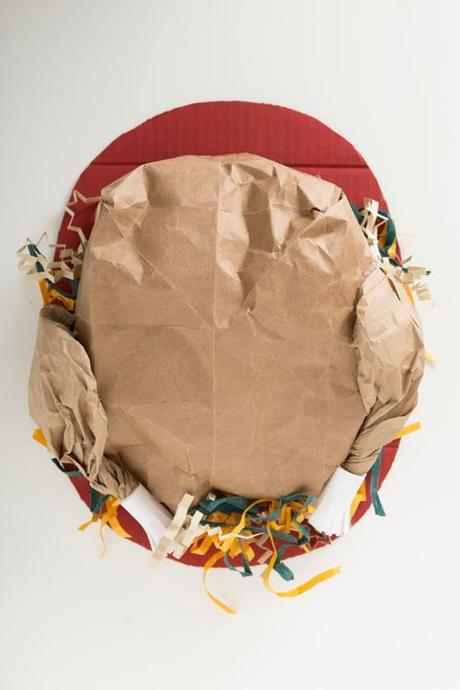 TURKEY HAT by Ashley IsenhourMaterials: brown paper grocery sack, 2 brown paper lunch bags, hot glue gun, scissors, tape measure, cardboard, x-acto knife or box cutter, white paper, colored paper scraps, craft paint, paint brush, pencilInstructions: (We adapted this tutorial from One Charming Party)
Step 1: Draw a large oval onto a piece of cardboard. Measure the circumference of your head. Draw a circle with the same circumference in the middle of the oval. Use an x-acto knife or box cutter to cut out the oval and the circle within the oval. This will be your "platter". Paint the platter desired color and allow to dry.Step 2: Lay the brown paper grocery sack flat. Cut the sack apart vertically into two sections. One section will be about 1/3 of the width of the bag and the other section will be about 2/3 of the original width.Step 3: Discard the larger section. Cut a few inches off of the opened end of the smaller section of the bag. Use scissors to fringe the cut edge of the smaller section. Cuts should about 1" deep and 3/4" apart.Step 4: Turn this section of the bag inside-out. Don't turn the corners of the bag all the way, this will give your "turkey" a rounded appearance. Fold the fringed edge of the bag under so that the fringed edge is hidden. Fold the two corners of the open end of the bag under and hot glue in place. You will be left with a paper dome that will be your turkey body.Step 5: Hot glue the fringed, folded under edge of the turkey body around the edge of the circle cut out of the cardboard platter. Step 6: Carefully turn both paper lunch bags inside-out. Again, leave the corners unturned to create the rounded end of your "drumsticks". Flatten one paper bag. Use your fist to mold a concave, cupped shape on the closed end of the bag. Twist the open end tightly to make a drumstick shape. Repeat steps with other paper bag.Step 7: Cut two 2" strips of white paper. Cut fringe along the edge of the strips about 1" deep. Use hot glue and wrap one of the strips around the twisted end of each drumstick. Tousle fringe with fingers to give them dimension. Hot glue around the cupped edge and secure drumsticks to either side of the turkey body.Step 8: Cut thin strips of colored scraps of paper. Crumple strips and hot glue into place strategically around turkey body. This is your "stuffing".
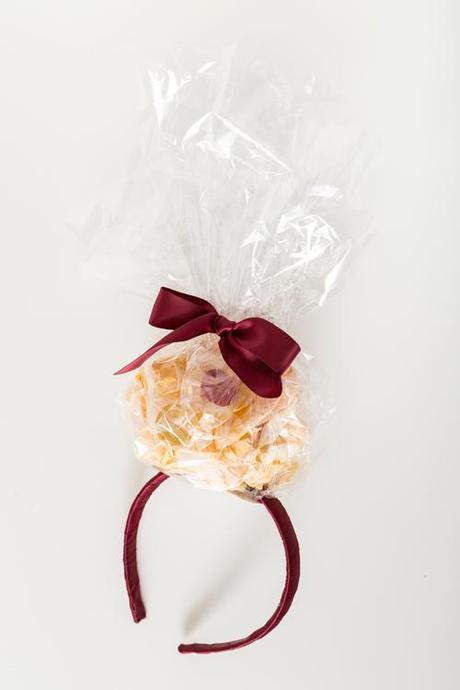 POPCORN BALL by Victoria Riza
Materials: coffee filters, headband, fabric, ribbon, cellophane, watercolor
Step 1: Tear apart a coffee filter.
Step 2: Watercolor it with a yellow/orange buttery color. It doesn't have to be perfect.
Step 3: Scrunch up a number of them and put them into a piece of cellophane and wrap it it the shape of a ball. Secure with ribbon.
Step 5: Wrap a headband in the fabric of your choice.
Step 4: Glue the popcorn ball onto a headband.
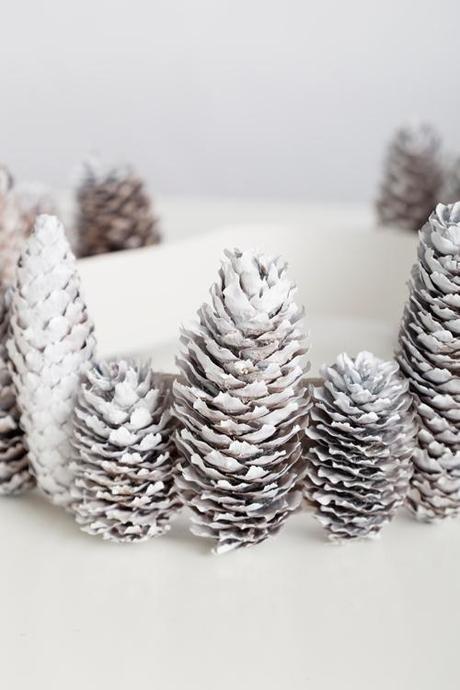 WINTER PINECONE by Brittany Jepsen
Materials: pinecones, spray paint, cardstock, glue gun
Step 1: Create a base to fit onto the head with a piece of cardstock. Secure with tape or glue. I made mine 2" wide.
Step 2: Glue the pinecones onto the paper.
Step 3: Spray paint white.
Donzo!
SO, are you going to adopt the tradition???? Too fun, right?!

