The addition of thick viscous liquid ingredients like condensed milk, honey and corn syrup seems to make sandwich breads extra soft!!!
For instance, these are the super soft breads that I have baked...
with condensed milk:
Japanese Shokupan Condensed Milk Sandwich Bread - Recipe One
Japanese Shokupan Condensed Milk Sandwich Bread - Recipe Two
Japanese Shokupan Condensed Milk Sandwich Bread - Recipe Three
with light corn syrup:
Super Soft and Fluffy White Crusted Japanese Square Bread
with honey:
American Honey Sandwich Bread
Spongy Soft Honey Sandwich Bread
Super Soft White Basic Sandwich Bread with overnight starter
Super Soft Sandwich Bread with NO Overnight Starter Recipe ONE
Super Soft White Crusted Sandwich Bread with NO Overnight Starter Recipe TWO
And here, I have found another super soft HONEY sandwich bread recipe...
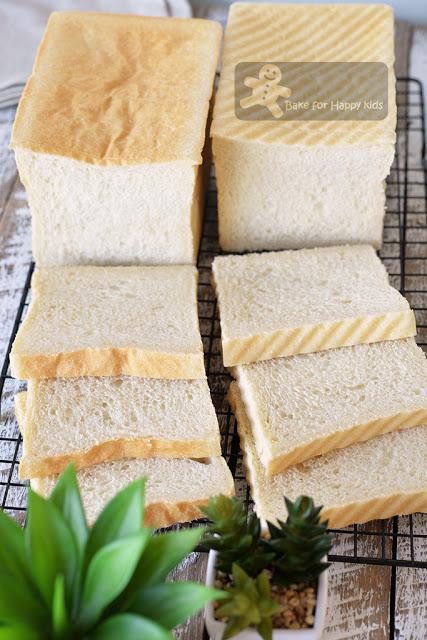
Super Soft Honey Sandwich Bread
This is the classic sandwich bread recipe that contains milk, butter but no egg.
What are the differences?
Looking at the honey sandwich bread recipes closely, I have noticed that this recipe contains a lot more water and honey than Super Soft White Crusted Sandwich Bread with no Overnight Starter Recipe TWO, very less butter than Super Soft Sandwich Bread with no Overnight Starter Recipe ONE. More water means that the breads are moister and denser, spongy soft rather than feathery fluffy soft. More honey means that the breads are slightly sweeter and the crusts are a little more golden. Less butter means that the breads are less fatty! Hmmm...
If all of these breads are super soft, which one is the softest?
I must say that it is very difficult to tell the slight differences because they are all SO SOFT. Although the detailed me reckon that Super Soft White Crusted Sandwich Bread with no Overnight Starter Recipe ONE and TWO are a little softer, I won't reject these soft breads that are made with more honey and very less butter.
Some people might say that we shouldn't bake with honey because the baking heat destroys the beneficial enzymes in honey and also alter the taste of the honey. Agree but the honey on supermarket shelves are pasteurised (heat-treated) anyway and the baked honey taste is also yummy. If honey can actually make my breads softer and tastier, so why can't I bake with honey?
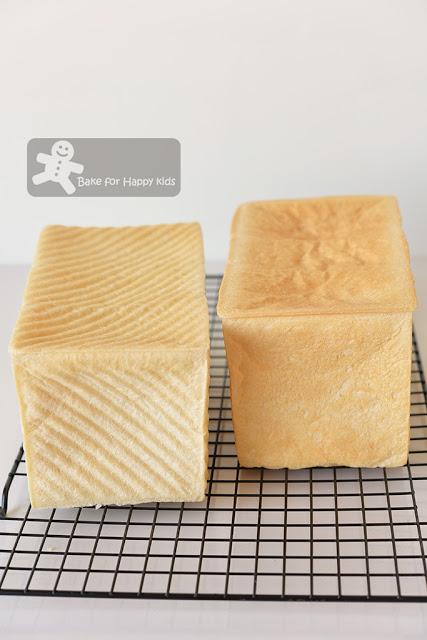
With a good amount of added honey...
These breads are a little more golden than those that are made with less honey.
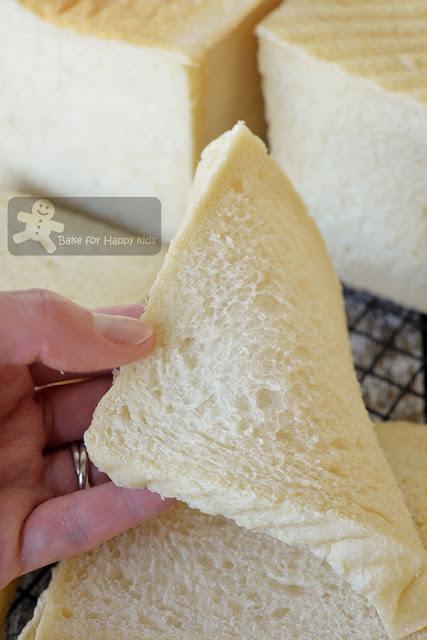
Wow! I'm happy that I found another super moist super soft sandwich breads!!!
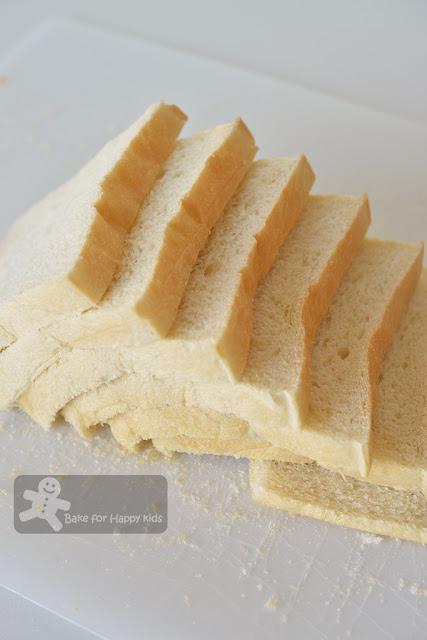
These breads are so soft that slicing them evenly can be pretty challenging!!!
Here's a video showing how I baked these super soft breads.
Please note that this bread dough is fully loaded with moisture and will be sticky and difficult to handle at the beginning of kneading. Just keep kneading and you will see (shown in the video) that the dough will become very smooth and white like a baby's bottom! It's actually pretty therapeutic to watch! LOL! Enjoy...
If you like my recipes and want more, please LIKE, SHARE and FOLLOW me my Facebook at here or here or my Instagram @zoebakeforhappykids because every LIKE, SHARE and FOLLOW from you will motivate a hardworking working mom like me to share more!
Yet, I will be having a short break from blogging due to school holidays and won't be sharing any new recipes for the next two weeks. Nevertheless, I will continue to share pictures and baking video of the food that I baked via my Instagram @zoebakeforhappykids within this school holidays week. So please stay tune as I will be back to blog at mid-October. Ciao!
Here's the recipe that is adapted from King Arthur Flour
WARNING: This bread dough is fully loaded with moisture and will be sticky and difficult to handle at the beginning of kneading. Please use a breadmaker or an electric mixer with hook attachment for kneading and do not knead the dough by hand.
Make two perfect square 10 x 10 x 20 cm or 450g loaves
Note: You can use half of this amount to bake just one loaf.
460g water, lukewarm about 37°C / 100°F
45g honey
650g bread flour with about 12% protein
45g milk powder - please do not replace this ingredient and water with milk.
4g salt
50g unsalted butter, soften at room temperature
2 tsp instant dry yeast
extra butter or vegetable oil spray to grease the loaf pans (plus the pullman lids if required)
extra bread flour for dusting and shaping
If you are using a breadmaker to knead and prove, add all ingredients into the breadmaker according to this order. Use "dough" setting to mix and knead dough for 30 mins or until the dough is elastic and allow the dough to prove for 60 mins.
If you are using an electric mixer with an hook attachment to knead, combine all ingredients except butter in the mixing bowl and mix at low speed until a soft dough forms. Knead in the butter until incorporated. Continue to knead at low speed for at least 25 mins or until the dough is smooth and elastic. It is important that the dough has to be elastic and stretchy. Cover the dough and allow the dough to prove in a warm and humid place for about 60 mins or until doubled in size.
To shape the dough into bread loaves:
Grease 10 x 20 cm loaf pans (plus their lids if required) with butter or vegetable oil spray.
Divide dough into into 6 equal portions. Shape all portions of dough into smooth balls. Allow them to rest at room temperature for about 10 mins.
Using a lightly floured rolling pin, roll each portion into long and flat oval shape (about 20 cm) on a lightly floured non-stick surface. Use your fingers to pick one shorter side of the dough and tuck and roll the dough like a Swiss roll. Use the rolling pin to flatten and roll the dough into a long rod shape. Then, pick one shorter side of the dough and roll it like a Swiss roll again. Repeat this rolling step with the remaining portions of dough.
Place three rolled dough with their seams side down into the each prepared pan. Press the top of the dough lightly to form an even surface. Allow the dough to prove in a warm and humid place for another 60 mins or until the dough is going to reach the maximum height of the loaf pan. Cover loaf pans with lids if required.
Bake breads in a preheated 180°C (350°F) oven for 25 mins or until the breads are thoroughly baked inside. Remove the lids and the breads from the loaf pans immediately and transfer onto a wire rack to cool completely before slicing and serving.
To store, wrap tightly in plastic wrap and keep at room temperature for 2-3 days or freeze in serving portions for 2-3 months.
Happy BakingPlease support me and like me at Facebook...
