A super soft loaf with pretty swirl chocolate filling...
I have a perfect recipe for you!
Or even better!!! ... because I know that I have baked my chocolate marble bread with lots of dedication. It is not excessively sweetened because the bread dough is made with 15g honey. The chocolate layers are made with premium Callebaut dark chocolate, French butter and Valrhona cocoa powder. And there is NO cane sugar added!
Yet, the bread is PERFECT! Not too sweet and not bitter! Just super soft, chocolaty and delicious! And it remains super soft even on the next day.
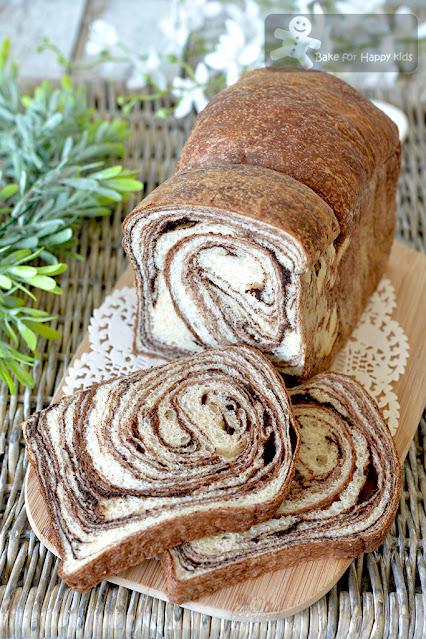
Proudly presenting...
My Super Soft Chocolate Marble Swirl Bread Loaf
I wonder if you have noticed... this bread dough recipe is exactly the same as the one in my Super Soft Black Sesame Marble Swirl Bread Loaf at here and also my Super Soft and Moist Cinnamon Sultana / Raisin Swirl Bread at here.
The idea of incorporating chocolate swirls into this super soft bread dough actually came after I showed my cousin that I have baked Black Sesame Marble Swirl Bread Loaf at here. She likes the idea of baking a super soft marble swirl bread but prefers to bake a chocolate version. So there you go...
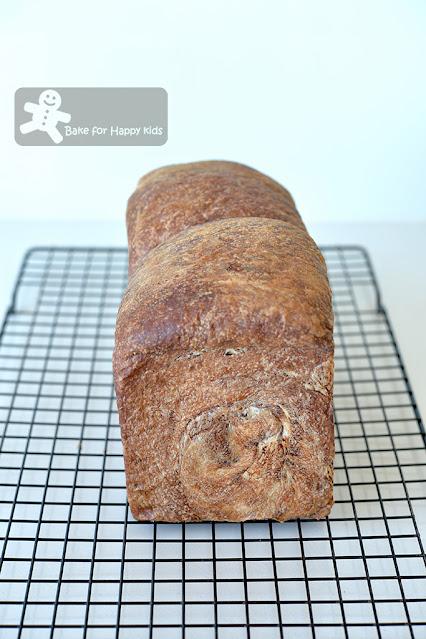
super soft bread base + dark chocolate = super soft chocolate bread!
YUM!!!
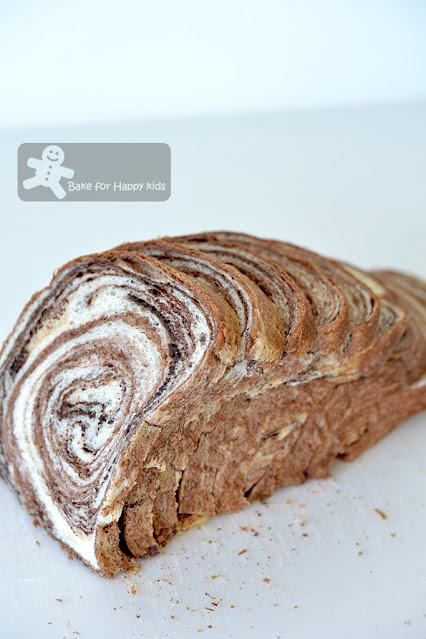
Even the crust of the bread is super soft!
See! Every slice is draping on each other.
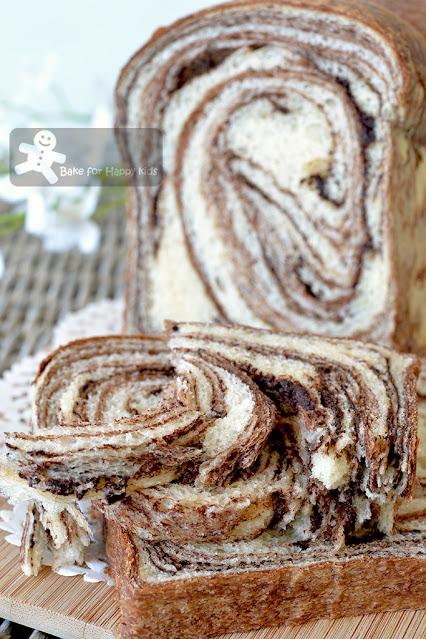
super soft bread + layers of dark chocolate= not just a super soft chocolate breadIt's a super yummy chocolate marble bread!It is not too sweet and not bitter. Just perfectly NICE!!!
In another words... Is this chocolate swirl bread is more challenging to bake than the black sesame swirl bread? Yes and no. Yes because there is definitely more steps involved. No because you will know how if you watch my 4 minute-video. I would say that both chocolate and black sesame recipes are equally good in their own way. However, due to the different swirl ingredients used, I can taste that the chocolate swirl bread is significantly softer.From the video, you might see that this bread dough is sticky and difficult to hand-knead. Thus, I would strongly recommend kneading the dough using a breadmaker or an electric mixer with hook attachment. No hand kneading, please. You should not add more flour into the dough while kneading but you can dust your hand, working surfaces and rolling pin with more flour while shaping the bread. Don't freak when the dough is sticky... Just keep calm while shaping the bread. It is really fun, therapeutic and rewarding especially when you sliced your pretty bread.
Music: BensoundIf you like this recipe, please support me! Please LIKE, SHARE and FOLLOW my Facebook at here or here or my Instagram @zoebakeforhappykids or SUBCRIBE my YouTube channel at here because every LIKE, SHARE and FOLLOW from you means a lot to me. It tells me that I'm in the right track and will continue to bake and share more in the future. Thank you!!!
Here's the recipe.
For the bread dough:
180g water at room temperature about 25°C / 75°F
15g honey
30g neutral-tasting vegetable oil
50g egg (from 1 large egg but please use the exact weight)
300g bread flour with 12% protein
15g milk powder - please do not replace this ingredient and water with milk.
2g salt
1 tsp instant dry yeast
For the chocolate layer mixture:
75g dark chocolate with 70% cocoa - I'm using Callebaut dark chocolate callets with 70% cocoa
25g unsalted butter
60g milk, at room temperature
35g egg white (about 1 large egg white), at room temperature
20g all purpose / plain flour
5g cornflour
10g cocoa powder - Mine is Valrhona, Dutch-processed1 tsp vanilla paste or extract
vegetable oil spray to grease the loaf pan
extra vegetable oil (about 1-2 tbsp) for brushing
extra bread flour for dusting and shaping but please use the minimal amount
For the bread dough:Place all the ingredients in a breadmaker according to the order of the above list. Use the dough setting to knead the dough for 30 mins or until it is smooth and elastic and allow the dough to prove for 1 hr or until doubled in size.
If you are using an electric mixer with an hook attachment to knead, combine all ingredients in the mixing bowl and mix at the lowest speed until a soft dough forms. Continue to knead at second lowest speed for at least 25 mins or until the dough is smooth and elastic. It is important that the dough has to be elastic and stretchy. Cover the dough and allow the dough to prove in a warm and humid place for about 1 hr or until doubled in size.
Important note: This bread dough is sticky and I do not recommend hand-kneading. You should NOT add more flour into the dough while kneading but you can dust your hand, working surfaces and rolling pin with more flour while shaping the bread.
While the bread is proving, prepare and cook the chocolate layer mixture.
For the chocolate layer mixture:
Place chocolate and butter in a heatproof bowl. Melt mixture using either microwave with short bursts or place mixture over a saucepan of simmering water. Set aside to cool slightly.
Combine milk and egg white in a medium saucepan and use a hand whisk to mix until the mixture is well-combined.
Sift flour, cornflour and cocoa powder into the milk mixture and whisk to combine.
Add melted chocolate mixture bit by bit and whisk mixture well after each addition.
Cook mixture with medium low heat with constant whisking. Remove from heat when mixture forms thick firm paste. Whisk in vanilla. Set aside to cool at room temperature for about 5 mins or longer. If you are living in a warm place, you will need to chill mixture for about 10-15 mins in a fridge or until the mixture is firm enough to handle. Do not chill the mixture for too long.
To shape the dough into bread loaf:
Grease 10 x 20 cm loaf pan with vegetable oil spray.
Divide dough into 2 equal portions, about 280-290g each. Shape both portions dough into smooth balls. Allow them to rest at room temperature for about 10 mins.
Divide chocolate mixture into 2 equal portions, 107-110g each. Place each portion onto a sheet of baking paper and place another sheet of baking paper on top of the chocolate mixture. Use a rolling pin to roll the mixture into flat rectangle with 15cm length.Use the rolling pin to flatten and roll one portion of the dough into a flat long rectangle with 15cm width. Place rolled chocolate mixture on the rolled dough in the middle, aligning the 15cm length of the chocolate mixture on the 15cm width of the rolled dough. Fold both ends of the dough and seal the dough the joining ends at the middle.
Fold one: Use a rolling pin to roll and stretch dough along the folded side into a large rectangle (meaning the longer rolled sides should be folded). Fold one-third of the dough towards its middle and the other one-third from the other end towards its middle. You should get one longish square.
Fold two: Repeat the same roll and fold step that is similar to fold one.
Fold three: Repeat the same roll and fold step that is similar to fold one.
Use a rolling pin to roll and stretch dough into a long rectangle. Pick one shorter side of the dough and roll it tightly like a Swiss roll.
Repeat the same shaping step with the other half of the dough and the remaining chocolate mixture.
Place both rolled dough with their round swirl side facing the short side of the pan and their seams side down into the prepared pan. Press the top of the dough lightly to form an even surface. Allow the dough to prove in a warm and humid place for another 60 mins or until the dough is going to reach the maximum height of the loaf pan.
Brush bread dough with oil. Bake in a preheated 180°C (350°F) oven for 25 mins or until thoroughly baked. If your breads are becoming brown too quickly, cover the breads very loosely with aluminum foil at the last 10-15 mins of bake and continue to bake until thoroughly baked.
Remove breads from the loaf pans immediately and transfer onto a wire rack to cool completely before slicing and serving.
To store, wrap tightly in plastic wrap and keep at room temperature for 2-3 days or freeze in serving portions for 2-3 months.
If you want the leftover breads to be super soft just like the day when they are freshly baked, you can heat them slightly in a microwave with high power for 10-20 secs. The re-heated bread will be surprisingly soft, moist and nice again to enjoy!
Happy BakingPlease support me and like me at Facebook...
