If your answer is YES, YAY!!!
If your answer is NO, Hmmm... I kinda know why. Although the apple-loaded sandwich breads at here are extremely soft and delicious, they will shrink after cooling. This is because the maximally apple-loaded bread dough can rise well enough to its maximum height but doesn't have enough gluten strength to hold its spongy air pockets after cooling.
Not perfect enough? Hmmm...
Hence, I'm sharing ANOTHER SUPER SOFT apple honey sandwich bread that won't shrink after cooling! YES, LIKE and another YAY?

Proudly presenting...
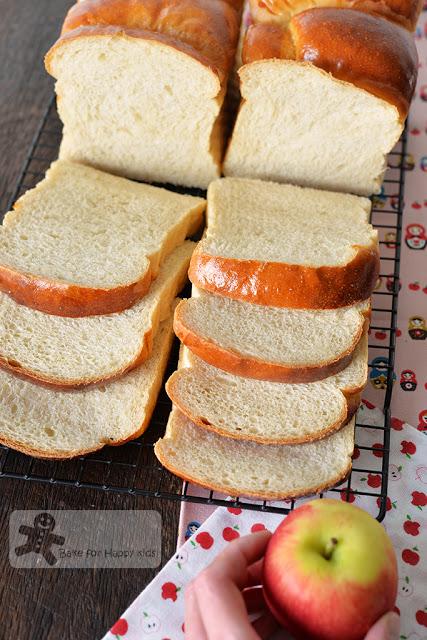
My Super Soft Apple Honey Sandwich Bread Recipe Two
Delicious soft apple breads that won't shrink!
Why these super soft apple breads made by recipe two will not shrink but the ones made by recipe one shrunk?
Unlike my previous recipe one at here, this recipe two...
1) contains 50g more bread flour and this addition will make these apple-loaded breads strong enough to hold the spongy structure well after cooling. So for recipe two, it is ok to use most typical bread flour with 12% protein meaning the use of extra strong bread flour with 14% protein or the addition of gluten flour is not required!
2) bakes the breads with NO lids and egg wash so that the well-baked top crusts will make the breads more structurally stable and a little firmer BUT just a little less softer. If you are extra critical, you might say that these breads with the baked crusts are not EXTREMELY soft but the usual critical me reckon that the difference in softness is actually not significant. In fact, these nicely baked soft crusts kind of make these breads EXTRA DELICIOUS with an alluring baked buttery apple fragrance. YUM!
3) contains less 160g (less 45%) apple and the missing apple is replaced with just water so that the breads will be lighter and spongier. Plus, the gluten in the breads will have enough strength to hold the overall bread structure before and after cooling. Is this good or bad because there is less apple? I must say that these breads are comparatively good being moist, chewy and apple-licious just like the ones made with recipe one but of course, I can't deny that the breads made with the more apple and without the top crust are the moistest and softest!

See here...
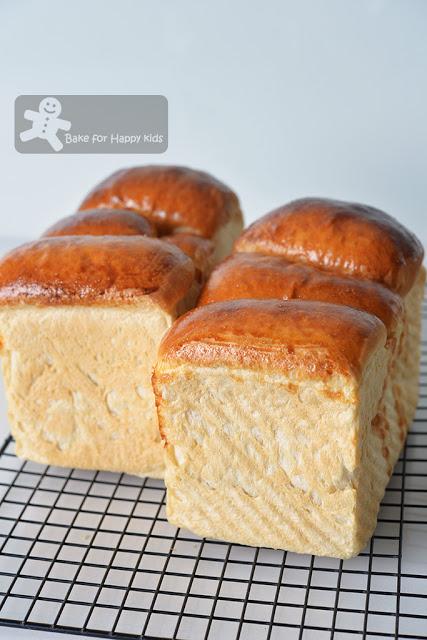
More bread flour and less apple have made these non-shrinking breads taller and spongier!!!

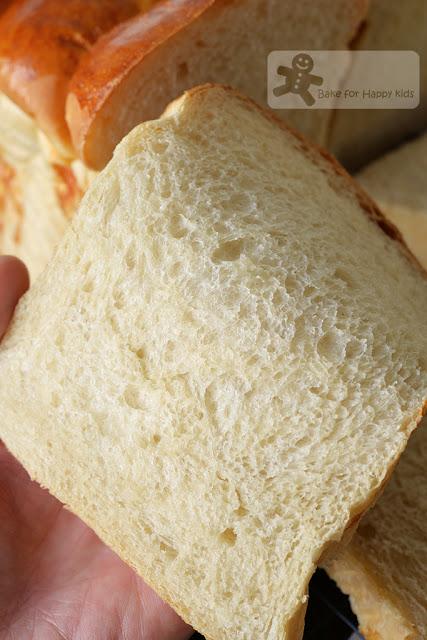
And these spongy apple breads are so flexible and soft!!!
So soft that every slice drapes on my hand!
Please don't get me wrong. I'm not saying that my recipe One is not good or my recipe Two is better!
To conclude...
If you are after apple honey sandwich breads that are maximally loaded with apples and don't mind if they will shrink after cooling, please use my recipe ONE at here.If you are after apple honey sandwich breads that are perfectly balanced with the added apples and won't shrink after cooling, please use my recipe TWO published in THIS post.
More-apple shrinking breads or the less-apple non-shrinking breads? To me, both recipes are equally fabulous! Thus, I have decided to share both recipes so you will have to decide! LOL!
Watch my video and see how I baked these super soft apple honey sandwich bread! So soft, spongy and tender and it won't shrink... but please be aware that slicing these soft and tender breads (both recipe ONE and TWO) can be challenging!!!
Like my recipes?
If your answer is YES, it's a big YAY for me!!! And it will be nice if you can LIKE, SHARE and FOLLOW me my Facebook at here or here or my Instagram @zoebakeforhappykids because every LIKE, SHARE and FOLLOW from you will motivate a hardworking working mom like me to bake and share more! Thank you for your support!!!
Here's the recipe.
WARNING: This bread dough is fully loaded with many moist ingredients and can be sticky and difficult to knead initially. It will be good if you can a breadmaker or an electric mixer with hook attachment for kneading.
TIP: These sandwich breads have to be baked with their tops brushed with egg wash so that the breads will not shrink after cooling and you will be amazed that the well-baked crusts are deliciously soft.
Makes two 10 x 10 x 20 cm loaves, 450g each
You can use half of the recipe to make one loaf of bread.
300g water, lukewarm at 37°C
200g unsweetened steamed-cooked apple purée or applesauce
50g honey
650g bread flour with 12% protein
40g milk powder - please do not replace this and water with milk
4g salt
60g unsalted butter, soften at room temperature
2 tsp dried yeast
For egg wash:
1 egg yolk
1 tbsp milk
vegetable oil or vegetable oil spray to grease loaf pans
extra flour for dusting and shaping but please use the minimal amount
Place all the ingredients in a breadmaker according to the order of the above list. Use the dough setting to knead the dough until it is smooth* and elastic and allow the dough to prove for 1 hr or until doubled in size.
If you are using an electric mixer with an hook attachment to knead, combine all ingredients except butter in the mixing bowl and mix at low speed until a soft dough forms. Knead in the butter until incorporated. Continue to knead at low speed for at least 25 mins or until the dough is smooth* and elastic. It is important that the dough has to be elastic and stretchy. Cover the dough and allow the dough to prove in a warm and humid place for about 60 mins or until doubled in size.
* Please note that the surface of the dough will not be silky smooth like most soft bread dough. It can be a little spongy on its surface.
Grease loaf pans with oil or cooking oil spray.
To shape, divide dough into 6 portions (about 215g each) and shape all into smooth balls. Allow them to rest at room temperature for about 10 mins.
Using a lightly floured rolling pin, roll each portion into long and flat oval shape (about 20 cm) on a lightly floured non-stick surface. Use your fingers to pick one shorter side of the dough and tuck and roll the dough like a Swiss roll. Use the rolling pin to flatten and roll the dough into a long rod shape. Then, pick one shorter side of the dough and roll it like a Swiss roll again. Repeat this rolling step with the remaining portions of dough.
Place three of the shaped dough with their seams side down into the each prepared pan. Press the top of the dough lightly to form an even surface. Allow the loaves to prove for another 1 hr or until the dough is going to reach the maximum height of the loaf pans.
Preheat oven at 180°C. For the egg wash, combine egg yolk and milk. Brush bread dough with egg wash and bake at 180°C for 25 mins or until thoroughly baked. If your breads are becoming brown too quickly, cover the breads very loosely with aluminum foil at the last 10 mins of bake and continue to bake until thoroughly baked.
When the bread is removed from the oven, unmould the bread immediately. Transfer bread on a wire rack to cool it completely.
Slice and serve.
WARNING: Breads are very soft and fragile to slice. It needs to be completely cooled before slicing and please use a serrated knife to slice.
Happy BakingPlease support me and like me at Facebook...

