Hence, I'll be sharing another HIGHLY RECOMMENDED hot cross buns recipe.
Proudly presenting... these Super Soft and Moist Chocolate Hot Cross Buns. Although these are made with a completely different hot cross bun recipe, these chocolaty hot cross buns will also stay soft and moist even on the next day of bake!!!
A MUST-TRY recipe if you love chocolate and hot cross buns...
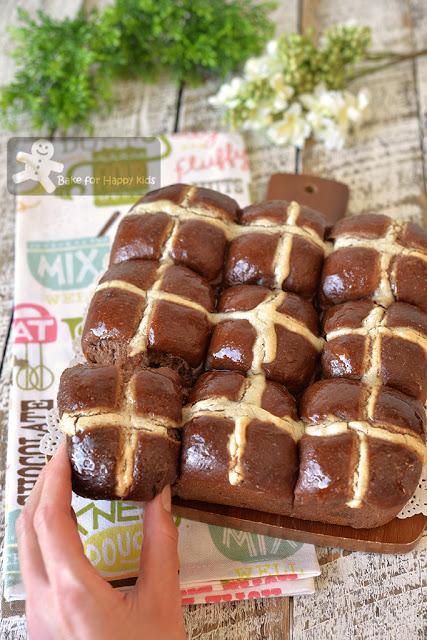
Super Soft and Moist Chocolate Hot Cross Buns
... that will stay soft even on the next day!
HIGHLY HIGHLY HIGHLY RECOMMENDED!!!
Remember the very chocolaty chocolate hot cross buns that I have baked at here (2012)? In the post, I wrote... "These buns are very extremely delicious when they were freshly baked. For my experimental purpose, I've kept a bun to see if it will stay fresh on the next day and kept another one in the freezer as my "comparison" bun. I'm not surprised at all to know that the "freezer" bun retained its texture better than the one kept at room temperature but when both of them were lightly toasted in the oven, they were equally soft and delicious again!"
Why aren't the very chocolaty chocolate buns stay soft on the next day???
Based on my baking experiences since 2012 till now, I have learned that the use of high amount of cocoa powder, un-scalded fresh milk and egg can make hot cross buns tough and dry on the next day.
Do you know that cocoa powder is hydrophobic and also hygroscopic? Meaning that it is not very good in absorbing water but tends to absorb moisture from the air and other sources of contact. This means that the added cocoa powder in any amount will reduce the overall hydration or moisture retaining capability in all bread dough. Furthermore, it can be worse if an excessive high amount of cocoa powder is added, causing the chocolate bread dough with a lower gluten composition to be less stretchy and rise lesser than usual.
In an another words, cocoa powder is not a good ingredient to use for bread baking and I will use it only if it is required.
In this case, I can't bake chocolate hot cross buns without any cocoa powder!!! And the best way to do it is to use a very moderate amount of cocoa powder and also a bread recipe that is very well hydrated... So this means that I won't bake my hot cross buns with fresh milk and eggs.
Why no fresh milk and eggs? To know more, please read my thorough write-up at here.
As mentioned at here, although I believe that all hot cross buns should be baked with the rich tastes of milk and eggs, I noticed that the addition of egg isn't necessary to enhance the taste of these chocolaty breads especially when a good amount of cocoa powder and another magic ingredient are added. Do you know what is the magic ingredient? I will tell you later...
Here's a video showing how I baked my super soft and moist chocolate hot cross buns... And I'm sorry that there is NO egg in these breads but I promise that these chocolate breads are still very rich in their flavours.
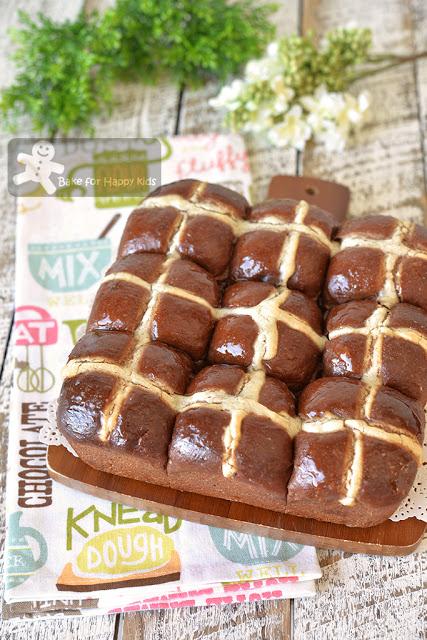
Wah! Can't wait to try these impressive-looking chocolate hot cross buns.
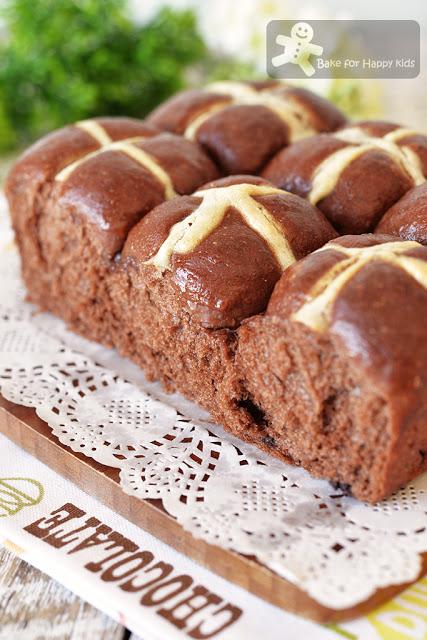
Wah! They don't just look good, they taste very good too!
So soft and moist...
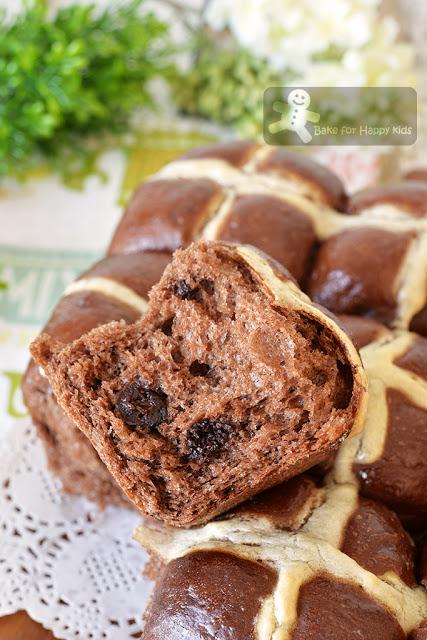
Deliciously chocolaty because they are made with premium dark chocolate chips.
Wow! These are truly unforgettably delicious too...Please forgive me for being naggy but I do have a few IMPORTANT baking tips to share before proceeding onto the recipe...
- Unlike my previous non-cocoa hot cross buns recipe at here, this dough with the added hydrophobic cocoa powder is actually very easy to handle and can be kneaded by a breadmaker or an electric mixer with hook attachment or even by hand.
- Unlike most hot cross buns recipes, my hot cross buns including these at here are not overloaded with sugar! So please do not omit the sugar glaze!!! The brushing of sugar glaze after baking will make these hot cross buns look very professional and nice with a glossy finish.
- Please do not replace self-raising flour with just plain flour or even plain flour with baking powder to make the crosses. I have learned that the self-raising flour has made the crosses less tougher and can make the buns taste much more better than those that are made with plain flour.
- Although these hot cross buns are super soft and moist, please store them in an airtight container at room temperature when they are completely cooled so that they can soft and moist even on the next day. However, please consume these buns within the next day of bake because these super moist buns won't be super moist anymore on the day after!
- HOWEVER!!! We discovered that these buns (even on the 3rd or even 4th day of bake) will become soft and moist again just like they are freshly baked when they are slightly heated using a microwave with high power for 10-20 secs.
Oh!!! BTW, the magic ingredient is VANILLA!!! And please use vanilla paste or vanilla seeds scraped from vanilla bean. The vanilla extract won't be strongly flavoured and fragrant like the seeds. Do not use vanilla essence because it is actually fake vanilla!!!
I hope that you will like this recipe as much as we do. If you want the latest of my future recipes, you can follow me at either my Facebook at here or here or my Instagram @zoebakeforhappykids
Thank you!!!
Here's the recipe.
Makes 9 buns in one 20 cm (8 inches) square pan
For the bread dough:
220g water, lukewarm
300g bread flour with 12% protein
25g milk powder - please do not use milk to replace water and milk powder.
30g caster sugar
2g salt
10g cocoa powder, preferably Dutch processed1 tsp vanilla paste or vanilla seeds scraped from 1 bean
35g unsalted butter, softened at room temperature
1 tsp instant dry yeast
100g (1/2 cup) dark or milk chocolate chips - I used Callebaut dark chocolate callets with 70% cocoa
For the cross:
20g (2 tbsp) self-raising flour
30ml (2 tbsp) cold water
For the glaze:
25g (2 tbsp) caster sugar
15ml (1 tbsp) hot boiling waterextra butter or vegetable oil spray to grease baking panextra bread flour for dusting and shaping
For the bread dough:
If you are using a breadmaker to knead and prove the dough, add all ingredients except chocolate chips into the breadmaker according to this order. Use "dough" setting to mix and knead dough for 30 mins or until the dough is elastic and stretchy. At the last 3-5 mins of kneading (or some breadmakers will beep), add chocolate chips and continue to knead until the chocolate chips are well incorporated. Then, let the dough prove for 1 hr or until doubled in size.
If you are using an electric mixer with an hook attachment or your hand to knead, combine all ingredients except butter and chocolate chips in the mixing bowl and mix at low speed until a soft dough forms. Then, knead in the butter until incorporated. Continue to knead for at least 25 mins or until the dough is elastic. It is important that the dough has to be elastic and stretchy. Add chocolate chips and continue to knead for 3-5 mins until the chocolate chips are well incorporated. Cover the dough and allow the dough to prove in a warm and humid place for about 1 hr or until doubled in size.
Grease square pan with butter or vegetable oil spray. Using your lightly floured hands, divide dough into 9 equal portions, about 80g each. Pull, stretch and shape all portions into smooth balls. Arrange the dough in the greased pan. Allow the bread to rise in a warm and humid place for another 1 hr or until doubled in size.
Preheat the oven 350°F or 180°C.
For the cross:
Mix water and flour until it forms a smooth and thick paste. And it's ok to mix the mixture all in a disposable piping bag. Transfer into a piping bag if required and snip off the end to make a fine hole. Pipe a cross on top of each bread bun and bake for 15-17 mins or until golden brown and thoroughly baked inside and NOT over-baked. Remove from the oven and transfer onto a wire rack to cool slightly to warm.
For the glaze:
Before baking the bread, mix sugar and hot boiling water until the sugar is mostly dissolved. Do not add more water if the sugar is not completely dissolved. Set aside to let the glaze to cool to room temperature.
Brush a layer of glaze on the warm buns and it's ok to apply just a layer of glaze without using all of it. Allow the buns to cool further if required. Serve warm, cold, or toasted.
Store any leftover in an airtight container at room temperature when they are completely cooled so that they will stay soft and moist even on the next day. However, please consume these buns within the next day of bake because these super moist buns won't be super moist anymore on the day after next!
However, when the buns (even on the 4th day of bake) are slightly heated using a microwave with high power for 10-20 secs, they will be as soft and moist like they have been freshly baked!
Happy BakingPlease support me and like me at Facebook...
