I used to think... Is eating crust-less white bread a typical Asian thingee? I thought so until I noticed that the high tea sandwiches uses crust-less bread too.
Isn't it a wasteful thing to trim off bread crust from bread? Why can't we just eat and love the bread crust instead of throwing them???
When I was a poor student, I will never trim off and discard the crust from my bread. For this reason, I like to enjoy bread with all sorts of crusts, particularly the soft ones.
I'm always fascinated with the fact that the light crusted bread can retain their moisture so much better than the darker crusted ones and wonder how the bakeries managed to bake the white crusted breads without overly bake their outside and yet making sure that their inside are completely cooked.
I have been wondering...
Until today, I have managed to bake these super soft and fluffy white crusted Japanese breads...
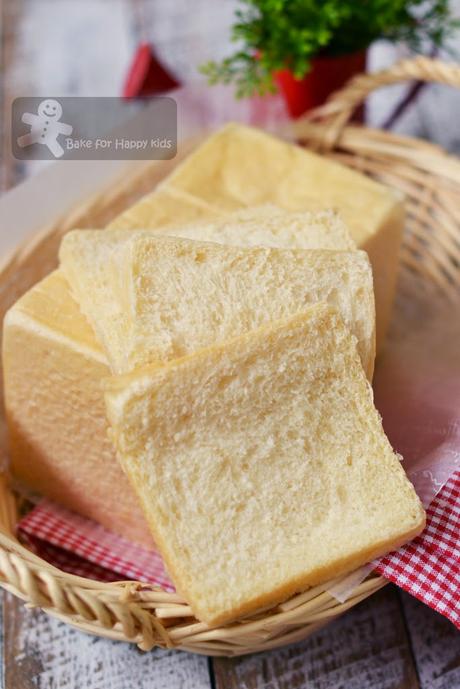
Super soft white crusted Japanese square bread ふわふわしっとり角食白パン
Yippee!!!!Thanks to Victoria Bakes and Cookpad at here or here. I have managed to bake these super duper white crusted breads and this is how I did it ...
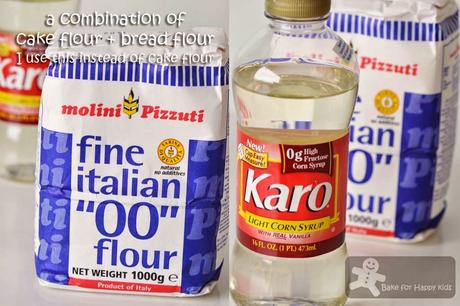
I have used these two interesting ingredients to bake these breads.
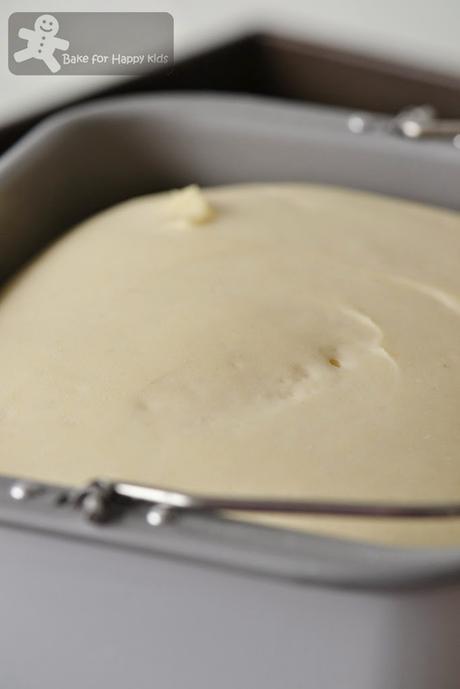
Using a breadmaker, I have incorporated the ingredient to knead into this super soft and smooth dough.
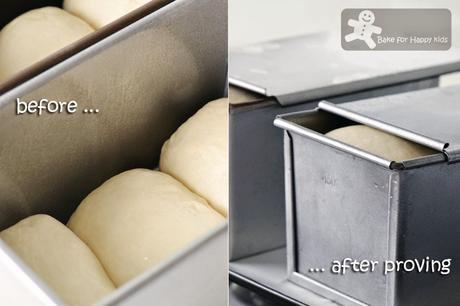
The dough is very soft and relaxed and they raise very quickly within less than an hour.
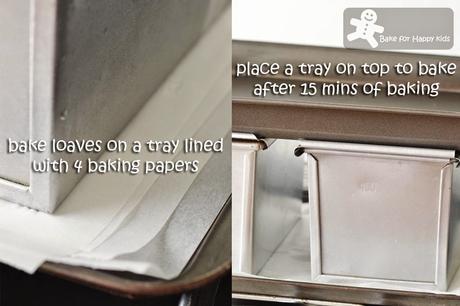
This is I did to stop the breads from getting darker crusts.
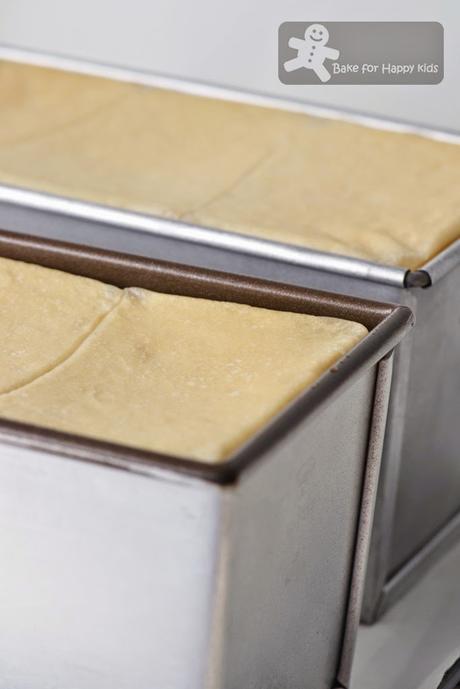
White crusts!!! I was thrilled when I saw these!!!
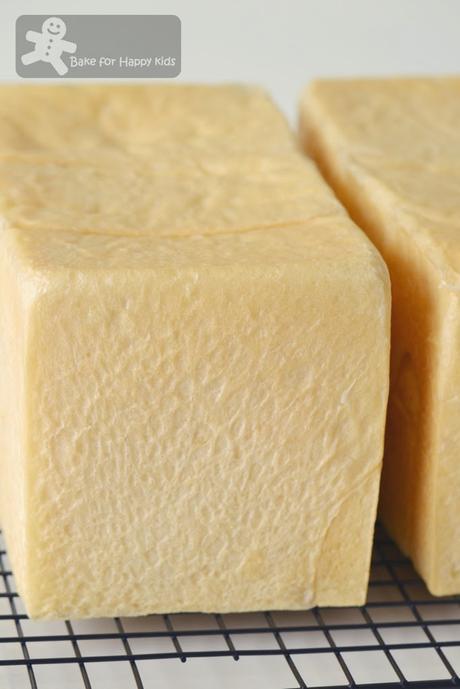
Help! I can't stop admiring these breads... LOL!
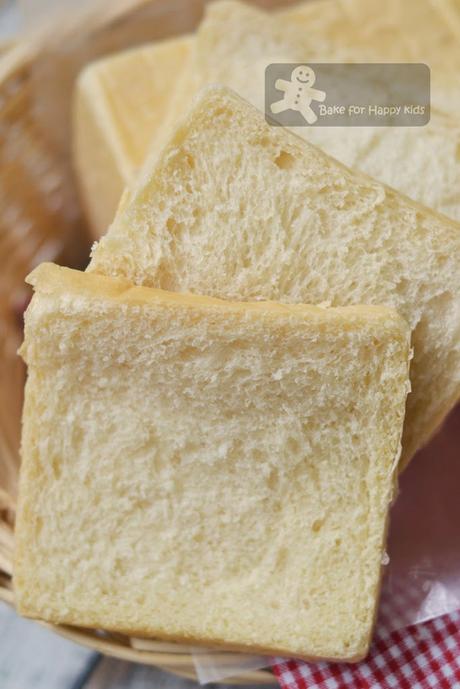
Every slice is so soft and fluffy!
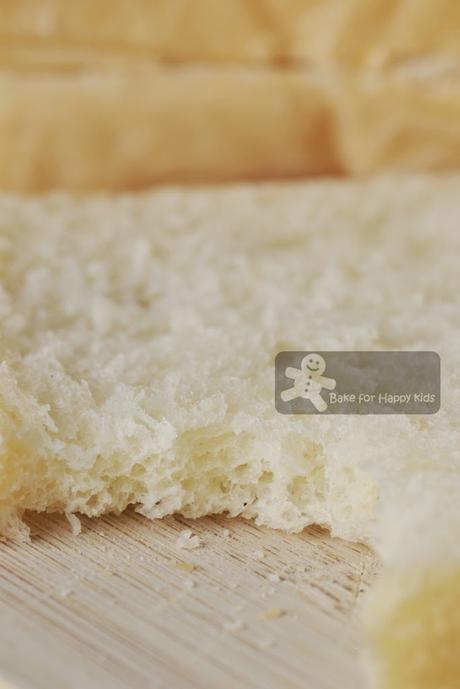
nom nom nom nom ...
No way that I'm throwing away the crusts of these breads!
Knowing that this recipe can bake fluffy white crusted bread, I have used the same recipe to bake this lightly-coloured Sumikko Gurashi + Cocoa Hot Cross Buns bread. And it turned out to be pretty good! Not perfectly good though because the top side of the buns is a little brown and so I made the lightly browned penguin looking upset and "dead"... LOL!
And also, I must admit that my Shirokuma (the white bears) bread don't look exactly like bears. With their puffy ears, I reckon that they look more than mice rather than bears. Opsie!
After seeing some of my cute bakes at my Instagram (@zoebakeforhappykids), some readers have asked me to share how I baked my cute bread for my family... You know I can't possibly write recipes for all the food that I cooked and baked but I'm trying my best to share as much as I can. So here you go... This is how I baked my cute Sumikko Gurashi bread.
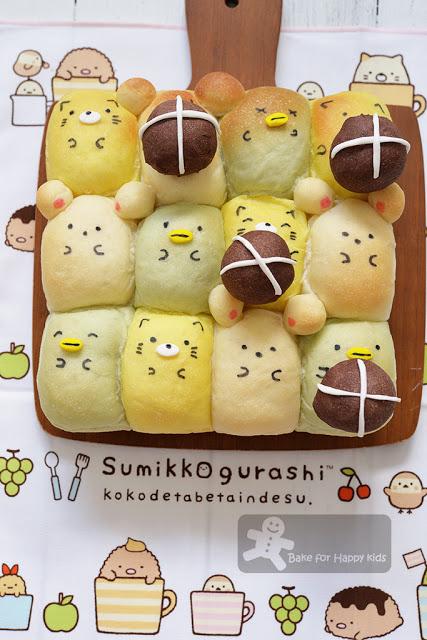
Sumikko Gurashi bread... Some are happy holding Chocolate Hot Cross Buns for Easter :)
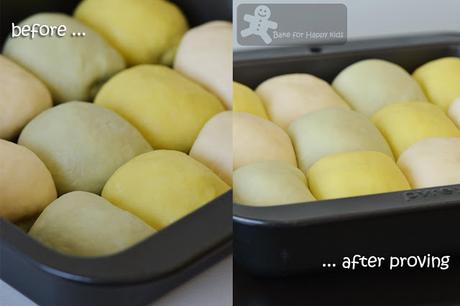
First I used the natural food colouring (Queen) to color one-third of the dough to yellow and another one-third to green and shaped them into these.
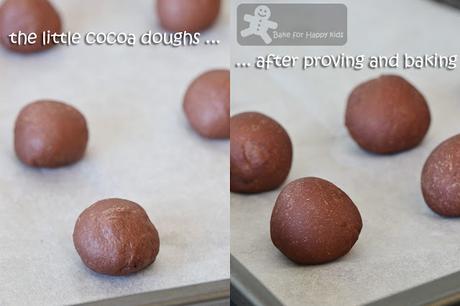
I have also made these little cocoa dough and proved and baked them separately.
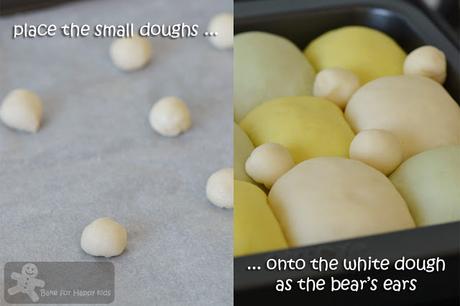
And placed the bears' ears on the bear dough just before baking the bread.
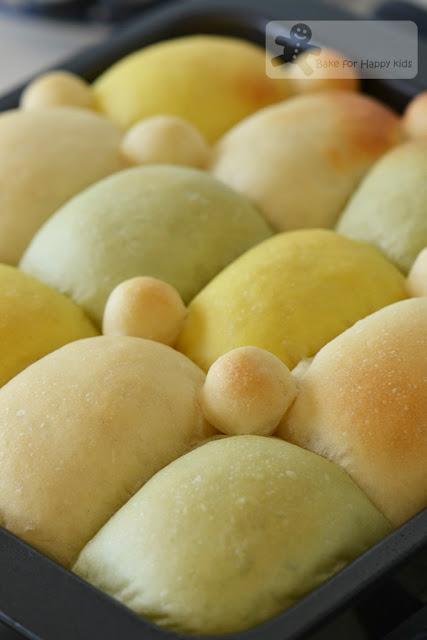
After baking... the bread are so nice and puffy!
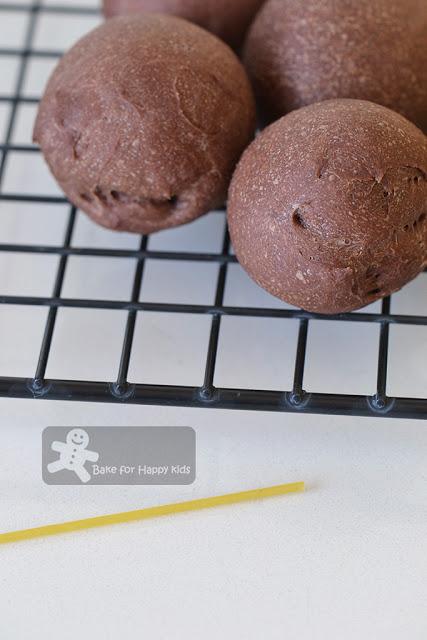
To assemble, I have use a thin spaghetti to attach the cocoa hot cross buns for the characters to hold.
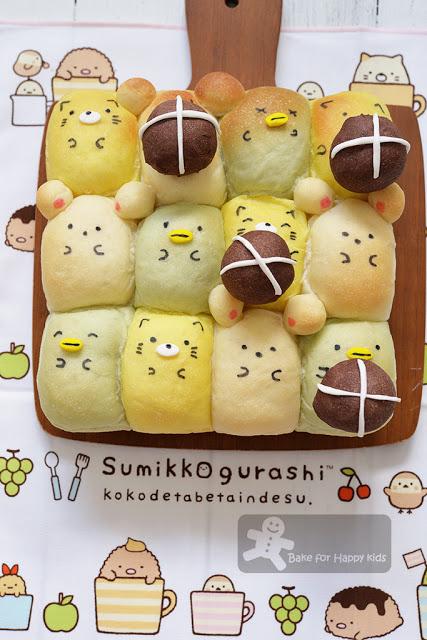
To finish, I have decorated the bread with rolled fondant and drew the faces of the characters using a black edible pen :)
Here's the recipe that is mostly adapted from Victoria Bakes and Cookpad at here or here
Makes one 10cm x 20cm or 450g square loaf
250g bread flour50g cake flour with lower amount of protein - I used used Italian OO flour with 9.5% protein content and it works well for me too
4g salt
30g unsalted butter
30g mizuame (or light corn syrup if mizuame is unavailable)
adequate milk (warm, 37°C) + mizuame or light corn syrup to give a total of 235g
(I suggest to measure these ingredients using a weighing scale to get the exact amount)
1 tsp instant dry yeast
cooking oil spray, preferable Alfa One rice bran oil spray
Using a breadmaker, mix all dough ingredients and knead into a smooth and elastic dough and allow it to prove for 1 hr.
If breadmaker is not available, kneading by electric mixer with a dough hook is possible. Using an electric mixer with low mixing speed, mix all dough ingredients (except butter) to form a dough first. Then, mix in the unsalted butter and keep kneading at medium low speed until dough is smooth and elastic. Transfer dough into a large bowl and cover it with a cling wrap. Allow the dough to rise for 1 hr or until doubled in size.
Grease the Pullman loaf pan with cooking oil spray.
When the dough has doubled in volume, take it out and deflate lightly. Divide into 3 pieces and roll them into round balls. Cover them with plastic wrap to prevent them from drying out. Leave the dough to rest for 15 mins.
Deflate one ball of dough completely and roll it flat. Fold in the sides of the dough towards the center, and then roll it up the dough to form a Swiss roll. Repeat the same shaping steps to the rest of the dough.
Place three of the shaped dough with their seam side down into the prepared pan. Press the top of the dough lightly to form an even surface. Cover the loaf with cling wrap and leave to rise for 45-60 mins until the dough fills the pan about 80% of the pan.
Preheat the oven to 180°C or 160°C fan forced. Close the lid of the pan. Place 4 layers of baking papers on top of a baking tray. Place the bread pan on top of the lined tray and into the oven. Reduce the oven temperature to 160°C or 150°C fan forced and bake for 15 mins. Place another baking tray on top of the bread pan and reduce oven temperature to 140°C or 120°C fan forced. Bake for another 25-30 mins (total baking time is 40-45 mins).
Remove the bread from the oven. Open the lid immediately and drop the pan from about a 15 cm height to prevent the bread from collapsing.
Unmould the bread immediately. Allow it to cool completely on a wire rack. Slice and serve.
If you are using this recipe to make this Sumikko Gurashi bread holding 4-6 cocoa hot cross buns...
Replace the use of 30g butter with 30g shortening, preferably Crisco, the trans fat free kind.
Using a breadmaker or electric mixer, mix and knead the bread dough like the step desrcibed in above.
Dough will be about 560g in total. Divide dough into 5 portions: 3 portions of 160g each, 1 portion of 60g (to make the hot cross buns) and 1 portion of 20g or slightly lesser (to make the bear ears).
For the cocoa hot cross buns, incorporate 1 tsp (5g) cocoa powder into the 60g dough and knead until the dough is thoroughly coloured.
For the penguins, cats and bears, incorporate adequate amount of food colouring (I used Queen's natural extract) into two portions of the dough to color them into 160g light yellow and 160g light green and leave the remaining portions of dough uncoloured.
Allow the dough to rise for 1 hr or until doubled in size.
Grease one 20 x 20 cm (8 inch) non-stick square pan with cooking oil spray. Line a baking tray with baking paper.
Deflate the dough lightly and divide them into:
3 portions x 4 dough x 40g each for the penguin (green dough), cats (yellow dough) and bears and shape each into a short cylinder dough6 x 10g for the cocoa hot cross buns and shape each into a round dough
8 x 1-2g for 4 pairs of bear ears and shape each into a round dough
Arrange the divided 3 portions x 4 x 40g dough into prepared square pan with alternate colours and the rest of the shaped dough onto the prepared baking tray with adequate space in between them for expansion.
Allow the dough to rise for about 1 hr or until doubled in size.
Preheat the oven to 160°C. Place two ears onto each of the white dough and bake cocoa dough on the baking tray and the Sumikko Gurashi bread in the square pan at 160°C for 5-7 mins for the cocoa buns and 15 mins for the bread in the square pan. To prevent the top of the bread from burning too much, cover the bread in the square pan loosely with a foil after the first 5 mins of bake and continue to bake the bread until it is fully cooked. Unfortunately, I did mine after the first 10 mins of bake... Ai ya too late!!! :p
Unmould the bread immediately. Allow it to cool completely on a wire rack.
To assemble and finish:
Use a thin spaghetti to attach the cocoa hot cross buns for the characters to hold.
Decorate the bread and hot cross buns with coloured, rolled and cut fondant.
Use a black edible pen to draw the faces of the characters.
Happy BakingPlease support me and like me at Facebook...
