In this post, I will talk on the topic Step-By-Step How to Check System Information on Windows 10. I will reveal the top 4 and best methods to do so.
Get To Know How to Check System Information on Windows 10: Tutorial
Knowing what's inside your computer and your OS information comes very handily whether you are using a desktop, laptop, or tablet. For example, when you want to install new software, but you're not sure whether it'll run with your current PC configuration. Whenever the device stops working, and you need to troubleshoot the problem. Or when you notice system performance issues, and you want to check if the hardware needs an upgrade.

The System Information utility is a fast way to get information about your system, but how you open it depends on which version of Windows that you're using. Today we will teach you how to do it.
Step-By-Step How to check system information using Settings in Windows 10
Step 1: Type in the search area "About your PC" without the double-quotes.
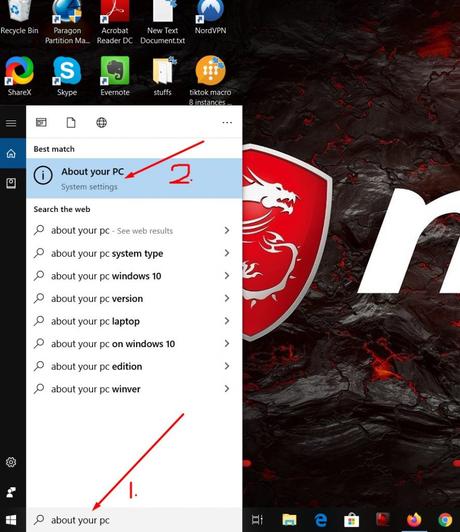
Step 2: Click on "About your PC".
Step 3: See the "Device specifications" and "Windows specifications" sections.
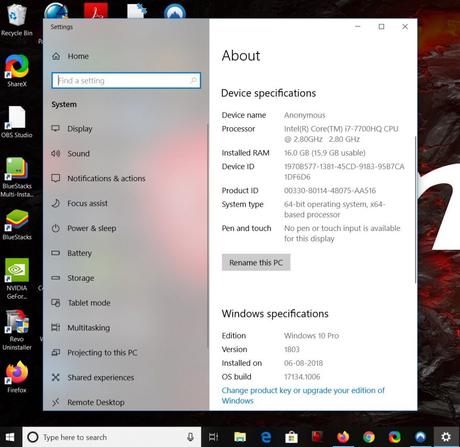
In the Device specifications section, you will find your device name, processor, installed RAM, system architecture type, and if the computer includes support for a stylus or not.
Also, in the Windows specifications section, you can check the version of Windows 10 (Home, Pro, Enterprise, or Education), version number, installation date, and the current build number.
Step-By-Step How to check system information using the System Information tool in Windows 10
Using the System Information tool is one of the best ways to get a complete overview of your PC specifications.
Step 2: Search for System Information and click the top result to open the experience.
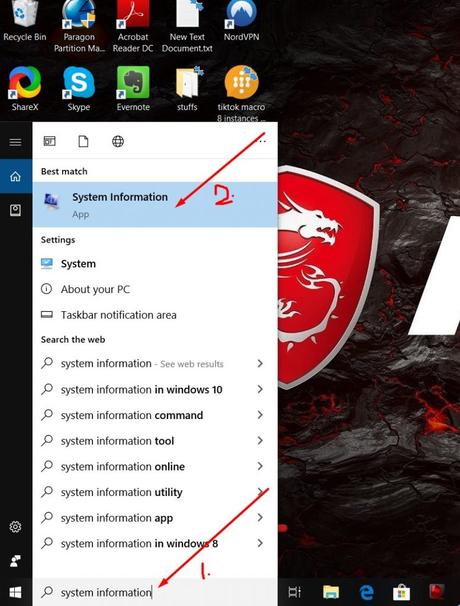
Step 3: Select the System Summary category from the left pane.
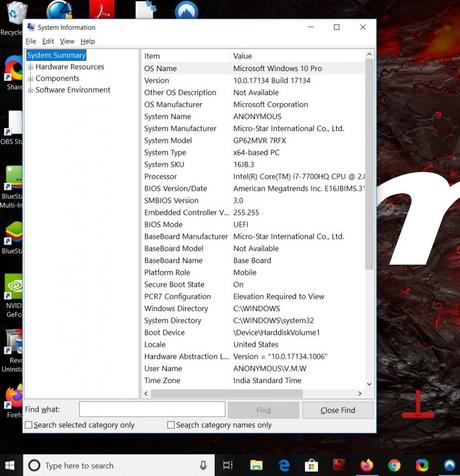
However, in the system summary page, you won't find your graphics card information. If you need this information, you can find it under Components > Display.
The System Information tool offers a search option at the bottom of the page to quickly find the information you need if you're looking for a specific property detail.
Step-By-Step How to create a system specification report using System Information Tool in Windows 10
Another very useful feature in System Information is the option to create a full report of your computer specifications.
To create a report of your system specifications,
Step 1: Click the Windows button.
Step 2: Search for System Information and click the top result to open the experience.
Step 3: Select the specifications you want to export.
Step 4: Click on the File menu.
Step 5: Click the Export option.
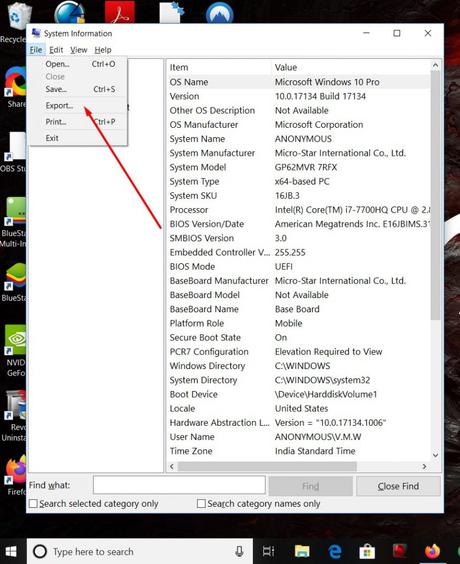
Step 6: Select the location to save the file.
Step 7: Click the Save button.
Step-By-Step How to check system information using Command Prompt in Windows 10
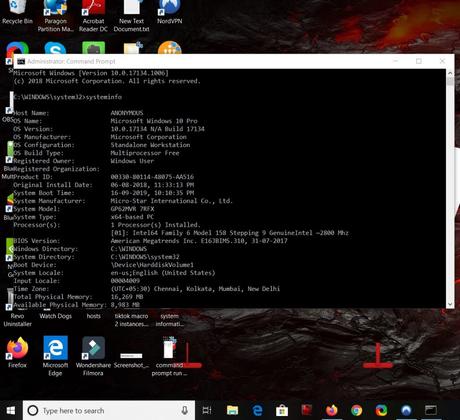
Alternatively, you can also use the SystemInfo command tool with Command Prompt to view specifications about your computer.
Step 1: Click the Windows button.
Step 2: Search for Command Prompt by typing "cmd" without the double quotes, right-click the top result, and select the Run as administrator option.
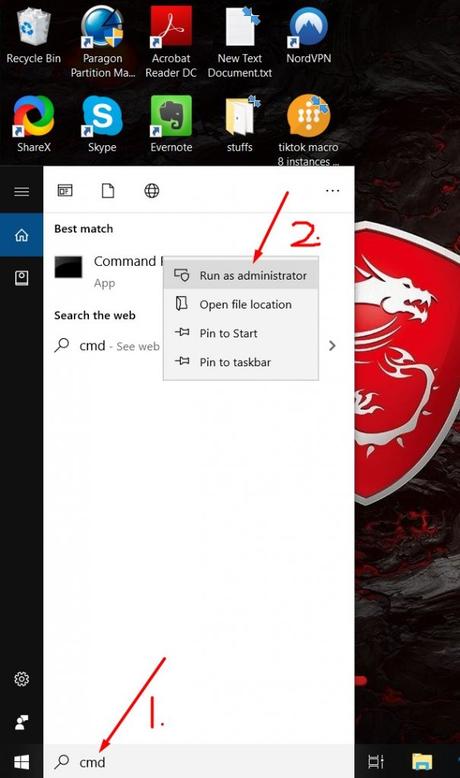
Step 3: Type the following command without the double quotes "systeminfo" and press Enter.
Step-By-Step How to check system information using Windows PowerShell in Windows 10
In addition to the methods listed above, you can also use PowerShell to find the full specifications of your device hardware and OS.
Step 1: Click the Windows button.
Step 2: Search for Windows PowerShell, right-click the top result, and select the Run as administrator option.
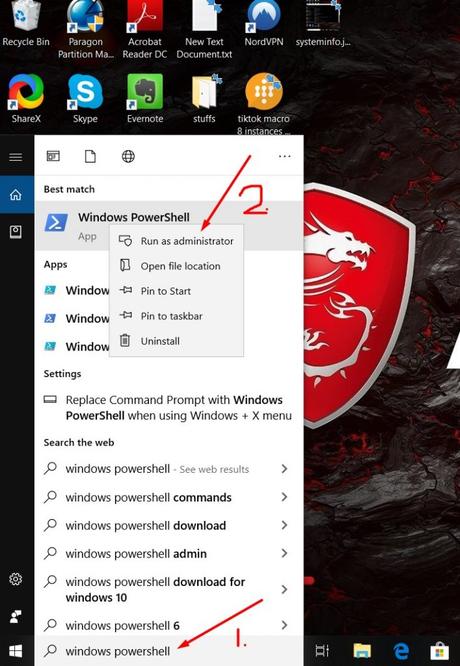
Step 3: Type the following command without the double quotes "Get-ComputerInfo" and press Enter.

Conclusion
I am sure now you have a clear understanding and you will be able to check the systems information on your Windows 10 PC quite easily and effortlessly.

