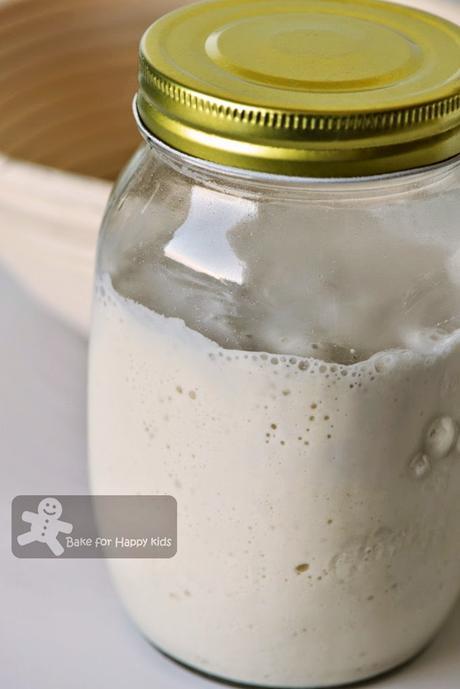
After baking my first successful loaf of sourdough bread with this jar of starter, I told myself that I'm not going to lose this!!!
Why???
Reason 1: I have gone through a long journey to achieve the beautiful culture... You see what I meant later...
Reason 2: Baking with this starter is really super addictive. All the breads that I have baked with this culture are very tasty and fragrant as if I have incorporated yogurt into my breads.
Reason 3: Do you know that some so-called sourdough starters are comes in powdered form are dehydrated pre-ferments made from yeast and flavouring? After seeing this remark in the book, Bread by Nick Malgier, I had a look at the internet and supermarket shelves and was totally shocked to learn this truth! Fake sourdough!!! Ewww! Knowing that my jar of starter is the real thing, I'm loving this jar of little babies!
Reason 4: Typically, living microorganism culture can take a few days to regenerate its activity after storing it in the freezer or even a fridge. For this reason, I'm hesitate to put my starter into any dormant state... What if they don't revive? I really hate having this thought in my mind.
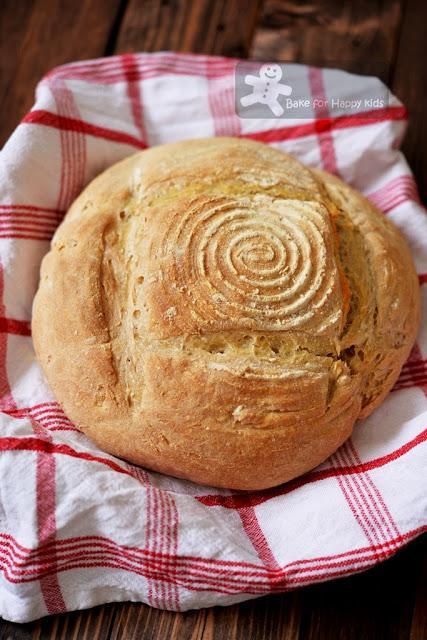
My first successful sourdough artisan bread...
... made with my bubbling sourdough starter.
To start, I have seen some books suggested dark rye flour, bottled distilled or spring water or even pineapple juice to attract the growth of the right microorganism in the starter but I have used just tap water, rice syrup and bread flour to start mine...
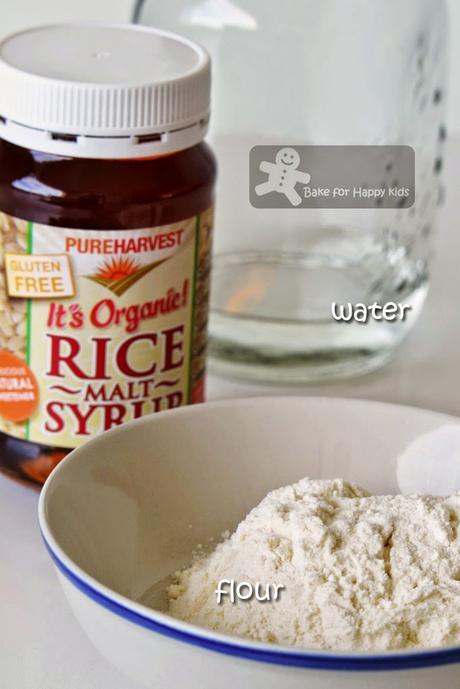
The ingredients that I have used to start my starter.
Initially, my son was helping enthusiastically to mix the starter but after the first smelly feeding, he was finding excuses not to do it and so the poor mom continued to do the rest of the feedings.
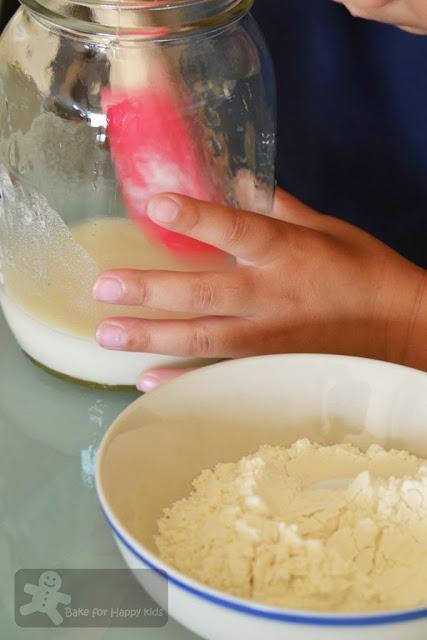
It is fun stirring the starter but only the first!!! After this, everything is just SMELLY!!!
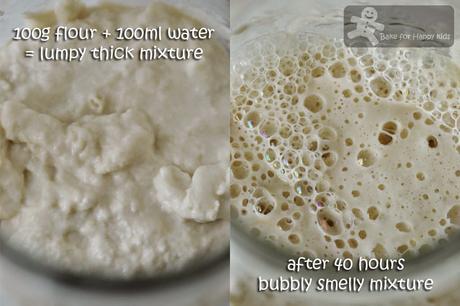
Day 1: The house is smelling like floury spew!!!
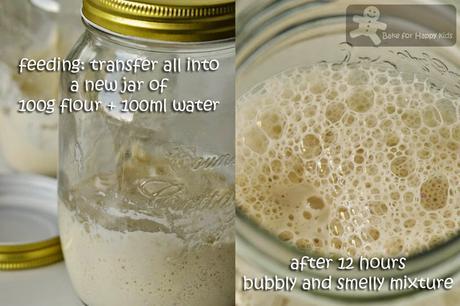
Day 2: Washing these smelly jars can be extremely painful!!!
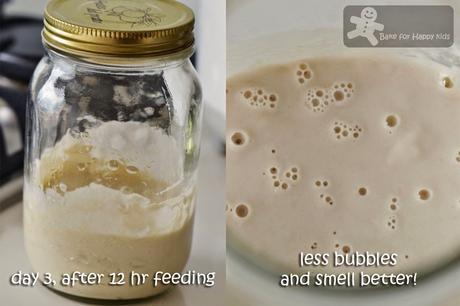
I'm seeing some good signs now!!!
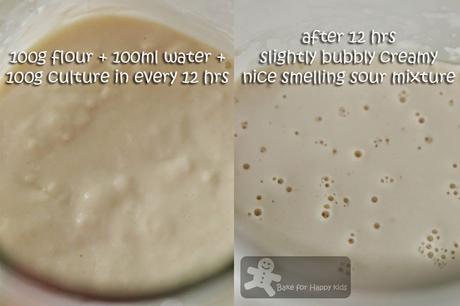
By Day 4 or 5, you should be getting better-smelling starter that you will eat!!!
From this stage, I can feed this starter in every 24 hours and I'm doing this everyday!
What happens to my son??? Yup, that boy who recruited me to help him to do this and had disappeared after one stirring!
"Mum, I think our baby is dead!!!" said my son. We called our starter... Our baby!My husband and son claimed that they are my "sourdough police"! Without fail, they have been monitoring my starter everyday, making sure that I have feed them or checking if the starter is dead or has turned mouldy!These are the few failure starters that I have made... Ops!!!
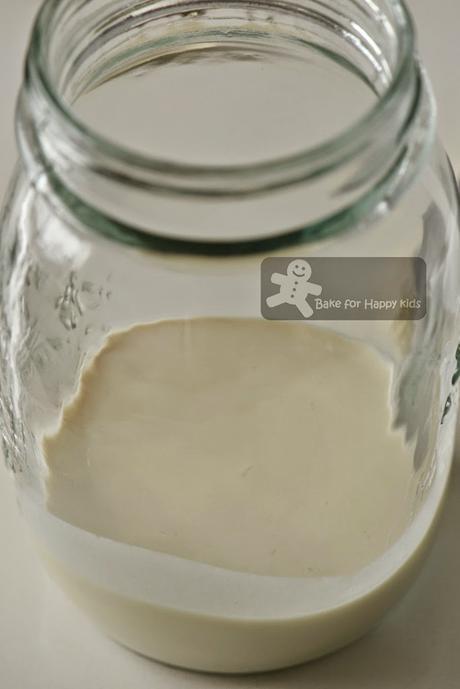
No action??? This baby is dead!!! LOL!
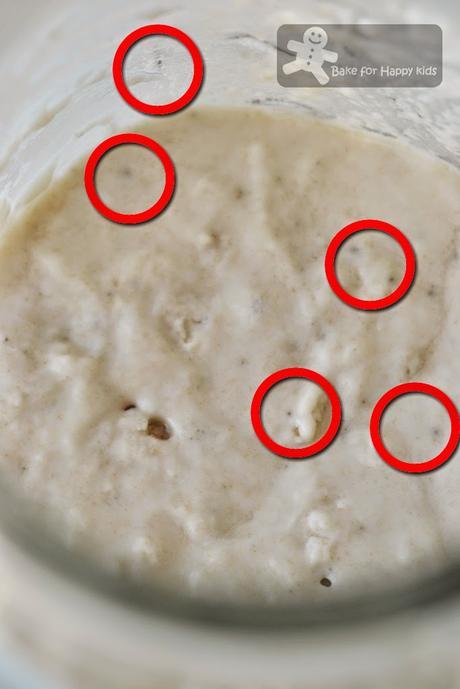
Yucks!!! This happens if I don't transfer the starter into a clean jar after every 24 hours!!!
With countless number of smelly bottle washing, I'm glad that I have tried and learnt a lot from my mistakes. Good that we have eventually got something that is so sweet smelling (like alcohol) and addictive! Or maybe our sourdough dance (I mean circling around our house with the starter jar) had saved our day... LOL!
Told ya... making a sourdough starter is not easy! Nevertheless, I must say that this was a fun attempt and I'm happy that it has worked for us eventually.
Although I had already saved my starter in the freezer as a standby, I had continuously fed this starter until my holidays in September 2015. So stay tune for more of my highly recommended sourdough bread recipes in the next coming months.So what's next? Using my sourdough starter, I have made my first successful sourdough bread...
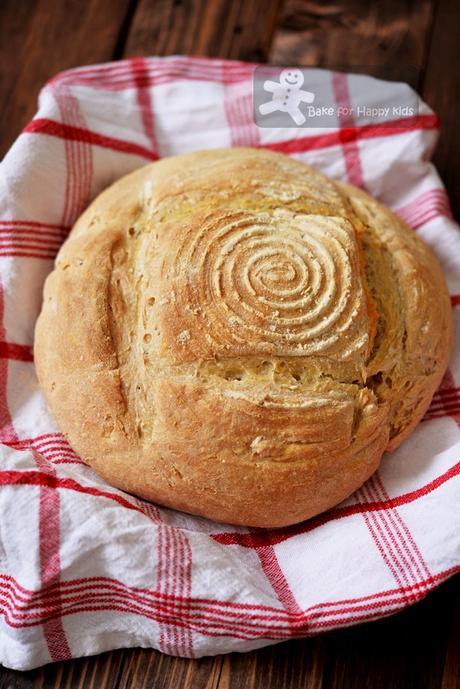
My first successful sourdough bread
What am I so happy? Although this is my first successful sourdough bread, this is not my first time baking a sourdough bread because my first sourdough bread was not successful at all...
Why? I have waited for it to rise for more than 8 hours and told myself that I can't wait anymore and went to bed with the bread still proving. After 12hrs, it became this... I baked it and it was too sour and dense to eat!!! Yuck!
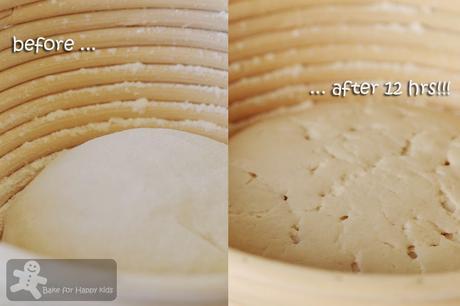
This sourdough bread took too long to prove!
For my next bake, I have decided to add a minimal amount of dried instant yeast to reduce the waiting time for proving and this is what I did.
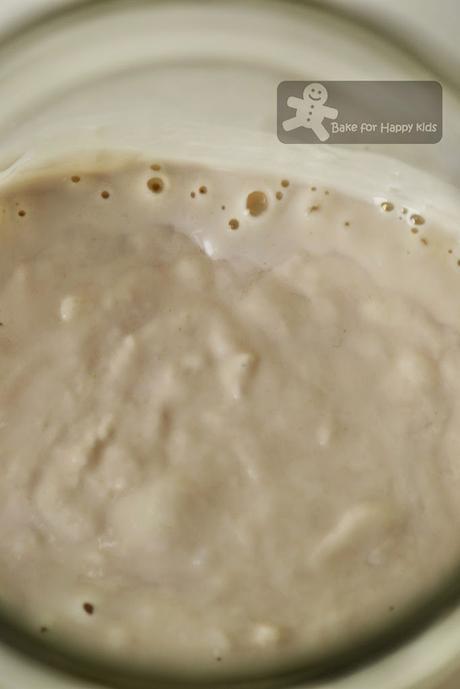
This is my 8-hr old sourdough starter.
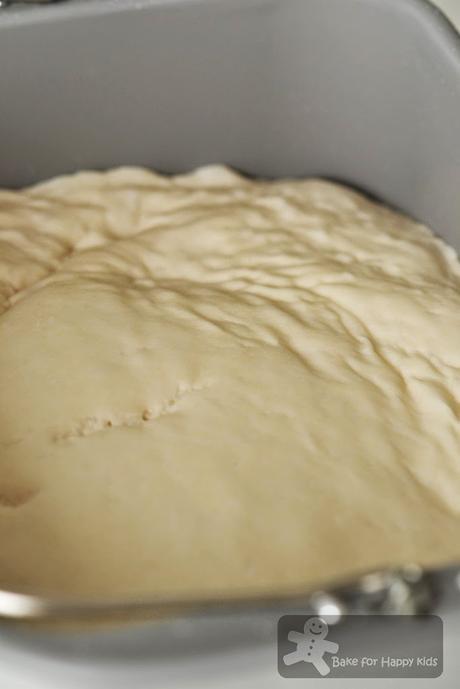
Using a breadmaker, I have mixed and kneaded the starter and the rest of the ingredients.
While proving, my son and I went out to watch a movie...
We thought that it will take a long time to prove but this dough seems to be slightly over-proved!!!
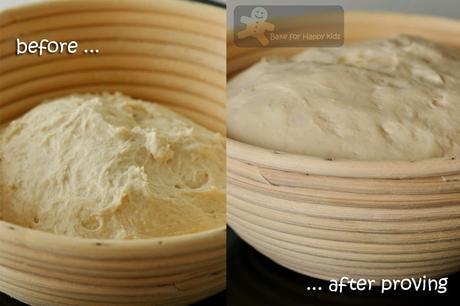
Lucky that the yeast in this dough is still very active.

For a nice crusty finish, these are the things that I have to do.
Geez! I was still using my old oven when I baked this bread!
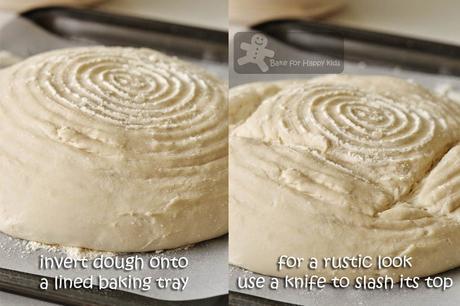
Ewww... I think I need a sharper knife to do this!!!
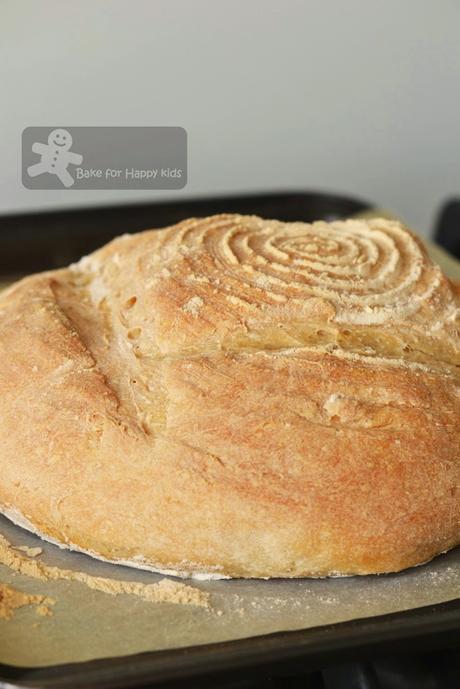
It looks slightly better after baking!
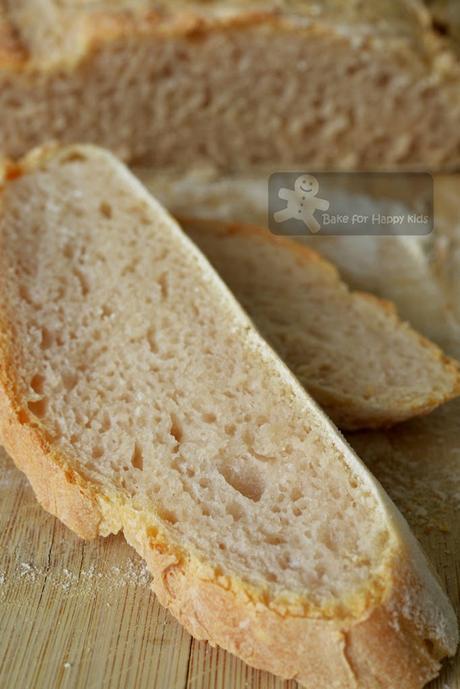
And, taste way better than my first bread
Hurray that this is a successful one!
Before proceeding on to the recipe, I like to clarify the theme, artisan. What is considered an artisan bread? There are a few interesting perceptions regarding the use of this term at here. Particularly, I agree the meaning artisan bread as bread that is less industrial and closer to homemade. It has the rustic kind of appearance rather than those that are neatly wrapped in the packaging or those that you can find on supermarket shelves.
I think this bread is looking pretty rustic... and I hope that you don't mind that I'm saying that it is an artisan bread.This is how I started my sourdough starter... Instruction is mostly adapted from the book, Bread by Nick Malgier
To start, you need:
at least 2 large glass or plastic jar or bowl about 1 to 2L capacity each - Please do not use metal bowls or containers as the acidic culture will react and corrode metal material.
a weighing balance100g unbleached all purpose or bread flour
100g bottled or tap water
1/4 tsp malt syrup
Day 0:
Wash the jar or bowl and a stirring spatula in hot soapy water, rinse, and drain until dry.
Place the clean jar or bowl on a weighing balance and tare the balance. Pour water into the jar until it weighs 100g. Add malt syrup and stir until syrup dissolve into the water. Tare the balance again and place flour into the jar until it weighs 100g. It is important to add the water first and also in this sequence because the flour that is added first might get stuck at the bottom of the jar of bowl if the mixture is not well combined.
Stir well to combine water and flour into a sticky and lumpy mixture. Cover the jar or bowl loosely with a lid or cling wrap and allow the fermentation to take place in 24 to 48 hrs at room temperature.
On the 40th hour, the starter started to bubbled a lot and it is ready for feeding.
Day 2: Feeding the starter
You need:
100g unbleached bread or all-purpose flour100g water
Place the clean jar or bowl on a weighing balance and tare the balance. Pour water into the jar until it weighs 100g. Tare the balance again and place flour into the jar until it weighs 100g. Stir well to combine water and flour into a sticky and lumpy mixture and transfer all of the starter into this new jar of mixture. Stir again to combine.
Important: It is essential to transfer your starter into a clean jar or bowl in every feeding. Failing to do so will increase your chances of growing mold at the sides of the jar or bowl and eventually spread the contaminating mold into the rest of your starter!
Cover the jar or bowl loosely with a lid or cling wrap and leave the culture to ferment until it triples in bulk, 4-12 hrs at room temperature. Feed the starter again within the 12 hrs - Important! Otherwise, the culture will lose its action and die.
Day 2, Part 2: Continue to feed the starter
You need:
100g unbleached bread or all-purpose flour
100g water
Place the clean jar or bowl on a weighing balance and tare the balance. Pour water into the jar until it weighs 100g. Tare the balance again and place flour into the jar until it weighs 100g. Stir well to combine water and flour into a sticky and lumpy mixture and transfer 100g of the starter into this new jar of mixture. Stir again to combine. Discard the rest of the starter.
Cover the jar or bowl loosely with a lid or cling wrap and leave the culture to ferment until it triples in bulk, 4-12 hrs at room temperature. Feed the starter again within the 12 hrs - Important! Otherwise, the culture will lose its action and die.
Day 3, 4 and 5: Continue to feed the starter in every 12 hoursRepeat the steps of Day 2, Part 2 until your starter starts to smell pleasantly sweet and sour, so pleasant that it even has a scent of alcohol. If your starter is still smelling yucky, keep feeding in every 12 hrs. If your culture is smelling good, you can start baking with it and continue feeding with the steps of Day 2, Part 2 in every 24 hrs.
Storing your culture:
You can store your culture in a fridge or freezer. If you store your starter in a fridge, you will need to feed it about every 5 days by repeating the steps in Day 2, Part 2.
To store your starter in a freezer, knead in 50g flour into 100g starter until the starter becomes a soft and pliable dough. Wrap the dough in a freezer bag and place it into an airtight container before storing it in a freezer. Although some sources condemned the effectiveness of freezing a sourdough starter, the microbiologist me is a believer of freezing microorganism cultures as long as the water content of the frozen culture is minimized
To revive a refrigerated or frozen culture, allow the starter come to room temperature before feeding it and feed it for at least 2 or 3 times before baking with it.
How to use the starter for baking?
One the day before your bake, prepare two clean jars before feeding the starter. Use one to make your starter for baking and another for continuing your starter.
To make your starter for baking, you have determined the amount and recipe of starter that you need. Place the clean jar or bowl on a weighing balance and tare the balance. Pour water into the jar until it weighs the amount that you need. Tare the balance again and place flour into the jar until the amount that you need. Stir or knead (if required) well to combine water and flour and transfer the required amount of the starter (usually 100g) into this new jar of mixture. Stir or knead (if required) again to combine. The, use the rest of the starter to continue the culturing of starter.
To continue culturing the starter, repeat the steps of Day 2, Part 2.
Have fun growing these babies!
Here's the slightly simplified recipe that is mostly adapted from the book, Bread by Nick Malgier
Makes one medium boule-shaped loaf
For the levain (sourdough sponge):
100g 8 to 12 hr sourdough starter (see above for details)
100g water at room temperature
100g unbleached bread flour
For the dough:
All the above levain150g water at room-temperature
1/2 tsp instant dried yeast, optional and omit if you don't mind waiting for extra 4-6 hrs
300g unbleached bread flour
9g salt
One well-floured banneton (mine is 20 cm round with 10 cm height) or cloth-lined basket, plus two baking pans
For the levain, stir the starter and water together in a small bowl or a large glass jar. Please do not use any bowl or container that is made of metal. Use a spatula or spoon to stir in the flour a little at a time. Cover the bowl and let the levain ferment until it doubles in size, 4 to 8 hrs, depending on the temperature of the room.
Using an electric mixer or bread maker (with a dough setting), mix and knead all of the dough ingredients unit the dough is smooth and elastic.
If you are using an electric mixer to knead, transfer the dough into an oiled bowl. Cover with plastic wrap and allow the dough ferment for 1 to 2 hrs or until double the size. If you are using a bread maker, just leave the dough to prove in the breadmaker for 1 to 2 hrs after kneading.
To form the loaf as a boule, invert the dough to a floured work surface and fold the top, bottom, and sides of the dough toward the center. Turn the dough over, cover it with a towel or plastic wrap, and let it rest for 10 mins. Uncover the dough and round the loaf by pushing against the bottom of the dough all around with the sides of your hands held palms upward. The dough will quickly form an even sphere. Drop the dough, smooth top side down ward into the prepared banneton or basket - I noticed dough can be very sticky to handle and can be only be smooth on its top sphere which is facing down into the banneton and so the back of the bread facing upwards can look a little rough and ugly.
Cover with plastic wrap and let proof until doubled in bulk 2 to 4 hrs (sooner if yeast is added).
Preheat oven to 450°F or 240°C (with or without) fan forced. Line a baking tray with baking paper. Set a rack in the middle level of the oven. At the same time, place another baking tray on the very bottom of the oven and also get ready 1-2 glasses of iced water.
Once the oven is ready, invert the banneton onto the lined baking tray. Use a knife to cut a slash pattern on the top of the loaf. Note: Most professional bakers transfer their bread dough onto a pre-heated baking stone or tray before baking it but I find that this step has been pretty daunting for me and so I just invert the bread dough onto a non-heated tray.
Quickly open the oven and place the bread on the middle rack and pour the iced water onto the preheated tray at the bottom. Wait for 5 mins, then decrease the oven temperature to 425°C or 210°C (with or without) fan forced and continue to bake for 25 mins or until it is well risen and deep golden or its internal temperature is about 200°F. Allow it to cool completely on a rack. Slice and serve. The bread is its best on the day of bake. To store, wrap it in a paper bag and place in room temperature.
Happy BakingPlease support me and like me at Facebook...
