And I was like YES with a flex arm when I heard this remark... LOL!
I totally agree with my son. These QQ* milk breads are amazingly soft, moist and delicious!!!
Despite of my victorious discovery, I was actually facing a dilemma, thinking whether I should share this recipe or not... because I know that the addition of gluten flour is absolutely essential to bake these extra chewy QQ bread!
Gluten flour???!!! I know. It is not a common pantry ingredient and many people wouldn't have or will buy this ingredient even they are baking breads frequently at home.
What is gluten flour? Low in carbohydrate and very high in protein, gluten flour is wheat flour that is made with the bran and starch removed. Due to its high protein content, gluten flour is often used with low-protein flours like whole wheat and rye to improve the elasticity and overall texture of some specialised breads.
If you are an avid baker like me, I hope that you will consider buying and using this ingredient for some of your bread baking because this addition can really make some bread recipes REALLY extra awesome!
So, you might ask... Where can you buy gluten flour? I bought mine from a local health shop and I'm sure that you can buy it from most bread baking supply shops or via online if you do a Google search for it.
Back to my dilemma... To share or not to share this fantastic recipe... Alright! I will share because this recipe is truly too good to be missed.
*QQ in Chinese term means chewy food with bouncy texture.
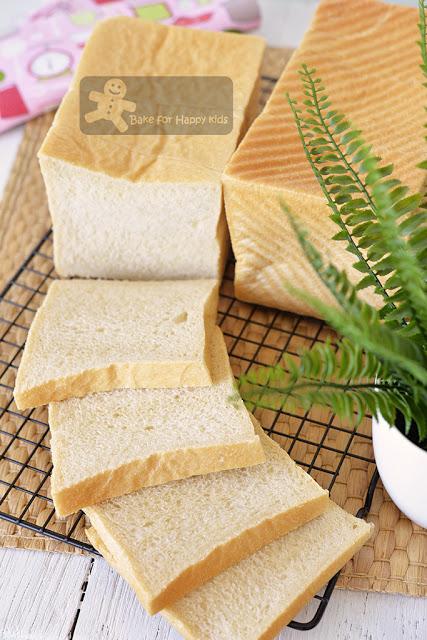
High Gluten Soft Chewy Milk Sandwich Breads
Amazingly Soft, Moist and Delicious!!! - HIGHLY RECOMMENDED!!!
So here we go... Here's my one-minute video showing how I baked these QQ condensed milk sandwich breads.
Keen to bake with this recipe? You might wish to read the following tips before proceeding to the recipe...
1. You can mix and knead this bread dough using a breadmaker or an electric mixer with a hook attachment but I would not recommend kneading this dough by hand as it need to thoroughly kneaded. After the dough is well-kneaded and proved into a soft and elastic dough, it will be very easy to handle. So easy that you will need very minimal amount of flour to dust your hands, rolling pin and your work area while shaping the dough.
2. If gluten flour is unavailable, please use the strongest bread flour with at least 14% protein. However, the calculation has shown that the breads without the addition of gluten flour won't have as much gluten as those that are made with gluten flour. So, please be aware that the breads without gluten flour can never be as soft and chewy as the ones that are made with gluten.
3. To make these breads very chewy and porous, it is important to roll and stretch adequately, just like what I shaped my breads.
4. Not to worry if your shaped soft dough especially the buns will not puff up in their height after proving... They will puff up a lot during baking but will shrink just a little after baking.
5. Due to the addition of dense beige-colour gluten flour, please know that these high gluten milk breads won't be milky white as most of the milk sandwich breads that I have baked at here.
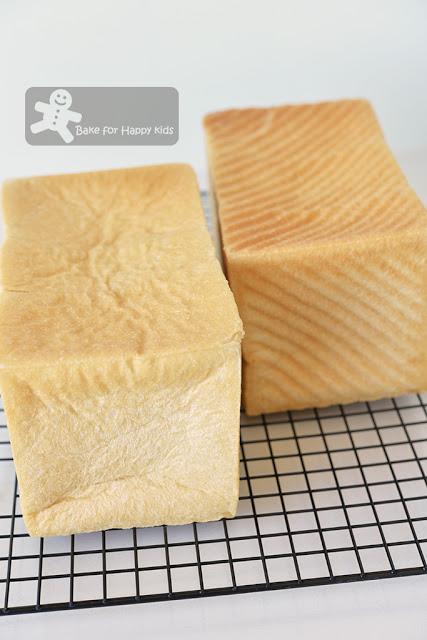
Perfect!
These milk sandwich breads will rise and bake into this perfect square loaves!
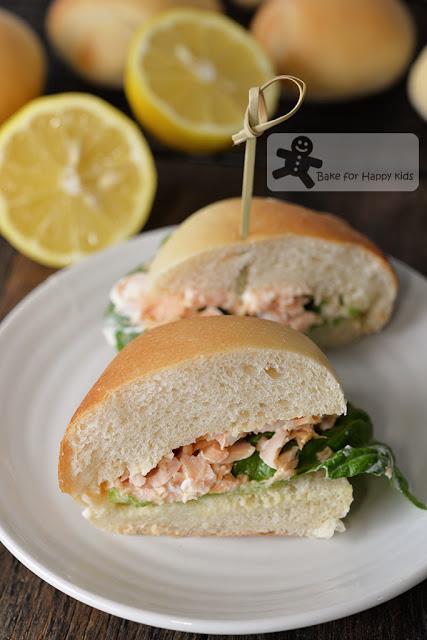
I have tried using this recipe to bake very delicious soft chewy bread buns too.
And here's my mayonnaise salmon sandwich made with a high gluten bread bun.
Yum!!!
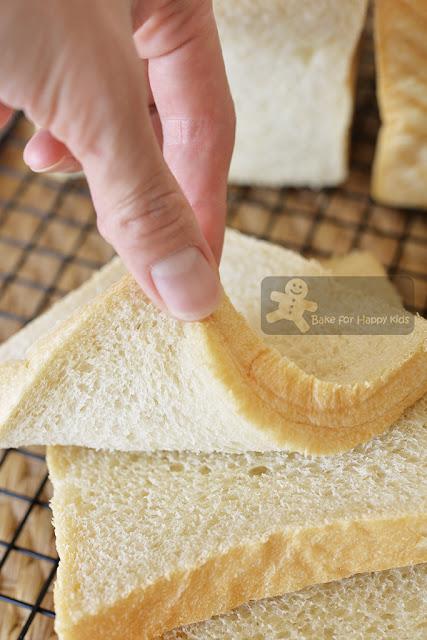
See!!! This bread is very soft, spongy and elastic!!!
HIGHLY HIGHLY HIGHLY RECOMMENDED!!! ... but you will have to buy gluten flour for these bake.
I hope that you will like this amazing bread recipe. If you want more, you can get the latest updates via my Facebook at here or here or my Instagram @zoebakeforhappykids
Here's the recipe - HIGHLY RECOMMENDED but please be aware that the addition of gluten flour is essential to make these breads as soft, moist and chewy as the ones shown in my video and pictures.
Please make sure that the ingredients are in their exact weight or volume.
Make one standard 450g, 10 x 20 cm loaf
230g water, at room temperature
25g condensed milk, at room temperature
290g bread flour with 12% protein
12g caster sugar
2g salt
15g milk powder
35g gluten flour - please read the above point 2 and **
30g unsalted butter, softened at room temperature
1 tsp instant dried yeast
Make two standard 450g, 10 x 20 cm loaves
460g water, at room temperature
50g condensed milk, at room temperature
580g bread flour with 12% protein
25g caster sugar
4g salt
30g milk powder
70g gluten flour - please read the above point 2 and **
60g unsalted butter, softened at room temperature
2 tsp instant dried yeast
Make 10 medium slider type of buns
200g water, at room temperature
20g condensed milk, at room temperature
250g bread flour with 12% protein
10g caster sugar
2g salt
15g milk powder
30g gluten flour - please read the above point 2 and **
25g unsalted butter, softened at room temperature
1 tsp instant dried yeast
** If gluten flour is unavailable, please use the strongest bread flour with at least 14% protein.
If you are making one standard 450g loaf, substitute 290g bread flour and 35g gluten flour with 325g bread flour with 14% protein.
If you are making two standard 450g loaves, substitute 580g bread flour and 70g gluten flour with 650g bread flour with 14% protein.
If you are making 10 buns, substitute 250g bread flour and 30g gluten flour with 280g bread flour with 14% protein.
However, please be aware that the breads without gluten flour will never be as soft and chewy as the ones that are made with gluten flour.
extra butter or vegetable oil spray to grease the loaf pans plus their lids if required
extra bread flour for dusting and shaping
Add all ingredients into the pan fitted in a breadmaker according to the order of the above list. Use the dough setting to knead the dough until it is smooth and elastic and allow the dough to prove for 1 hr.
If breadmaker is not available, you can knead using an electric mixer with a hook attachment and NOT by hand - See above point 1. Combine both flours, sugar, salt, milk powder and yeast in the mixing bowl of your electric mixer. Make a well in the flour mixture, add water to form a dough. Use electric mixer with low speed to knead the dough. While kneading, add butter gradually and keep kneading until it forms an elastic and smooth dough (at least 20 mins) and then allow the dough to prove for 1 hr or until doubled in size.
To shape the dough into bread loaf or loaves:
Grease 10 x 20 cm loaf pan/s with butter or vegetable oil spray.
Divide dough into into 3 (for one loaf) or 6 (for two loaves) equal portions (about 210g each). Shape all portions of dough into smooth balls. Allow them to rest at room temperature for about 10 mins.
Using a lightly floured rolling pin, roll each portion into long and flat oval shape (about 20 cm) on a lightly floured non-stick surface. Use your fingers to pick one shorter side of the dough and tuck and roll the dough like a Swiss roll. Use the rolling pin to flatten and roll the dough into a long rod shape. Then, pick one shorter side of the dough and roll it like a Swiss roll again. Repeat this rolling step with the remaining portions of dough.
Place three rolled dough with their seams side down into each prepared pan. Press the top of the dough lightly to form an even surface. Allow the dough to prove in a warm and humid place for another 1 hr or until the dough is going to reach the maximum height of the loaf pan. Cover loaf pans with lids if required.
To shape the dough into buns:
Line baking trays with baking paper. Divide the dough into 10 equal portions. Stretch, pull and mold it round. Cover and allow the dough to rest for another 10 min.
Use a rolling pin to roll each portion into a flat oval shape. Arrange the rolled dough lengthwise. Roll the dough up from bottom to top like a Swiss roll. After rolling up the dough, use a rolling pin to roll the dough side-wise (not the same as the Swiss-rolled direction) to form a long flat dough and roll the dough again like a Swiss roll. These rolling steps will help the buns to form many stretchy pockets inside the dough. Arrange the shaped dough with the seam facing down in the prepared tray. Repeat this shaping step with the rest of the portions. Arrange the shaped dough onto the prepared with about 10-15 cm apart. Allow the bread to prove for 1 hr or until doubled in size.
Note: Although the shaped dough will not puff up in their height after proving, they will puff up a lot after baking.
Preheat oven at 180°C.
Bake one tray of buns or the loaf one at a time at 180°C for 12 min (for the buns) or 25 mins (for the loaf or loaves) or until the bread are thoroughly cooked, smooth and golden.
Remove lids and breads from the pans immediately. Transfer the breads or buns onto a cooling rack to cool completely. Serve and enjoy!
Store any uneaten bread buns in airtight container and in room temperature for up to 2 days. I have noticed that these bread are the softest to eat when they are slightly warm. To achieve that, it is best to warm them by wrapping them well in a foil and placing them in a hot oven for 2-3 mins just before serving.
Happy BakingPlease support me and like me at Facebook...
