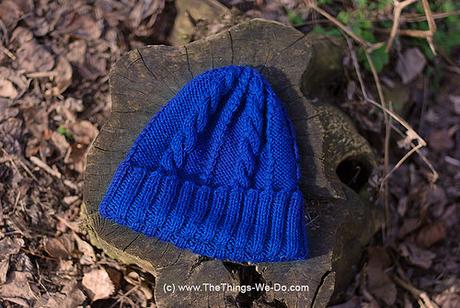
Here’s a nice navy cable beanie I knit for my friend this spring. From the yarn leftovers I’ve also made the matching Navy Baktus with Pom Poms
Materials:
– size 8 (5.0mm) Circular Knitting Needles;
– set of four size 8 (5.0mm) double pointed knitting needles;
– 2 skeins of Gazzal Baby Wool (Turkey) wool blend (100 grams total)/ xx yards/xx meters;
– yarn needle;
Gauge:
20 sts and 24 rows = 4×4in or 10×10cm
Size:
Hat diameter is 52 cm/20.4 in
The pattern is multiple to 20sts, use this info in case you wish to change the hat diameter.
Abbreviations:
K – Knit
P – Purl
K2tog – knit two stitches together
P2tog – purl two stitches together
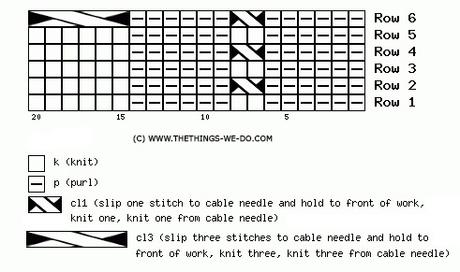
CL1 – slip one stitch to cable needle and hold to front of work, knit one, knit one from cable needle
CL3 –slip three stitches to cable needle and hold to front of work, knit three, knit three from cable needle
Base of the hat:
Cast on 100 stitches using circular knitting needles and join for knitting in the round. Knit 10cm/4in of K2,P2 rib.
Afterwards knit 14cm/5.5in of the pattern below:
Pattern:
Row 1: *P6, K2, P6, K6* repeat until the end of row;
Row 2: *P6, CL1, P6, K6* repeat until the end of row;
Row 3: *P6, K2, P6, K6* repeat until the end of row;
Row 4: *P6, CL1, P6, K6* repeat until the end of row;
Row 5: *P6, K2, P6, K6* repeat until the end of row;
Row 6: *P6, CL1, P6, CL3* repeat until the end of row;
Pattern chart:

Decrease:
Row 1: *P2tog, P4, K2tog, K2, K2tog, P4, P2tog, K2* repeat until the end of row; 80 sts left
Row 2: *P5, K4, P5, Cl1* repeat until the end of row;
Row 3: *P2tog, P1, P2tog, K4, P2tog, P1, P2tog, K2* repeat until the end of row; 60 sts left
Row 4: *P3, K4, P3, Cl1* repeat until the end of row;
Row 5: *P2tog, P1, K4, P1, P2tog, K2* repeat until the end of row; 50 sts left
Row 6: *P2, Cl2, P2, Cl1* repeat until the end of row;
Row 7: *P2, K2tog, K2tog, P2, K2 * repeat until the end of row; 40 sts left
Row 8: *P2, K2, P2, Cl1* repeat until the end of row
Row 9: *P2tog, K2,P2tog, K2* repeat until the end of row; 30 sts left
Row 10: *P1, Cl1, P1, Cl1* repeat until the end of row
Row 11: *P1, K2tog, P1,K2tog* repeat until the end of row; 20 sts left
Row 12: K2tog until the end of row; 10 sts left
Cut yarn, leaving the long tail. Thread the tail through the remaining ten stitches. Pull tight and weave in the end on the inside of the beanie.
You’re done! The Simple Cable Beanie is ready!
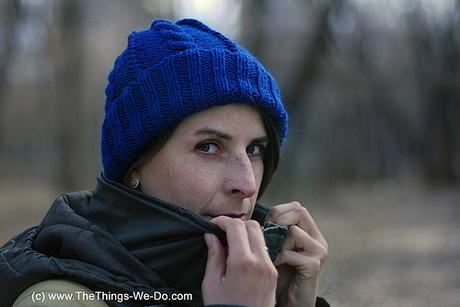
Here are a few photos of the finished beanie and of me wearing it.


Comments
comments
