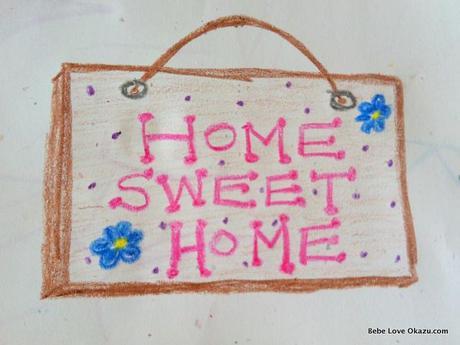
I did it!!!
After months of debating whether to self-host my blog and create a newly designed site, countless hours spent on laborious updates, here I am! My new home, Bebe Love Okazu DOT COM!
What began with the simple fact that I was running out of free hosting gigabytes on WordPress (an excellent , free blogging site, I must add) I am happy to say that moving to a self-hosted site and redesigning my site, financially made the most sense when compared to the options that were available on my free blogging site.
This post isn’t for everyone. In my opinion, it’s fairly dull (if not down-right stale and boring), but as a former knowledge consultant in a previously employed life, I thought I would share my low-tech experience, just in case there is someone out there who is thinking about redesigning their blog, is just as tech-averse as I am, and might learn something from my mistakes. I don’t profess that this is the best way to do it and would do a few things differently if I knew any better, but my site is up and running, despite a few technical kinks I still need to iron out.

The biggest challenges I had to overcome were, 1) whether my blog deserved a new home given I’m not a professional blogger, and don’t earn any money from my blog and, 2) how in the world was I, tech-challenged girl that I am, going to build a new blog site without spending very little to no money?!? The following are the steps I took to get my blog up and running.
1. Graphic Design
Your logo, color scheme and font will likely determine the overall look and feel of your blog. One of my first challenges was a logo to create the look and feel of the site. Given I didn’t really have a budget to work with, I had to rely on the grace of one of my best friends who just happens to be very creative and artistically gifted (can’t share her drawings or paintings online but she is amazing). Thank goodness for M! Thankfully, I caught her at a good time as she is generally slammed with work and obligations. All she had was the name of my blog and a tagline and a vague idea that I hoped the logo would capture a bit of my Asian / Japanese heritage.

You can find the logo she designed in the header of every page on my blog. I loved it instantly! She used our wedding colors – pink and brown! How could I not love it. She selected a free font that I also loved, created a favicon for me, (above) as well as all of my social media icons. She made different sizes for me, inverted the colors for me, I could go on and on. Thank you, M, you rock!!! I love you!!! After she created the logo, favicon and icons for me, there was no going back. Now I had to build a new site.
Need a referral? My bestie, M, likely won’t provide design services, but I can certainly ask her if you’d like. BUT I do know of a really great graphic designer who has an awesome portfolio. Her name is Amy, and I’d be more than happy to provide an introduction.
2. Decide Whether You Want a Custom Designed Website from Scratch OR Whether You Want to License a Free / Paid Template
As you might have guessed, I chose the cheaper route of licensing a free or paid template versus custom building my site. A custom site would have been pretty great, but I’m happy with my new home. :) After exploring many options and reviewing countless WordPress based themes (there are thousands to be discovered via Google), ultimately, I chose to purchase an inexpensive licensed template, given all of the free templates I reviewed offered limited customizations.
3. Select a Self-Hosting Company
For a nominal monthly fee, I was able to secure a hosting company with many free perks: free domain name registration, unlimited file transfer, unlimited storage space and much more! I did some research as far as the quality of the hosting company based upon industry rankings, number of clients served, server downtime (should be close to zero), and quality of customer support (because I would need someone to be understanding and patient of my 2nd grade level techy questions). The host I selected was also recommended by a trusted source. Ask around, get recommendations, do some research, but go with what you are most comfortable with.
4. Transfer Files From The Old to New
Thanks to Aya-chan, my sister-from-another-mother, calling in a favor, MK generously donated his time and helped transfer all of my files from my old blog site, to my new blog here. He spent a Sunday afternoon transferring the files and setting-up the basic foundation of my blog for me and voila! I had a new home. Thank you SO much MK! If it wasn’t for MK, I would have never gotten to the next step of customizing my site. All of a sudden, I had a functional new blog home, but it wasn’t quite my ‘home sweet home’ yet.
5. Plug-Ins
There are many plug-ins available to bloggers using the WordPress platform that helps to automate many uber-cool features on websites. But don’t get carried away, and I definitely recommend getting a few professional opinions before choosing to install plug-ins. MK’s advice was to be careful of the plug-ins I installed on the site because it could get “too crowded” causing my site to “break”. I heeded MK’s advice, but there is a feature of my blog, unnoticeable to visitors, but broken nonetheless. How will I fix this? After seeking the techy advice of a colleague who couldn’t figure out what was wrong, it looks like I might need to seek the help of a pro at some point in the future.
6. Finding a Techy Programmer & Customize the Details
The template I licensed had one or two standard color schemes and one font (that I was aware of, there could have been more). The HTML knowledgeable friends that helped me, customized all the fonts you see on my site using a free web-based font. Note: Be sure to select a font that also includes all punctuation marks. :) Half-way through redecorating my site, I noticed that some of my punctuation marks (not all, thank goodness) were missing. Well, it’s because the font I selected didn’t have them. I can laugh about it now, but this was a good lesson learned. Add widgets to your column, and include a footer if you need more space to share valuable information on your site.
I cheated. I am able to make minor modifications on my site, thanks to previously learned WordPress techniques, but I had to ask for help with customizing my site and modifying HTML code. If you don’t know anyone who can help you, I can recommend Amy, who worked on my friend’s site which looks fabulous, or I can recommend a few other folks but you will need to private message me via my Contact page.
7. Photos
This was a hard lessen learned, although common sense dictates that you should only post photos on your site that are small in size, so that your site’s visitors can easily load your blog onto their computer, tablet, or mobile phone. Well folks, I lacked common sense in this area and apologize if you have any issues loading any recipe posts. I’m in the process of slowly swapping out photos that are too large, with photos that are more web-friendly.
I would also advise taking good photos and showcasing your best work on your blog, but this area is a work in progress for me, and honestly I don’t know if I’ll ever get this stuff right. I am not a good photographer. I don’t understand basic photography techniques, but what I do have is a really talented, and generous brother-in-law, Hideki, who takes some of the really great looking food shots here on my blog. The mediocre photos are all me. :) You can check-out his Flickr portfolio or a sample of his work on the Photography page on my blog.
8. Comments & Interacting with Readers
Despite the fact that my blog is primarily a journal of sorts, allow your blog visitors to leave comments and interact with you. By doing so, you might meet some really amazing people and make new friends. Be wary of spammers and people who are just not nice. It never hurts to moderate comments.
9. Social Media Networking
Allow your readers to connect with you via social media platforms. There are different platforms for different folks. My favorites are Facebook, Instagram and Pinterest. I also do Twitter, but primarily because this platform allows you to share tweets across multiple social media sites (Facebook etc.). Because different people like different platforms, I provided a number of social media options to follow my blog and connect with me, but honestly, I don’t always have or make the time to keep up with all platforms.
If you’re actually reading #9 of “How I Created My New Blog Site” and made it this far into this post, and you are considering following me, by far, my Facebook Fan Page, Instagram (search for Bebe Love Okazu) and Pinterest are my most interactive networking vehicles. :)
10. Tips
- Be patient. Building a new site takes time. Even when someone else is doing the techy programming for you.
- As with all business dealings, communicate clearly with your “vendors”. Be respectful, thankful and patient.
- Have a vision of what you want your site to look like. Expect to do some grunt work such as laboriously editing details that even your programmer won’t accept money to do.
- Realize that some things are technically possible to make your vision a reality, but some things are technically not possible, or will cost you an arm and leg.
- Use social media icons that are standardly recognized so that it’s easy for visitors to associate with and identify.
- Use small size photos so that your site loads easily and quickly. Let me repeat that one: use small size photos.
- If you’re like me and don’t have a lot of money to spend on your site, ask friends for help. Treat them to a nice meal which allows for some quality friend time. Return the favor, or cook for them. :)
- Back-up your website files. Accidents happen. My Host does this for me automatically, but I also download the backup files to my computer periodically.
- Google and research ‘best practices’. Visit other bloggers who share techy tips or blogging tips in layman’s terms and learn from their mistakes. :)
- Have fun redecorating your site. Don’t get obsessed or frustrated over it.

