Windows 10 is installed in over 800 million devices but a fraction of those are running with increased security offered in this operating system.
In this tutorial we will show you how to enable Secure Boot and TPM to increase the security of Windows 10.
What is Secure Boot?Secure boot is a security standard developed by members of the PC industry to help make sure that a device boots using only software that is trusted by the Original Equipment Manufacturer (OEM). This prevents it from starting the computer from malware, ransomware, etc.
What is a Trusted Platform Module (TPM) ?TPM is a hardware chip that is either part of the motherboard or added on later.
Trusted Platform Module (TPM) technology is designed to provide hardware-based, security-related functions. A TPM chip is a secure crypto-processor that is designed to carry out cryptographic operations. The chip includes multiple physical security mechanisms to make it tamper resistant, and malicious software is unable to tamper with the security functions of the TPM.
Enabling Secure BootAlways backup your computer before making major modifications. Write down your current settings. Microsoft has some tips on enabling Secure Boot. Each computer is different, so your screen options will vary.
- Enter your PC's BIOS setup by hitting the right key during bootup, such as F1, F2, F12, ESC or Delete.
- Make sure your computer Boot Mode is set for UEFI, not Legacy

3. Look for an option called Secure Boot - In MSI motherboards, it is located in Settings\Advanced\Windows OS Configuration Secure Boot
Set Secure Boot Mode - Custom
Select Key Management
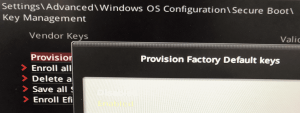
Set Provision Factory Default Keys to Enabled

The Intel GOP driver was then installed.
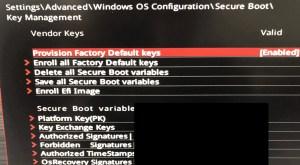
After it is enabled, the Secure Boot Variable fields will get set and now you can go to the previous screen and actually Enable Secure Boot!
Enabling a TPM in Windows 10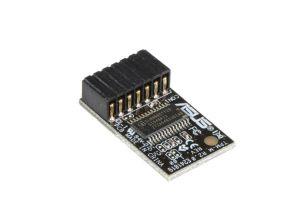
Some PCs and motherboards come with TPM already installed. In most cases, you need to figure out if your motherboard has a socket for a TPM. These are specific to hardware, you cannot put a MSI TPM board into a Asus motherboard. If so buy one, turn off your PC, and install it. Try to buy the TPM directly from the manufacturer, not from a random seller on Amazon or eBay. Laughingly, our TPM board was made in China. It could have been hacked during assembly! (So much for true security)
- Enter your PC's BIOS setup by hitting the right key during bootup, such as F1, F2, F12, ESC or Delete.
2. Look for an option called Trusted Computing- In MSI motherboards, it is located in Settings\Security\Trusted Computing

Set Security Device Support to Enabled - Set Device Select to Auto
Save the settings and restart your computer. Re-Enter your PC's BIOS select the same option
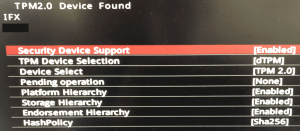
You should see additional options now that the TPM was found.
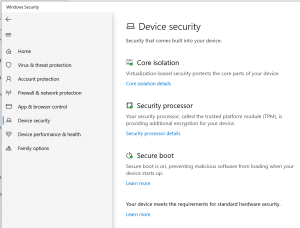
Restart the PC and enter Windows. If the installation was successful, you should see these additional notes in the Windows Security - Device Security Screen.
Congratulations!

