Everyone knows recognizes jolly ole Saint Nick in his festive red suit, eating those yummy snacks we leave each year. We all know he loves his cookies. So, here at Natures Garden, we were inspired by both Santa’s wardrobe and those delicious treats. This cute candle idea that you can give as gift or to decorate your home this holiday season. Our Santa Hat Candle Recipe also smells delicious. It just so happens to use our Santa Snack Fragrance Oil.
Santa Hat Candle Recipe Ingredients Needed From Natures Garden:
- Pillar of Bliss Wax- 10 Pounds
- Joy Wax- 1 SLAB
- Santa Snacks Fragrance Oil
- CD Candle Wicks (100 wicks)
- Votive Candle Wick Pin
- Spectrum Liquid Candle Dye- BROWN 1oz.
- Cupcake Cherry on Top- Mold Market Molds
- Spectrum Liquid Candle Dye- RED 1oz.
- Spectrum Liquid Candle Dye- BLACK 1oz.
- POURING POT
- THERMOMETER
- Safety GLOVES for Soap Making- 1 pair
Santa Hat Candle Recipe Other Ingredients Needed:
Scale
Spoon
Mixing Bowl
Ziplock Bag or Decorating Bag
Scissors
Pots (For Double Boiler)
 Santa Hat Candle Recipe Creating the Cupcake Bases:

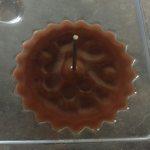
First, you will need the cupcake mold. In addition, will need two votive wick pins. Place one wick pin in the center of each cavity of the cupcake mold. Use a scale to weigh out 7 ounces of Natures Garden’s Pillar of Bliss Candle Wax. Next, melt the wax using a double boiler method to 195 degrees as we described in one of our candle classes.
For the cupcake base you will need to include 2 drops of brown liquid candle dye. In addition, add 1 drop of our spectrum black liquid candle dye. Stir to fully incorporate the color. When the Pillar of Bliss wax has cooled to about 180 degrees you can go ahead and add your fragrance oil. Use your scale to weigh out and add 0.7 ounces of Santa Snacks Fragrance Oil. Stir thoroughly to blend the fragrance oil with the wax. When the temperature reaches 140 degrees, pour the wax into the cupcake Mold Market mold. The temperature is very important because you do not want to melt the mold. Let the cupcake bases to set up. Then, remove them from the molds once they harden.
 Santa Hat Candle Recipe Separating and Whipping the Wax:

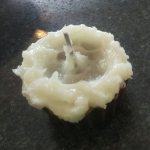
Next we will be created the part of the candle that looks like Santa’s Hat. We will be using Natures Garden’s Joy Wax. Since this is a container wax, it is softer and also easy to whip and pipe. Using a double boiler, weigh our and melt 10 ounces of Joy Wax. When your wax reaches 200 degrees, remove 3 ounces of wax. Put this wax in a separate, small mixing bowl. We will be using this white portion of wax for the white parts of the Santa hat. Let the temperature drop to about 175 degrees, before adding 0.3 ounces of Santa Snacks Fragrance Oil.
Allow the wax to set up slightly. You want the wax to be at a slush consistency. Whip the wax with a spoon or fork. Put the wax on top of the base of each cupcake. You want it to look like the white portion of Santa’s hat. However, you should save about ½ ounce of wax. This waxs will used for the two white balls that go on the top of each Santa hat. Set the remaining wax aside, we will come back to it.
 Santa Hat Candle Recipe Piping the Wax:

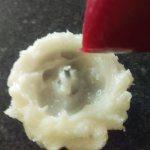
The remaining Joy Wax will be colored red. We will use it in the red part of the Santa hats. Allow the remaining wax to reach 200 degrees. Add 4 drops of Spectrum Liquid Red Candle Dye. Also, use a toothpick to add a small amount of black liquid candle dye. Use a mixing spoon to blend the colorant in with the candle wax. Let the temperature of the Joy Wax to drop to 175 degrees before adding 0.7 ounces of Santa’s Snacks Fragrance Oil. Stir well to blend.
Now, we will be piping the wax. You will need a decorating bag or a ziplock bag. Once the wax has a frosting like consistency, place it in a ziplock bag. Then, cut the corner of the bag so you can pipe the wax. Pipe the wax in a circular motion on top of the cupcake. You want the wax to look like Santa’s hat, sort of a triangle shape. This means wider at the base, and narrower going up.
 Santa Hat Candle Recipe the Finishing Touches:

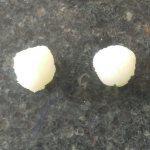
For the finally part you will need to wear gloves. Using the white wax you saved earlie, create two white balls by rolling it in the palms of your hands. Place these white balls on top of the red wax. Once the candles have set up, remove the wick pins and thread the wick through the candle. Your candles can now be used or given as Christmas gifts to your family and friends.


