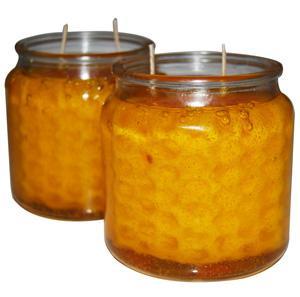
 Gel wax is a great candle wax for embedding items in candles. This translucent wax also provides the opportunity to make realistic gel candles. Sea or ocean themed gel candles are perfect examples of this, right down to the air bubbles.
We at Natures Garden however, wanted to take the realistic gel candle concept and kick it up a notch. Using the fragrance oil Honey, which is gel safe; we arrived at a notion of somehow adding the look of an embedded honeycomb. Trying to stick with items we already had in house, we creatively used bubble wrap and beeswax (because of it’s high melting point); to make our very own spin on embeds. Through several trails and errors, we found the perfect look, scent, and color for this Honeycomb Candle Recipe.
Here is a List of the Items You Will Need:
Gel Wax- to emulate the look of delicious honey
Beeswax White Pastilles- to make the embed of a honeycomb
Honey Fragrance Oil- a gel safe scent to match the realistic gel candle theme
Zinc Core Wicking- to make your candle more than just a decoration
Spectrum Candle Dye- Yellow- the color of the honeycomb
Spectrum Candle Dye- Orange- this color lightly added to the yellow makes the perfect golden honey hue
Thermometer- to monitor the temperature of the gel wax
Other Items and Supplies Needed:
Stirring Spoon- to fully incorporate the color and scent to the wax
Stove- for the double boiler method
Scale- to be dead on for your measurements
Knife- to cut the beeswax
Toothpick- to add a touch of orange to the gel wax
9 x 13 cake pan- to make the honeycomb
bubble wrap- to make the honeycomb shape
(2) Pots- for double boiler method
Apothecary Jars- this recipe below will make a total of (2) 16oz jars. Any shape or size jar will work, you will just need to adjust the measurements accordingly
And finally, here are the steps with pictures included:
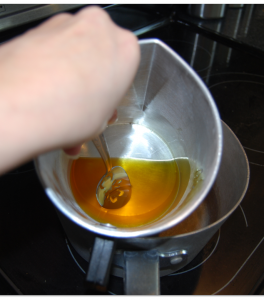
Step 1: Using the double boiler method, set the temperature of your stove top between medium and low heat. Next, weigh out and melt 230 grams of beeswax. You will want to stir this occasionally as it melts.
Step 2: When the beeswax is in a liquid state, place 2 drops of Spectrum Yellow Candle Dye in it and stir. After the color is incorporated, place the pot back into the heat source.
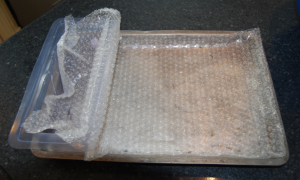
Step 3: Next, lay your cake pan on a flat surface, this will ensure that your honeycomb has an even thickness. Measure out 7 inches of length in your pan. Mark this length by placing your knife across the pan. If your knife is not long enough, you can use any kitchen utensil that will lay across the pan. Next, with the bubble side up, place the bubble wrap over your knife and cake pan.
Step 4: Now, weigh out 23 grams of Honey Fragrance Oil. Remove your beeswax from the heat source, add the fragrance. Stir.
Step 5: Slowly pour the beeswax over the bubble wrap. Allow this to fully set up. Please Note: Do not rush the set up of beeswax or it may crack.
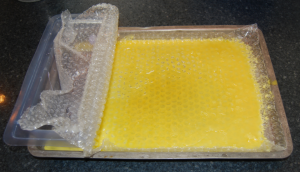
Step 6: When the beeswax has cooled, gently remove it from the cake pan. Now, taking your time, carefully peel away the bubble wrap.
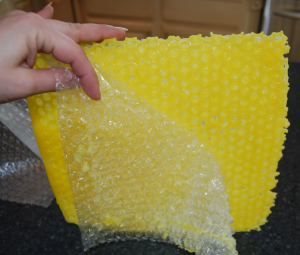
Step 7: Next, weigh out 1000 grams of gel wax. Place this into the double boiler and allow it to melt, stirring occasionally. This will resemble to a thick syrup.
Step 8: Now, lay your beeswax on a flat surface. Place one of your candle jars on its side. Using your knife, mark the width of the jar (before it changes shape). Next, subtract 1/2″ from your marking. Finally, make a line and cut it with your knife.
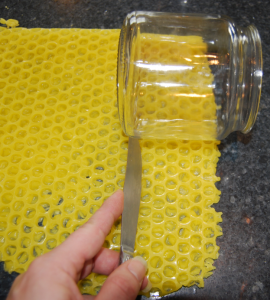
Step 9: Gently roll your beeswax into a loose circle. Place one roll in each of your jars. Make sure the beeswax roll is at least 1/2 inch away from the walls of the jar. Then, set aside.
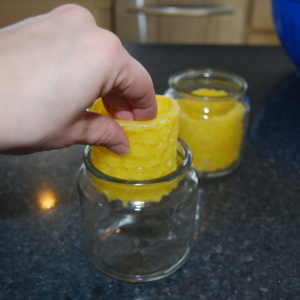
Step 10: Now, secure your wicks to the bottom of your candle jars. Make sure they are centered.
Step 11: Once the gel wax is melted, place 4 drops of Spectrum Yellow Candle Dye into the gel wax. Next, add 1 toothpick tip of Spectrum Orange Dye. Stir. Finally, add 100 grams of Honey Fragrance Oil. Stir again.
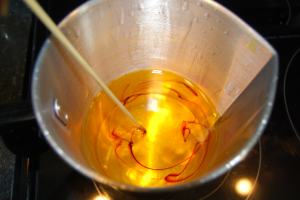
Step 12: Place your thermometer into the gel wax. Then, begin to slowly stir the gel wax. Do not stir to quickly or you will have an excess of air bubbles. Keep stirring and scrapping the sides until the gel wax temperature hits 165 degrees Fahrenheit.
Step 13: Now, slowly pour the gel wax into the containers until your honeycomb is covered. Then, straighten your wicks. Finally, allow the candles to fully set up.
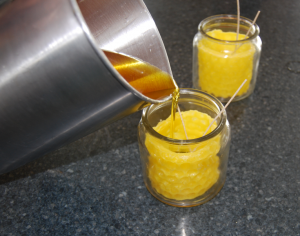
Your honeycomb candles are now ready. Simply trim your wick, light, and enjoy!
With this realistic gel candle, there are two crucial steps that come into play. The first is the thickness of the beeswax. You want your beeswax to be nice and thick so it can withstand the temperature of the melted gel wax. However, making the beeswax too thick may make it more difficult to curl, therefore complicating the honeycomb shape that can be achieved. Lastly, the temperature of the melted gel wax is everything for this recipe. Pouring over the 165 degree Fahrenheit point, will melt and warp your honeycomb.
Happy Crafting!
