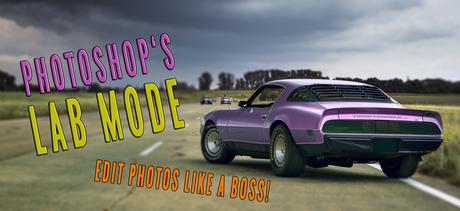
Photoshop* has tons of features to edit and to retouch photos. As a beginner, you will be overwhelmed by the sheer quantity of possibilities and ways how to achieve great results. Maybe that’s why the most people using Photoshop are not familiar with the so-called LAB mode which lives in a shadowy existence of the RGB mode. But if you delve more into this mode, you will see that the LAB mode brings a lot of advantages the normal RGB mode often cannot provide. Thus, getting closer this topic, you would bring your Photoshop skills to a next level and gain an edge to stand out from the crowd. That’s why I’d like to introduce to you the LAB mode and show you the advantages.
Please note: this blog post is not about how to use the LAB mode but rather about the LAB mode in general so you get familiar to it in theory and see the differences to the common RGB mode.
Prerequisite: If you an absolute beginner, you might have problems to follow my explanations because I will not go deep into the detail as it would go beyond the scope. In this case, I strongly recommend you to acquire some basic skills regarding photoshop. By the way, for absolute beginners, I recommend using Lightroom* first as it’s easier to learn (just mentioned in passing).
Difference between LAB mode and RGB mode
I think, it’s best to show you the difference by showing you the picture below. This will be the starting point. I already edited it in Lightroom and sent it to Photoshop. You maybe already have seen this picture in the post where you could download photos with muscle cars.
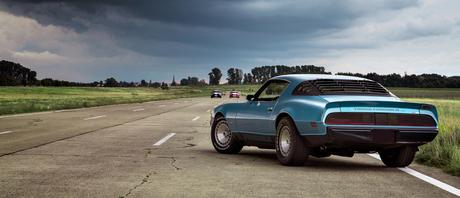
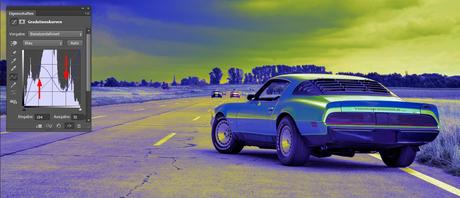
Now let’s play around with the colors and adjust the blue tones of the pic, just for fun to see what happens. For this reason I create a new adjustment layer, e.g. “Curves”. I’ll bring the dark parts more up and the highlights more down. What do we see now? We see that my adjustments changed the colors a bit. So far so good.
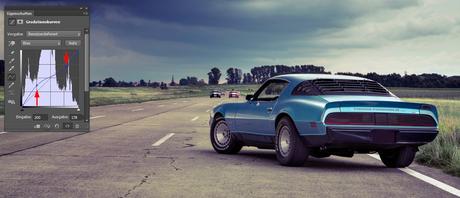
But doing this too much, you will see that the photo doesn’t look natural anymore. Actually, you see now a pretty ugly and messed up picture with eroded and pixeled parts. Check it out:
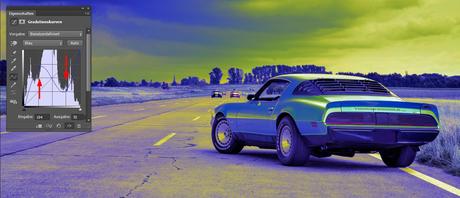
What’s the reason for this? Well, the concept of the RGB mode (which stands for red, green and blue) provides not only changes in the colors but also changes in the lightness! In other words: when you edit each of those three channels of the RGB mode, you actually bring up or down the lightness or the darkness, although you just wanted to change some colors. That’s why the images look eroded in some parts and messed up when you exaggerate.
And here comes the LAB mode which eliminates the disadvantage of the RGB mode. Before we delve into explanations, just take a look at the same photo which I opened in the LAB mode and did the same adjustments like in the RGB Mode:
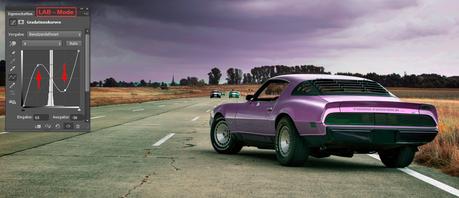
You can see that although the adjustment layer “Curves” has the same extreme adjustments, there are no eroded parts at all! The reason for this is, that the LAB mode has another concept than the RGB mode. It doesn’t combine colors and the lightness but doing the opposite – it separates the lightness from the colors. And that’s why you can change the colors in the LAB mode without to be worried to get eroded and messed up photos.
Here you can see the straight comparison of the two modes. Just move the slider back and forth. Of course, in this example, the adjustments within the LAB mode don’t look good as well. But that’s not the point. The point is that in the LAB mode you can avoid eroded parts and get better results.
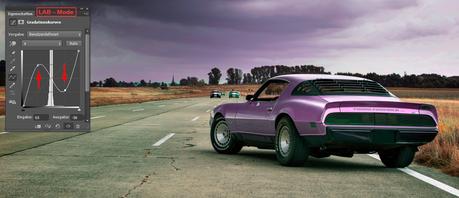
Now let’s improve the photo in our example using the LAB mode. For example, we could change the color of the car which could look like this:
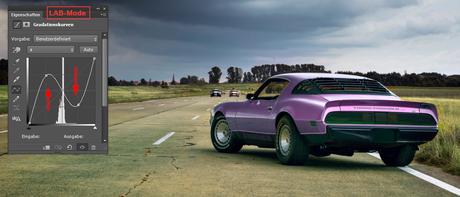
What I’ve done here was letting the adjustments extreme as before but using a layer mask to remove the violet color everywhere except of the car. As you can see, using the LAB mode, I was able to make more extreme adjustments without messing up the photo. It took me about one minute to convert the photo to the LAB mode, to make the adjustments and to paint out the undesired parts with the help of the layer mask.
Of course, to achieve the same result using the RGB mode is very possible too. But would it be possible to achieve this result in the same brief time? Maybe… But to answer this question for yourself, you need to practice, folks. Start to delve into the topic of the LAB mode and see what happens.
On Youtube, there are a lot of free courses where you can get your first insights. If you need more professional solution, you can buy some great tutorials to learn how to master the LAB mode. One those interesting professional tutorials is for example this one: “How to Add Color & Lighting Effects to Photos in Photoshop“*, presented by Aaron Nace’s Phlearn.
*Affiliate link: when you click on this link, no additional costs would arise for you and the product or the service will not become more expensive. When you decide to buy the product or use the service, I’ll get a little benefit from the provider which I would reinvest to keep this blog alive.
