Well, I got sidetracked, as usual. I'd rather sculpt, than write about sculpting. As usual, I have a few irons in the fire. Thank you for your patience. My intention here is to add some commentary and offer a few tips to go along with the mask-making videos. I just posted the secone one here. If I put everything I wanted to say in the videos they would be way too long. Go beyond five minutes with a video tutorial and it begins to feel like you're watching paint dry. So I'll say some things here that I didn't have time for in the videos. You can read them at your own pace. Or read them really fast (if you took Evelyn Woods' "Speed Reading" years ago, you can zip through this in 20 seconds, and enjoy none of it.) (You could even read it backwards....like dyslexic people. They actually teach that in that course. )(I have some dyslexia so I can make that joke.)(And I took the Evelyn Woods course when I was in college.)(Couldn't read any faster when I was done.)(Of course I didn't do any of the homework.)(See...this is what I call "commentary.")
I want to talk more about the armature of the mask. There are many ways to make an impression. You could run down the street naked. NO...I mean the impression of your head! Some people actually have a friend paper mache on their face. I've never done that, but it seems problematic. Too much preparation. And you have to sit with the stuff on your face until it's sort of dry. I really like this wire. I got this brand at Home Depot. It's called "Wire Form". It's made for this kind of thing. I made four face impressions (and they extended all the way down the back of my head) with the 10 ft by 20 ft piece of wire in the package. Now I must warn you, the edges will poke you and scratch you. The directions say to wear gloves. Yeh....sure....I'll get out my big work gloves. No...just be careful of the edges.


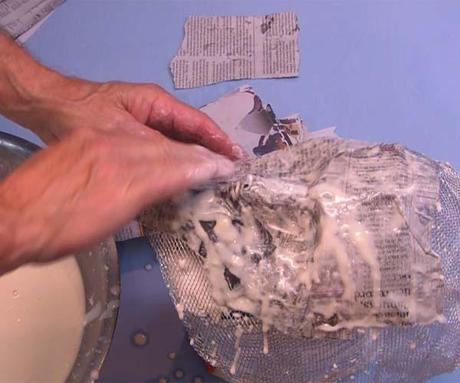
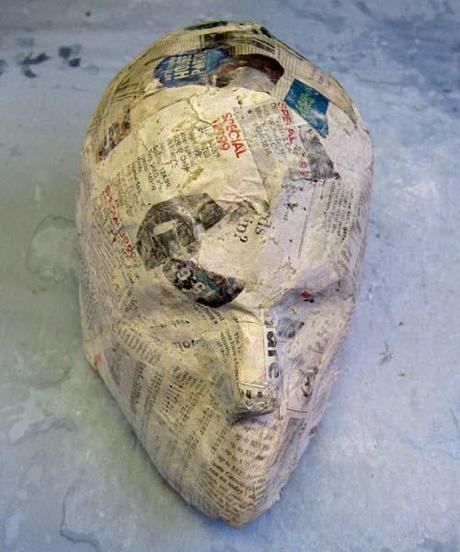
In the video I used my usual "cloth mache" to cover the wire impression. It's too flimsy to add horns and other details without adding something. You can also use regular paper mache over this wire armature. Just use smaller newspaper strips than usual. I found that it works well to put the wire form over the flour bag. It supports the wire impression perfectly while you work.


On the left is the dried paper mache version. On the right is the cloth mached version. I still like the cloth mache. It's very strong and light, perfect for this purpose.


Speaking of cloth....I've noticed more people using plaster cloth, the stuff they use for casts when you break your arm. You just dip strips of it in water and apply. I suppose you could have a friend put that on your face too, to make the armature....and then sign it (ha ha). I just think that would be way too heavy. Some paper mache artists are now adding a "skin" of plaster cloth to their projects. I've used it. Don't like it. Too unwieldy. Way too heavy for a mask you might want to wear. And isn't nearly as effective as the "cloth mache" when it comes to adding details. But don't take my word for it. Give it a try and let me know what you think.
Back to paper mache. For the green-man mask (that I'll profile on this blog) I made some smaller horns. Once again I just crumpled paper and wrapped with masking tape. I didn't use clothes hangers with these because they are so small. I will paper mache these horns. Later, when they are dry, I'll pull the paper out from the inside. As I mentioned, weight is an important consideration when making these masks.

To mache these horns I start at the top and work my way down adding the paper strips as I go. Here's something I didn't mention in the videos. Keeping your hands really wet with paste, turn the horn as you add the strips rather than wrapping the paper strips around the horn. I know, this is confusing. Because of that, look at the 10 second video below. Also, squeeze the horn as you work. It adds tension as you add the strips. That is, as the horn expands back to its normal shape it presses outward against the newly applied paper strip. It makes the horn really smooth and strong. I hope this makes sense. Just watch this very short video.
Finally, a note about Eddie. As you might know by now, I have three cats. A very old one named Riley, who only rarely ventures into my studio. Max, the Bengal, who loves tearing up my paper. Then there is Eddie. He's a very smart, spoiled, but fun cat. He loves the heat, and he's very interested in everything I do. He has a cushy pillow for a seat in the corner of my workshop just under a heat vent. It's where I put my paper mache to dry. It's nice and warm and he can watch the squirrels and birds outside the window. Whenever I work, Eddie is there. At the end of Part 2 you can hear him talking. It really bothered him that I had my arm around "Fab Frank" (my lounge lizard Frankensien). He came running over to tell me so.

Here he is still staring at Frank. Makes you wonder.
That's it for now. More later. I still intend to add some posts about the making of Maleficent's "son". I'll try to get to some of those this week as well. But I'm working on another dog. I'll show you that later.
Thanks for stopping by.
Dan

