Arts & Crafts Magazine
It struck me last night as I was going to sleep, that I just needed to finish this project. So here it is! Once again, if you are interested in the paper mache instructions and commentary, read on.
Paper Mache Buddha with Jo
Again, if you want to see this in person, he's sitting above the fireplace at the Starling Coffee Shop on Ash Way in Lynnwood, Washington (just off the 164th exit on I-5). Say hi to Steve for me.
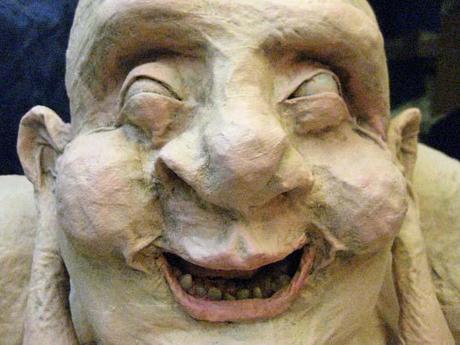
I promised in the last post to talk a bit about the cloth mache. Usually when I make lips I fold a small strip of cloth and simply wrap it under the mouth for the bottom lip. Then I do the same on the top. In this case I added a fold under the nose. For the most part, that's enough for nice lips. Of course a laughing Buddha should have lips that are a bit more plump, like Angelina Jolie. So I added a couple more small pieces of cloth around the folds.
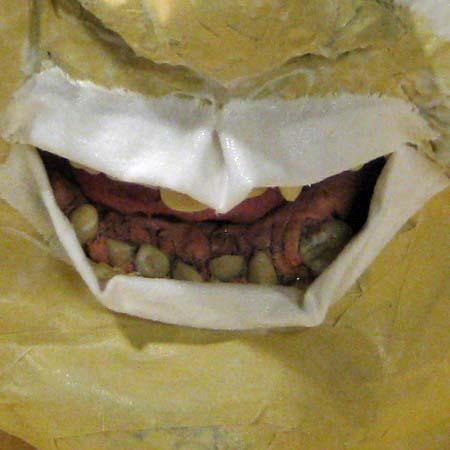
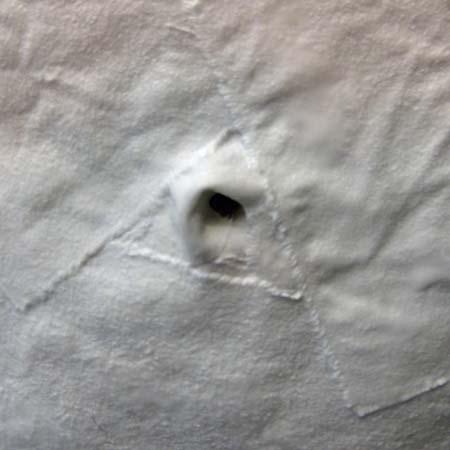
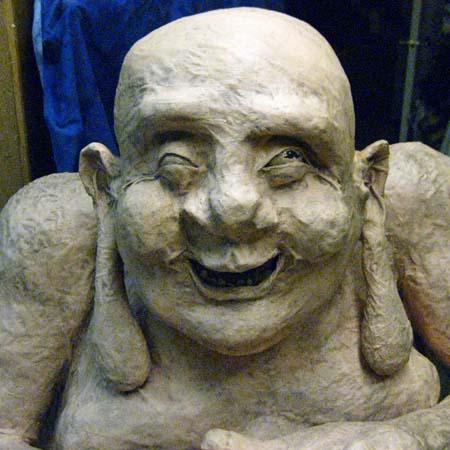
I folded cloth again and made eye lids. I wanted them to be crescent shaped. And I made a navel. Just poked a hole in the belly and stuffed some cloth into it (just like I did with the nose and ears).
I painted him a pale orangish-pink. He was very bright. Then I blackwashed him. It's funny, blackwashing is the step that most people who try my paper mache techniques resist. They fall in love with the first coat of paint and don't want to ruin it. I understand completely. Look how awful this face looks right after the backwash. But I'm telling you, you need the darkness to appreciate the light. (How's that for a nice Buddhist type saying! Actually, it was Bill Alexander, the crazy painter on PBS that used to say that, along with "Fire it in there!" when he was applying paint.) You spend a lot of time on the details of a project and you want to see them. The blackwashing really pulls them out.
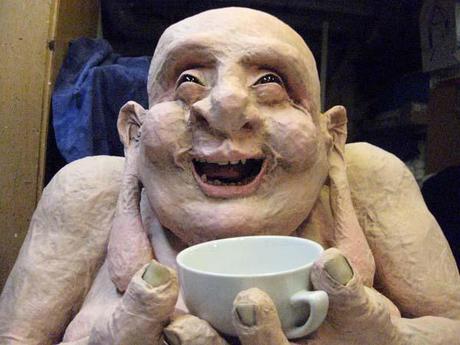
Notice how much better he looks once some of the color is added back. I put a small amount of paint on my brush and hit the high points on the head, the nose, ears, etc.. Note that I added a bit of pink to the lips and cheeks. Of course the best part of doing my paper mache art projects is scraping the paint off the eyes. It was no different with this piece. Buddha came alive when the paint came off. And, if I may brag a bit, I think he ended up looking very happy and wise, well, at least happy. Then again, it might have just been the caffeine. Did you notice that I pulled the arms and the cup up closer to his face? This Buddha was made for a coffee shop after all. I wanted to associate the bliss with the cup of coffee.
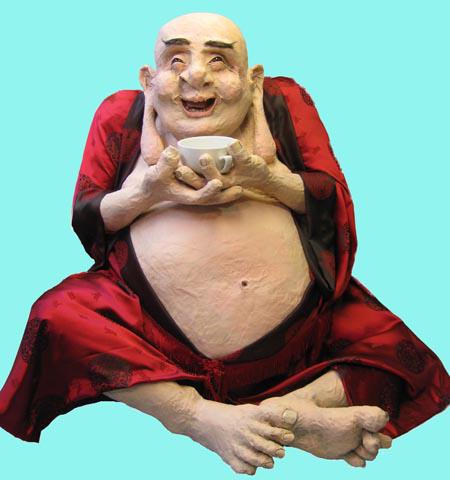
I bought some nice cloth and made a robe. Sorry, I didn't document the making of the robe. Just got carried away and did it. Suffice it to say that it really isn't a robe. I wouldn't have been able to put a real robe on the Buddha since you can't move the arms. So the cloth is pieced together with hot glue to simulate a robe.
And what would one of my paper mache pieces be without a cat? So here's...
...Buddha with Jo and Max.
Thanks for hanging with me. I'll post a video of this build on Youtube very soon. I just need to do some editing. I've got another paper mache piece of art started in my studio. I'll post something about it soon. Take care.
Dan
Paper Mache Buddha with Jo
Again, if you want to see this in person, he's sitting above the fireplace at the Starling Coffee Shop on Ash Way in Lynnwood, Washington (just off the 164th exit on I-5). Say hi to Steve for me.
I promised in the last post to talk a bit about the cloth mache. Usually when I make lips I fold a small strip of cloth and simply wrap it under the mouth for the bottom lip. Then I do the same on the top. In this case I added a fold under the nose. For the most part, that's enough for nice lips. Of course a laughing Buddha should have lips that are a bit more plump, like Angelina Jolie. So I added a couple more small pieces of cloth around the folds.
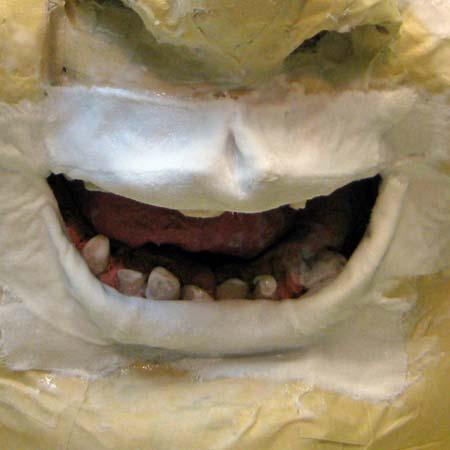
I folded cloth again and made eye lids. I wanted them to be crescent shaped. And I made a navel. Just poked a hole in the belly and stuffed some cloth into it (just like I did with the nose and ears).
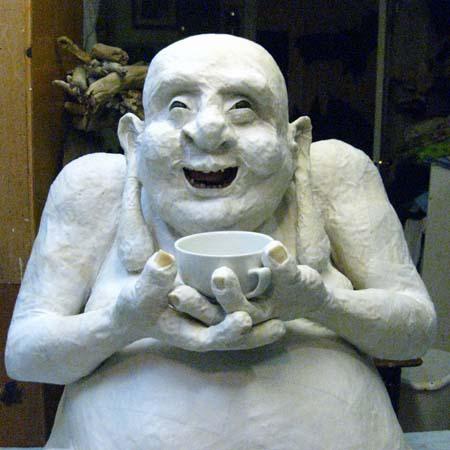
I painted him a pale orangish-pink. He was very bright. Then I blackwashed him. It's funny, blackwashing is the step that most people who try my paper mache techniques resist. They fall in love with the first coat of paint and don't want to ruin it. I understand completely. Look how awful this face looks right after the backwash. But I'm telling you, you need the darkness to appreciate the light. (How's that for a nice Buddhist type saying! Actually, it was Bill Alexander, the crazy painter on PBS that used to say that, along with "Fire it in there!" when he was applying paint.) You spend a lot of time on the details of a project and you want to see them. The blackwashing really pulls them out.
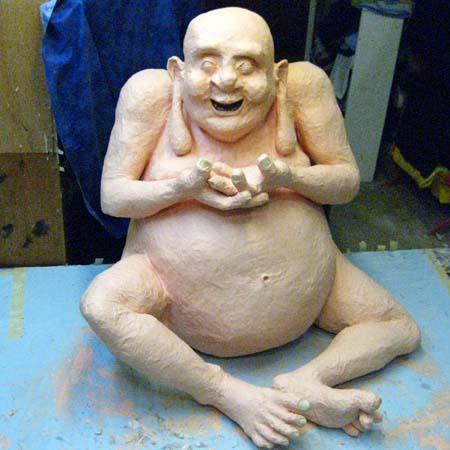
Notice how much better he looks once some of the color is added back. I put a small amount of paint on my brush and hit the high points on the head, the nose, ears, etc.. Note that I added a bit of pink to the lips and cheeks. Of course the best part of doing my paper mache art projects is scraping the paint off the eyes. It was no different with this piece. Buddha came alive when the paint came off. And, if I may brag a bit, I think he ended up looking very happy and wise, well, at least happy. Then again, it might have just been the caffeine. Did you notice that I pulled the arms and the cup up closer to his face? This Buddha was made for a coffee shop after all. I wanted to associate the bliss with the cup of coffee.
I bought some nice cloth and made a robe. Sorry, I didn't document the making of the robe. Just got carried away and did it. Suffice it to say that it really isn't a robe. I wouldn't have been able to put a real robe on the Buddha since you can't move the arms. So the cloth is pieced together with hot glue to simulate a robe.
And what would one of my paper mache pieces be without a cat? So here's...
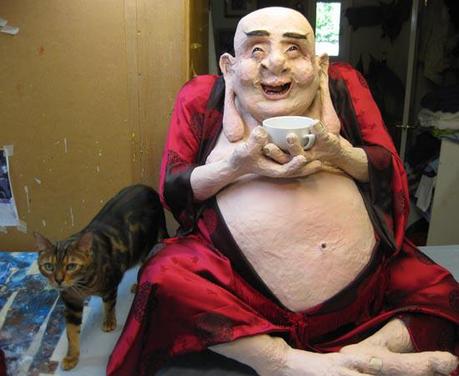
...Buddha with Jo and Max.
Thanks for hanging with me. I'll post a video of this build on Youtube very soon. I just need to do some editing. I've got another paper mache piece of art started in my studio. I'll post something about it soon. Take care.
Dan