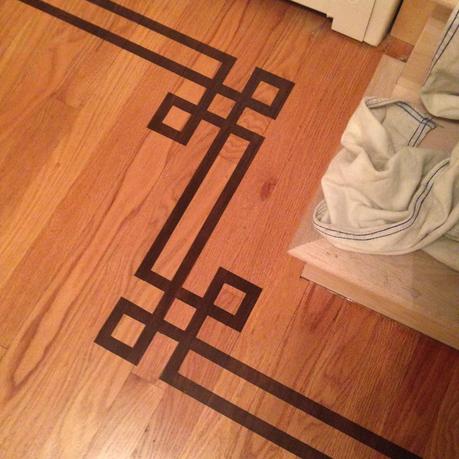
I have a client that is in the midst of renovating their entire second floor. This includes refinishing the hardwood floors on that level. They really love the look of dark wood floors, and chose to go with a rich chocolate tone. They plan on carrying the dark stain down the staircase treads to the first floor. The problem is the first floor is a much lighter clear-coated red oak. As much as they would like to redo the first floor to match the upstairs, it is just not practical for them at this point in time. We came up with a solution to blend the two floors together by adding a dark faux inlaid banding in the foyer area at the bottom of the stairs. It is a simple procedure that you can do in a day and you can use any color your heart desires. I've even made a printable template and did all the math for you!
1) You need to start with clean floors, so wet mop and be sure NOT to use any wax products* on them.
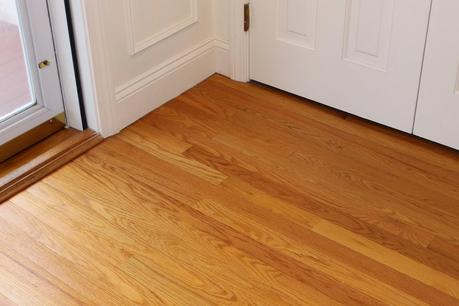 *If your floors have been previously waxed, the wax will need to be removed because the paint will not stick. There are plenty of products designed to remove floor wax, but plain ammonia and a scrub brush work just fine too. Apply liberally and let it sit for 15-20 minutes. The wax should scrub right off.
2) Once your surface is clean it is time to measure and tape the design. The design I did is a symmetrical key style corner, and it can be used on an inside or outside corner. You will need to start the design 6" from the wall if you have any outside corners to allow for it to lay out properly. If you have only inside corners (ex: a perfect square or rectangular room) you can choose to bring it in a few inches closer. I used a 6" wide sewing ruler as a guide and marked along the floor with pencil. You can also cut a 6”wide cardboard strip to use as a template. I then ran 36 mm Scotch Blue Painter's tape (for delicate surfaces) around the room following my pencil marks (be sure to apply your tape on the side of the mark closer to the wall). This is commonly referred to as 1 1/2”wide tape, but upon making the template I realized it’s actually a hair smaller than that. I prefer this brand of tape to basic masking tape because I found it doesn't damage the existing floor finish and allows for crisp edges.
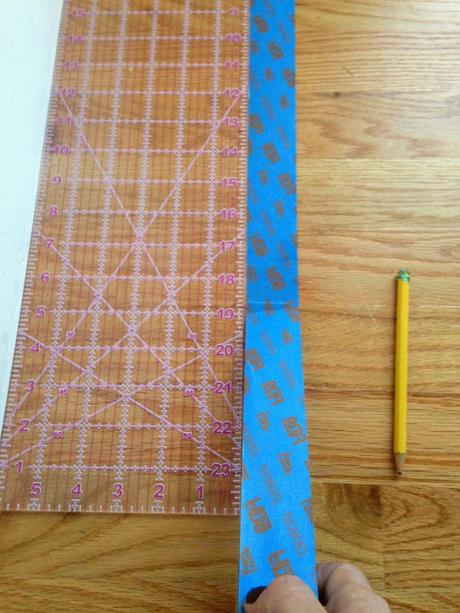 3) Next, add small pieces of 18mm painter's tape every of couple of feet along the edge of your first piece of tape. This will act as a spacer/guide
and is eventually going to be the area you will be painting.
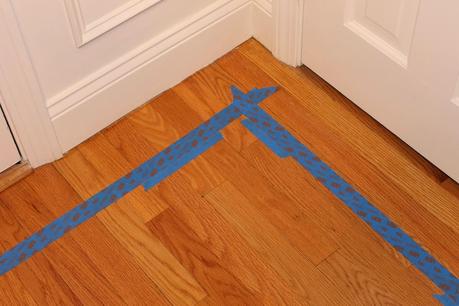
4) Using the 36mm tape again, apply another row of tape along the edges of the spacers.
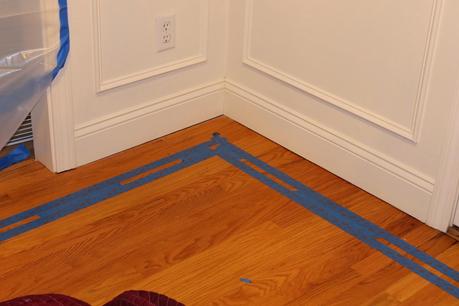
5) Remove the original spacers and move them in front of the second banding of 36mm tape.
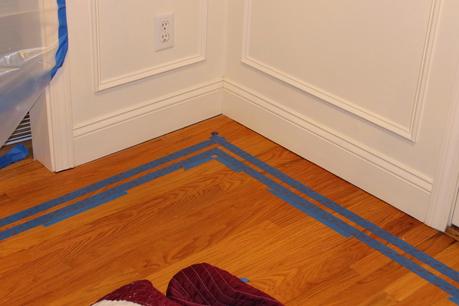
6) Repeat step 4.
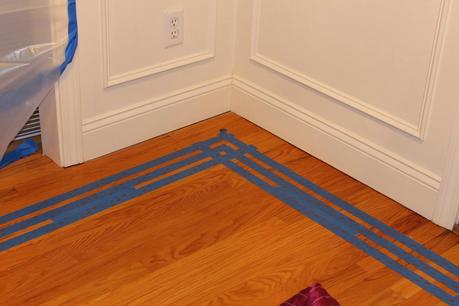
7) Remover spacers. You should now have three rows of 36mm tape running the perimeter of your room.
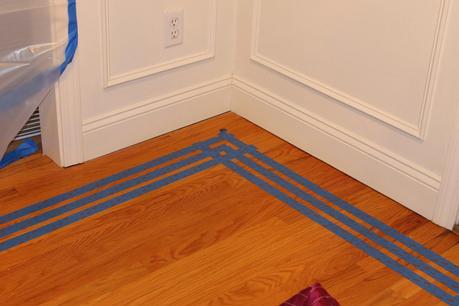
8) Now for the tricky part… the corners. I did mine the hard way with lots of math and it felt like a massive brain twister, but halfway through I realized this would be SO MUCH easier if I had just made a template. I spared you the agony and made one for you. Simply print and cut out. I recommend printing it on card stock so you can easily trace it, and when printing be sure to click "do not scale" or “scale 100%”if prompted. The file is sized to fit 8 1/2" x 11" paper. (After you print, just double check that the black area of the design is 18mm wide- if so you are good to go!) Click here for the template. Cut out the black area of the design.
9) In each corner line the two edges of the template up with your existing tape lines (see my two fingers in the following picture).
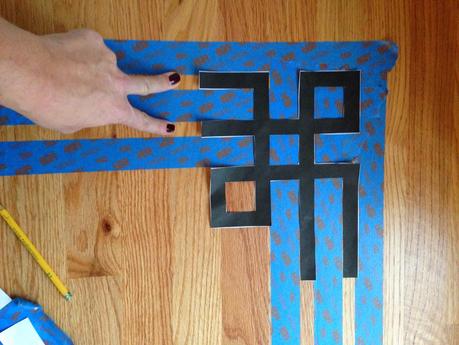
Trace the edges of the template, these will serve as guides as where to cut and add more tape.
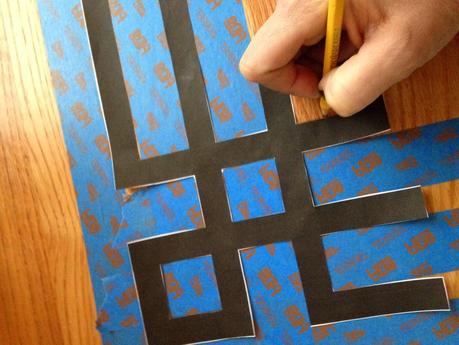
Add tape to create the inside edge of the design. Cut away areas allowing the bare floor to be seen wherever the black design is.
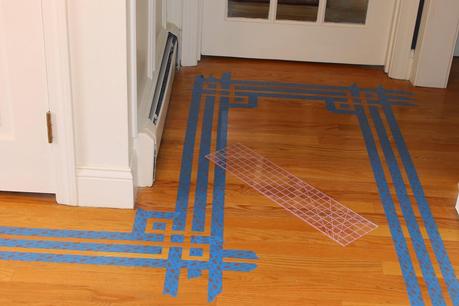
In the end you should have a design that matches the template. Repeat this for all corners. (photo 12)
10) Now it is time to prep the floor for paint. I tend to go a bit overboard, but you really want this to stick and not chip, so a good prep job is key. First, I burnish the edges of the tape so that they are well adhered to the floor and there are no gaps for paint to bleed into. Use your thumbnail wrapped with a clean rag and rub down all edges.
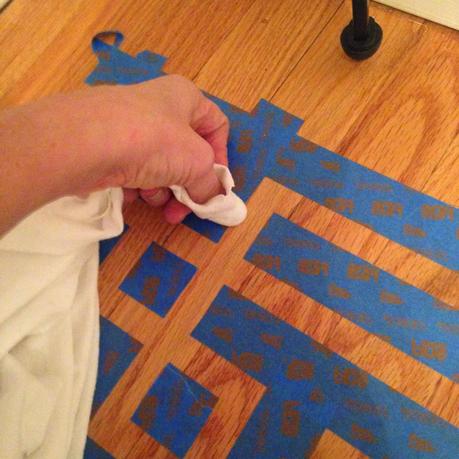
11) Use a fine grit sandpaper and lightly sand the area to be painted, taking care not to lift or rip the tape. If you do, no worries… just cut out the damaged area and re-tape/ burnish. Lightly sanding roughs up the existing smooth polyurethane surface and creates better adhesion. Vacuum up any dust.
12) Lastly, I like to use a deglosser to remove any bits of wax or dirt I might have missed. There are many brands on the market, but I prefer one that can be wiped on and off with no rinsing involved. Simply rub on in a circular motion and wipe off with a clean rag taking care not to get any on the rest of your floor, as this will dull the surface.
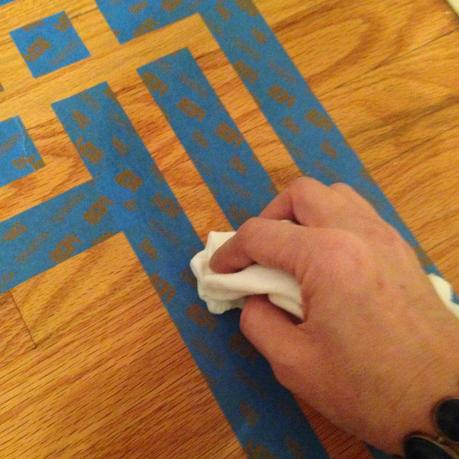
Once the area is dry you are ready to paint!
13) You can use any good quality paint that will withstand high traffic. If you have the option of using a paint specifically designed for the floor, even better. The color is completely up to you. I had my paint custom tinted at True Value to a deep chocolate brown to match the stain my client was using on her floors.
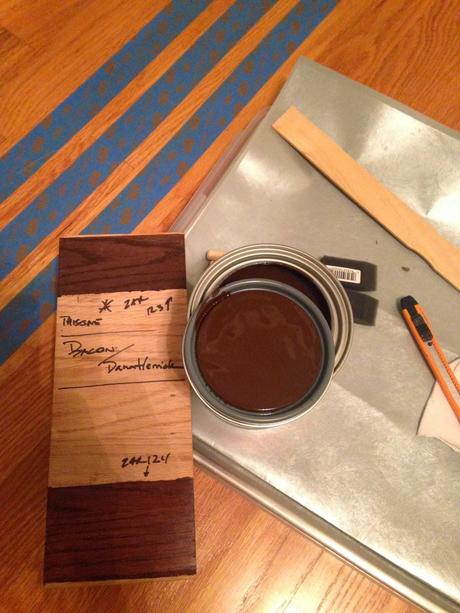
Using a foam brush apply one thin coat, brushing in the direction of the grain to make sure it penetrates. Once the first coat is dry, apply a second coat. Follow the dry times on your paint can.
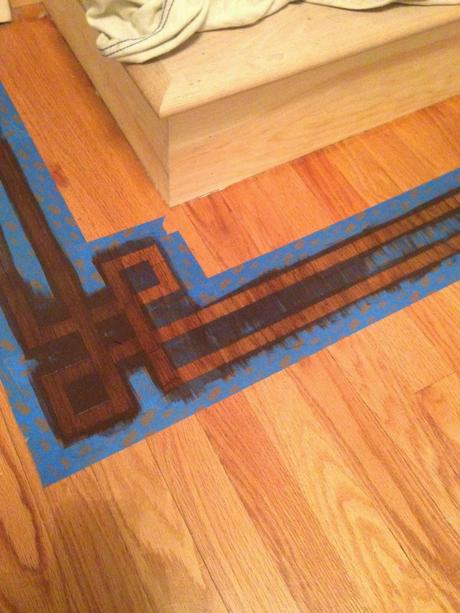
14) When both coats are fully dried apply one to two coats of polyurethane in a finish matching what you already have on your floors. (In this case we used a satin finish.) This will fully protect your hard work and give it a longer life.
You can now pull the tape and admire your work.
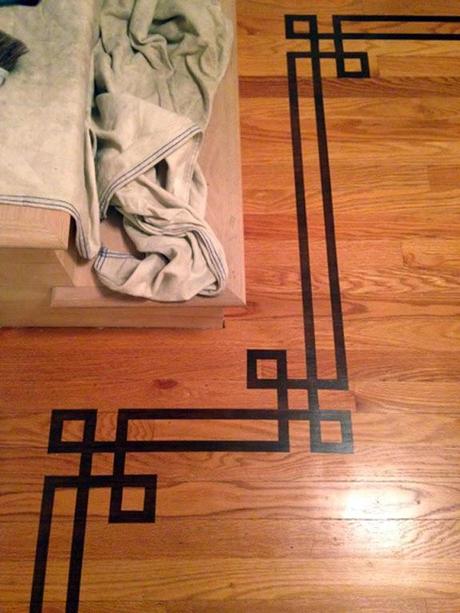
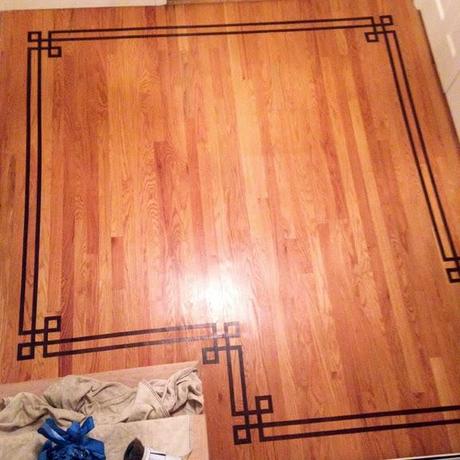
One last tip…when pulling your tape, pull slowly at a 45 degree or less angle to your floor AWAY from your new paint. This will prevent you from lifting any new paint up- a common mistake.
(My client's stairs are being stained chocolate brown shortly, so I will update this post with new "completed" space photos very soon!)
I was one of the bloggers selected by True Value to work on the DIY Squad. I have been compensated for my time commitment to the program as well as writing about my experience. I have also been compensated for the materials needed for my DIY project. However, my opinions are entirely my own and I have not been paid to publish positive comments.

