Are you looking for the EasyWP review or need to start a WordPress blog using EasyWP hosting? Keep reading this article.
Choosing a managed WordPress hosting is essential when you need a dedicated and robust environment. And shared hosting services can’t give you that. In that case, managed WordPress hosting companies are your best option.
This article will show you the complete EasyWP review and how to set it up for the best performance.
EasyWP Review
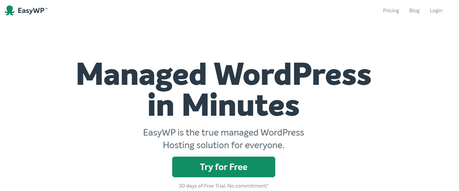
EasyWP hosting is one of the premium, affordable managed WordPress hosting companies in the market. If you search for the term Managed WordPress hosting on the internet, you will see several results with some well-known hosting providers. When you are on a tight budget and can’t spend $60/ month for hosting, those hosting companies will not help you.
Here, EasyWP comes with affordable hosting plans for everyone. On top of that, they have the best features for optimizing a WordPress website for performance.
You can check out the pricing plans here.
EasyWP
Namecheap's EasyWP is undoubtedly one of the best managed WordPress hosting solution considering its speed and performance. Not to forget, it is the most affordable managed WordPress hosting available out here.
Product SKU: null
Product Brand: Namecheap
Product Currency: USD
Product Price: 3.88
Price Valid Until: 2021-12-31
Product In-Stock: InStock
BlogHeist Rating:5
EasyWP Features
Now, let’s see some of the unique features of EasyWP.
- Single Dashboard
- Blazing Fast
- Affordable
- Backup Options
- Maintenance Mode
- Free SSL
- Free Sub Domain
- SFTP Access
- Database Access
- Free CDN
Etc.
Similar Read: Best Free and Almost Free Hosting Companies For Non-Profits
What’s In For BlogHeist Users?
If you want to start a WordPress blog with some benefits, we have got you covered. For BlogHeist users, the EasyWP team will give a one-month free trial without spending a single penny. If you want to test their environment for performance, security, and scalability, you can utilize these trial periods. We will show you how you can claim the EasyWP deal.
How To Set Up EasyWP?
Now, let’s see how we can claim a one-month EasyWP trial and start a WordPress blog instantly
1) Login to Your Namecheap Account
The first thing you need to do is, go to this link and click on the Try For Free button.
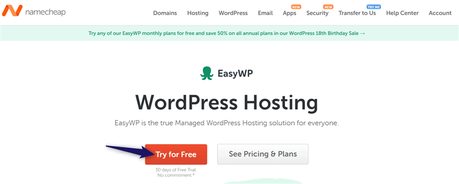
If you want to see the pricing and plans, you can click on the second button. Well, once you have clicked on the Try for Free button, you will be redirected to the EasyWP dashboard.
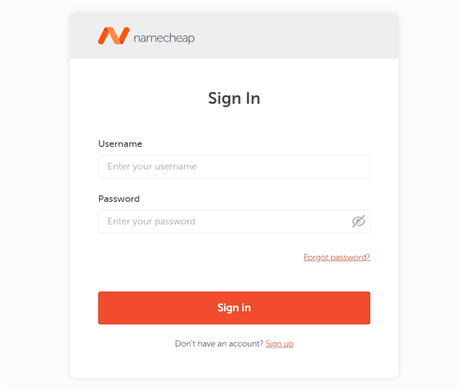
You do not need to create an additional account on the platform. By using your Namecheap credentials, you can log in to the site. If you are new to this platform, click on the sign-up button and create an account.
In this case, I have already got an account with Namecheap. So, I will use the same credentials for logging in to the EasyWP platform.
After validating your user credentials, you will be redirected to the account dashboard.

2) Create a New Website
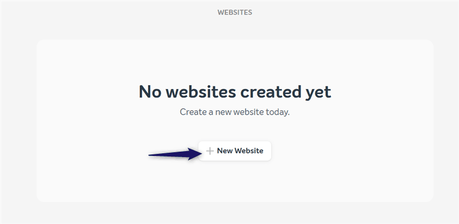
So far, we do not have any websites. Click on the + New Website button to create a new WordPress website.
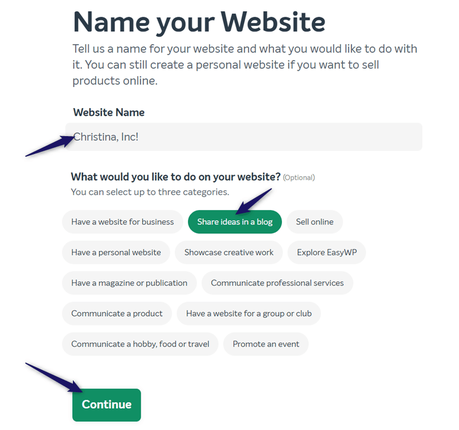
In the next step, you need to name your website. It can be anything and can change later. Once you have done that, you need to select the purpose of your website. That’s totally optional.
3) Choose Your EasyWP Plan
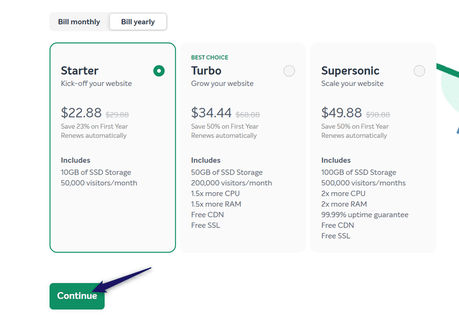
In the next step, you need to choose a plan.
Inside EasyWP, you will see two pricing models.
- Monthly billing
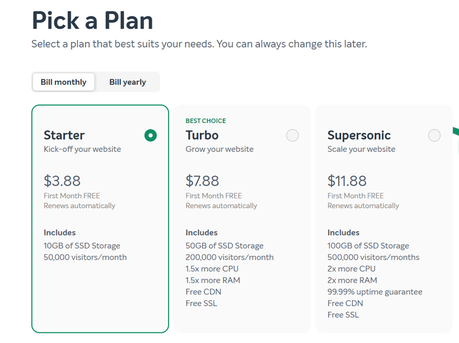
- Yearly billing
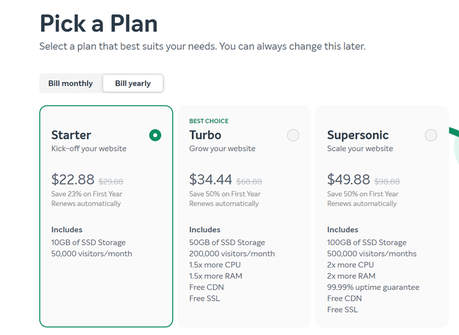
If you need to save some extra money, the yearly plan is the best choice. Higher plans will give you more CPU, RAM, and features. On the other hand, if you are just starting out, the basic plan is good enough.
4) Choose a Domain Name
Now, choose a domain name for your website. As we mentioned earlier, EasyWP comes with custom sub-domain names. You can use it for a while if you like.
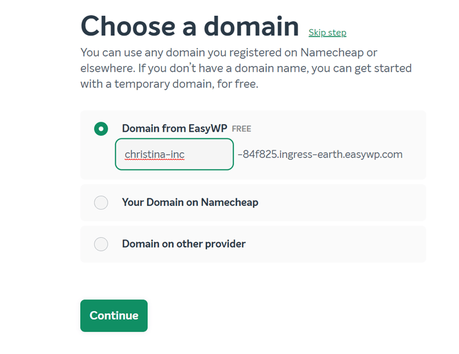
If you have a domain name registered with Namecheap, choose the second option. Plus, if you have selected any other registrar, choose the third option and mention the domain name. In this case, I am good with the free domain that EasyWP generated. So, click on continue and move to the next step.
5) Complete Your Purchase
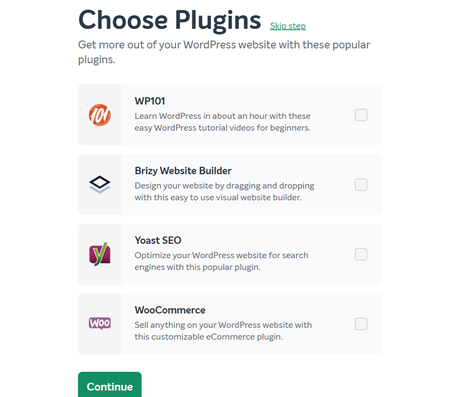
In the next step, you can choose several plugins to install. This is totally optional. If you are starting a WooCommerce website, select the WooCommerce plugin. On the other hand, you can also skip this step, install those plugins later.
At last, you can review your cart, complete the purchase.
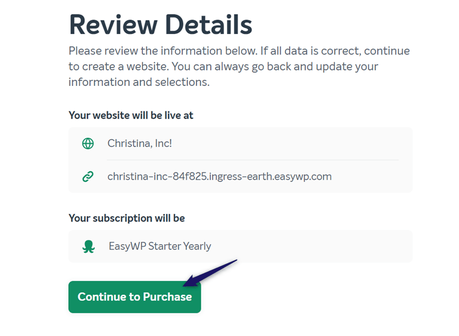
You can complete the purchase from the next page.
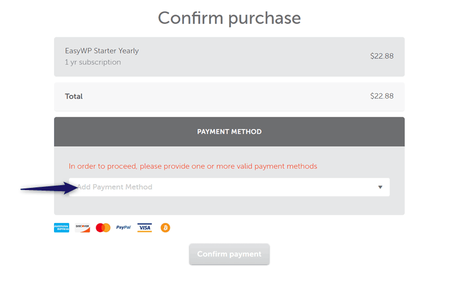
You can complete the website creation by validating a payment gateway. As of today, Namecheap supports payment methods like
- Credit Card
- PayPal Account
- Account Top Up
Once you have selected a payment method, move forward, complete the purchase.
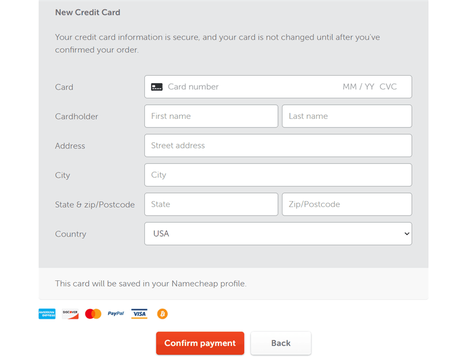
This way, you can validate the order. Here, we have validated the offer using a Credit Card. Once you have completed the payment, you will be redirected to the EasyWP dashboard.
Inside the dashboard, you will see four sections.
- Overview
- Backups
- Files and Database
- Integration
We will check them below.
6) EasyWP Dashboard Overview
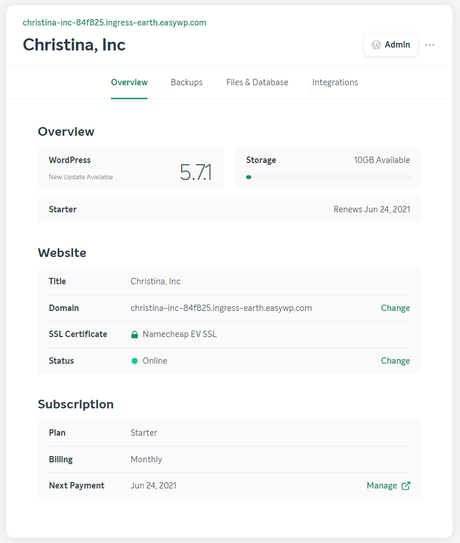
The overview section contains everything you need to know about your website. The department will show you:
- Domain name
- Site name
- WordPress version
- Storage consumed
- SSL certificate
- Status
- Plan
- Billing
- Next payment date
Etc.
You can also manage your domain name, SSL certificate, and payment option from there.
7) EasyWP Backups
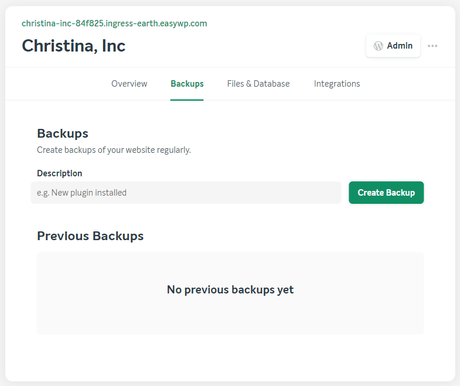
Without using additional backup plugins, we can generate in-house backups. Inside your EasyWP dashboard, go to the backups section. From there, you can manually create website backups. On top of that, you can also enter a description for your backup for easy understanding.
All the created backups will be displayed inside the section. You can manage the backups from there.
8) EasyWP Files and Database
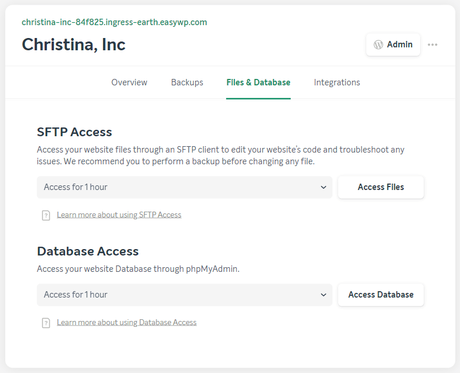
If you need to access your website’s files, you can use an FTP client. You can choose the duration and click on Access Files. You can also access the website’s database through phpMyAdmin. Select time and click on Access Database.
9) EasyWP Integrations
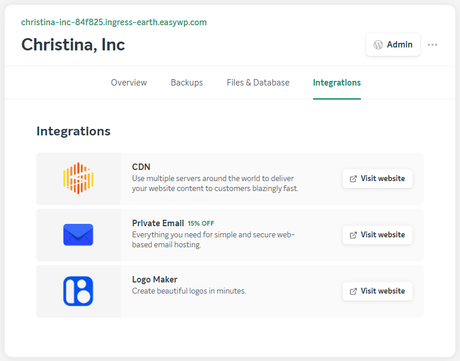
From the integration section, you can choose the add-ons you need inside your website. For making your website more powerful, these add-ons are essential.
You can click on the Visit Website buttons to check the add-ons.
10) Access Your WordPress Dashboard
For accessing your WordPress admin area, you can click on the Admin button. Soon, you will be redirected to the wp-admin section. From there, you can create posts, pages, add new media files, etc.
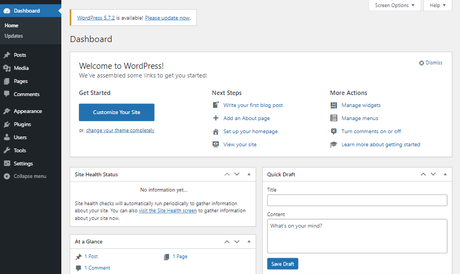
This is how you can use EasyWP for hosting a managed WordPress site.
Performance Test
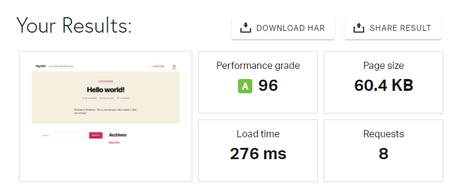
We ran through some tests to check the performance of the server and here are the results.
GTMetrix:

Pingdom Page Speed Test:
Pagespeed Insights:
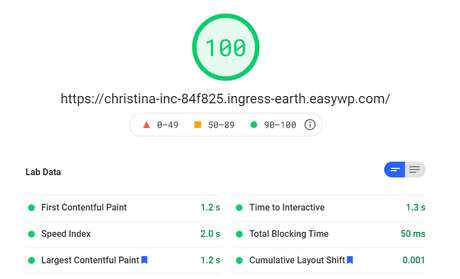
Given the speed and performance of the server, EasyWP is undoubtedly one of the best performing Managed WordPress Hosting solution for your WordPress site.
Get Started With EasyWP
You can get affordable managed WordPress hosting from below.
Buy EasyWP
$This is an affiliate link
We hope you have found this article helpful and learned how to start a blog using EasyWP hosting. If you did, please consider sharing this post with your friends and fellow bloggers on social media. You can read our blog for more tutorials and guides.
Related Articles You Might Like:
- Namecheap Review: The Best Affordable Premium Web Hosting Company
- Namecheap Coupon Code: Claim Namecheap Coupon For a Better Price
- How To Install WordPress On Namecheap Hosting Platform?
- Best and Almost Free Web Hosting For Non-Profit Organizations
- How To Purchase Namecheap Hosting Package (Step-By-Step)
Did you find the article useful?
Then pin me to your Pinterest Board, so that more people will find me
(Remember: The more you give to the Universe, the more you will get from the Universe)
So, Pin me