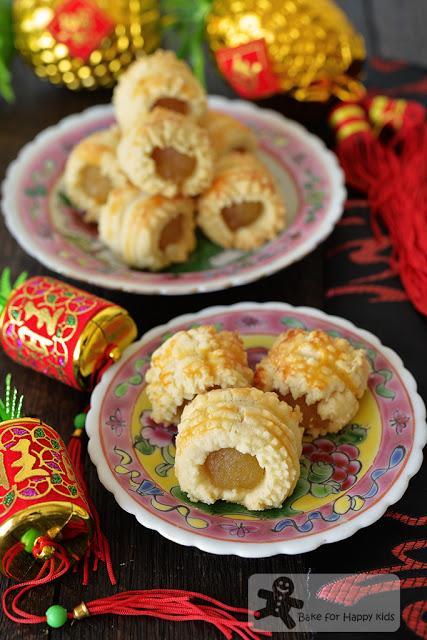
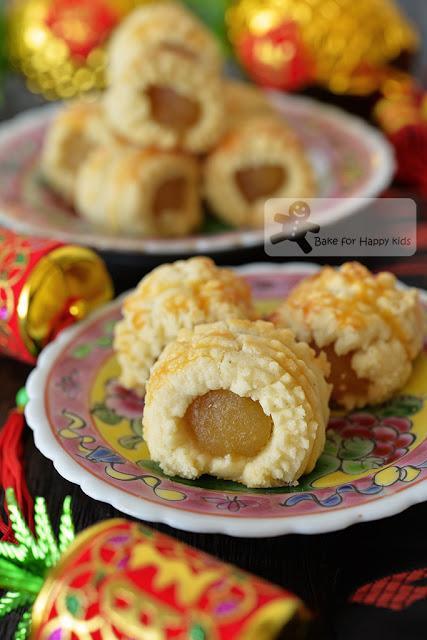
OMG... When the first of these nastar pineapple tarts was disintegrating slowly in my mouth, I knew instantly that I found the ONE!!! LOL!!!
After many years of searching for the best pineapple tarts recipe at here (2011), here (2012), here (2012), here (2013), here (2014), here (2015) and here (2016) I have finally reached the stage of finding the pineapple tarts recipes that I want!
This is it! Is this the best pineapple tarts recipe? YES YES YES! This is my BEST melt-in-the-mouth nastar pineapple recipe! To me, these nastar tarts are way more melty and crumbly than those that I have baked at here and I'm pretty sure that you can't go any more melty than these because these pineapple tarts are ultimately melty!!!
Best of all, the dough made from this recipe is easy to handle. It won't stick to your hands and so you won't need any extra flour for dusting. It doesn't require any resting or chilling. And its texture and softness is just right to press through any nastar press without giving your thumbs any pain or redness from pressing. The dough before and after baking is sturdy and not crumbly at all to handle and has minimal breakage when handling and rolling it. I would say... This recipe is simply PERFECT!!!

My Best Melt in the mouth Nastar Pineapple Tarts!
Where and how did I get this recipe? Ahem... I'm proud to say that this recipe originated from ME!
After many years of researching and testing many pineapple tarts recipes, I have managed to derive a few different best recipes that make the pineapple tarts that we adore the most and they are mostly the melt in the mouth types. And this recipe makes the best melt-in-the-mouth Nastar pineapple tarts.

Must try! Must try! ... if you like nastar pineapple tarts that melt in your mouth!
Why best melt-in-the-mouth nastar pineapple tarts???
Can we use this recipe to bake open faced or enclosed pineapple tarts?

Yes!!! You can! but but but ...
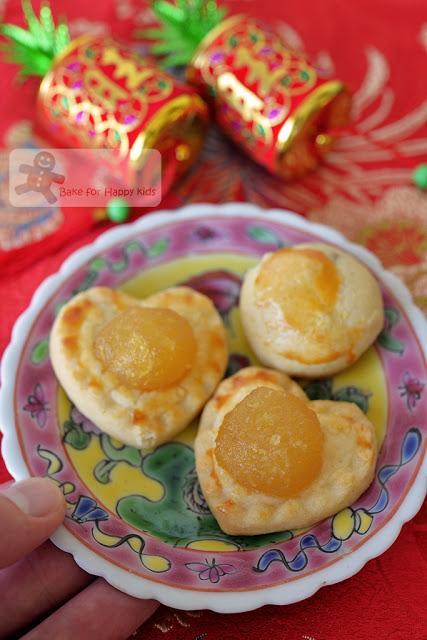
Despite the fact that this recipe can be used to make open faced and enclosed pineapple tarts, I don't really recommend it for making these types of pineapple tarts because the unbaked dough can be a little too soft for handling and rolling with a rolling pin and the baked pastry especially in its thinner form can be a little too crumbly and not sturdy enough for handling and stacking.
If you are after an easy and sturdy melt-in-your-mouth open faced pineapple tart recipe, you can find my recipe in the book, Bake and Celebrate published by Marshall Cavendish and the book is selling now in major book shops in Singapore and Malaysia.
What is best for me doesn't mean that it is the best for you??? I know. After reading my pineapple tart blog posts at here (2011), here (2012), here (2012), here (2013), here (2014), here (2015) and here (2016), many readers have asked me for recipes that makes pineapple tarts that are not melt-in-the-mouth, not buttery, must be crispy or crunchy and etc etc etc??? Hmmm... I have said all that I know in all of my pineapple tart posts and hope that you do realised that I have tried my best to illustrate all that I know. Hence, if you want to find your ideal pineapple tart recipe, please read my pineapple tart posts thoroughly, try baking the recipes and see if you like the pineapple tarts. And I sincerely hope that you will find your one too!
In a nutshell, please use this recipe to make nastar pineapple tarts only! And bake these ONLY if you like melt-in-the-mouth pastry! You have believe me that these pineapple tarts are so ultimately GOOD!
Here's a one-minute video showing you how I baked these ultimate nastar pineapple tarts.
Here's my best melt-in-the-mouth nastar pineapple tart recipe.
Please use the exact weight and make sure that all ingredients are at room temperature.
Makes about 60 open faced tarts or 40 nastar tarts
For the pastry:
200g unsalted butter, well soften at room temperature
30g icing sugar, sifted
25g egg yolk
1/2 tsp vanilla paste or extract - please do not use vanilla essence!
250g all-purpose / plain flour with 10% protein* - please check protein content
50g cornflour
1/4 tsp baking powder
1/4 tsp salt
*Important - Please do not use cake flour or all-purpose / plain flour that contains less than 9.5% protein.
For the egg wash:
1 egg yolk
2 tsp milk
store bought or homemade pineapple jam (see below) to fill the tarts
For the pastry:
Using a wooden spoon or an electric mixer with paddle attachment, beat butter and icing sugar at medium speed until creamy for about 1 min. Do not over-beat. While beating, beat in egg yolk and vanilla until all are well-incorporated.Combine flour, cornflour, baking powder and salt. Sift flour mixture into the butter mixture. Use a spoon or spatula to mix to form a soft pliable dough.
Line baking trays with baking papers. Preheat oven at 350ºF or 180ºC.
Use a nastar presss (see video) to press dough into long strips. Roll the dough strip around each rolled tablespoonful of pineapple jam with its ruffled side facing outwards. Cut any excess dough.
Arrange the shaped tarts on the prepared tray. Use a fine brush to brush the top and the side of the pastry with egg wash. Bake at for 15-18 mins or until golden brown - Please note that the baking time and temperature may vary a little if you are making your pineapple tarts in different sizes. My nastar tarts are all baked at 180ºC for 15 mins.
Allow all tarts to cool slightly on the baking trays for about 10 mins and transfer them onto a wire rack to cool completely.
Store in an airtight container at room temperature for up to 4 weeks depending on the types of pineapple jam that you used.
Warning: These melt-in-your-mouth tarts are fragile. So please handle them with care. If you are stacking them in a jar, please place pieces of baking or parchment paper in between every layer of tarts.
Here's my homemade pineapple jam recipe plus a video showing how I cooked the jam.
To make your own homemade pineapple jam to fill about 100 pineapple tarts:
2 pineapples, about 1.3-1.6 kg each before peeling and all are about 1.5 kg after peeling
250g caster sugar*
2-3 pandan leaves, briefly shredded and knotted
*IMPORTANT TIP: Depending on the sizes and sweetness of the pineapples that you used, you can adjust the amount of added sugar accordingly. However, please be aware that this recipe has suggested the amount of sugar to ensure the pineapple jam will preserve and store well at room temperature for up to 2 weeks. If you prefer to reduce the amount of added sugar, you will have to either store your jam and tarts in the fridge for up to 2 weeks or consume all within 1-2 weeks if you store the tarts at room temperature. Please be aware that chilling will affect the texture of the pastry too.
Peel the pineapples and cut them into chunks. Do not discard the core as it contains lots of fiber.
Using a blender or processor, process pineapple chunks into purée in small batches. Processing the pineapples in small batches helps by avoiding the addition of water to process the pineapples. Transfer pineapple purée into large cooking pan with wide cooking surface.
Using medium low heat, cook pineapple purée and pandan leaves with occasional stirring until thicken. Beware of the hot splattering pineapple juice while cooking the jam.
When the pineapple purée lose more than 80% of its liquid and becoming like paste, stir in sugar and the jam will look watery again. Reduce cooking heat, and cook until the jam look like a paste and translucent-looking.
IMPORTANT TIP: Pineapple jam can become firmer when it is cooled. Besides, the baking of open-faced pineapple tarts can dry up the jam slightly. Hence, it is better to under-cook the jam rather than over-cooking it. If the jam is still too wet after cooling, you can cook the jam again to reduce the moisture further. If it's too dry, diluting the jam with water will ruin its texture.
Store jam in an airtight container in a fridge for up to 2 weeks or in a freezer for up to 12 months.
Happy Baking and nom nom nom!Please support me and like me at Facebook...

