The whirlwind of the recent hurricane Swiss roll baking trend was so strong that I see that many baking enthusiasts got overwhelmed with it. Not surprisingly, I WAS one of them. Hmmm...
Like many hurricane Swiss roll bakers, I was chasing after perfection...
Perfect hurricane Swiss rolls that have 1) MANY "hurricane" streaky motifs 2) perfect round Swiss roll shape but the round ones are most often filled with A LOT of CREAM!!! 3) creative motifs or interesting delicious flavours such as rainbow-coloured hurricane motifs, charcoal hurricane Swiss roll or etc.
After my first Cocoa Hurricane Swiss Roll at here, I can't believe that I had to try baking more than once in order to create a better Hurricane Swiss Roll than my first one and this is the best Hurricane Swiss roll that I have baked so far...

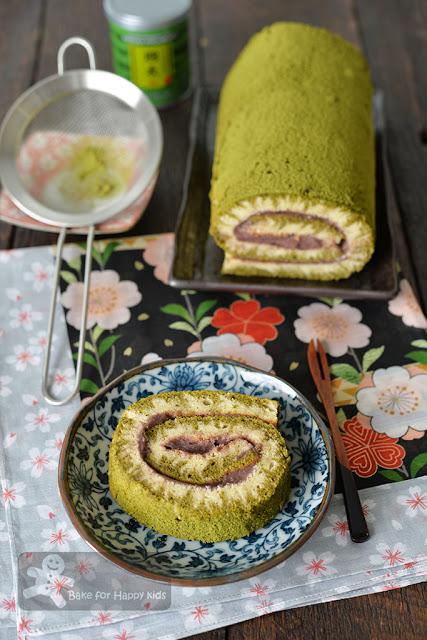
My Cottony Soft Green Tea Red Bean Hurricane Swiss Roll
Why can't I bake my hurricane Swiss rolls any better? What is my problem? LOL!
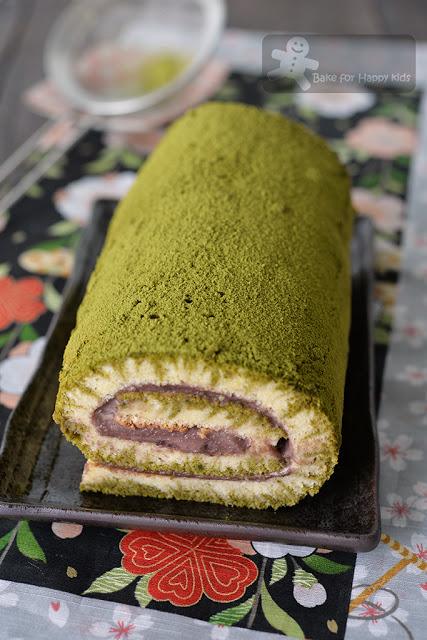
Honestly speaking, this green tea Swiss roll is cottony soft and delicious and has more hurricane streaks than my previous ones but it is not perfectly round! Plus, the health-conscious me is NOT making them any rounder with A LOT of CREAM!!! Hmmm...
In order to make the hurricane cake base prettier with more hurricane streaks, I had to make the top cake batter MORE runny than the bottom batter so that steaks from the top layer can flow in-between the bottom layer. Doing this meant that I had to bake the wetter top batter a little longer so that the cake skin would be dry enough for me to handle. However, baking the thick cake longer also meant that the non-wetter bottom layer would be drier than usual and would not flexible enough for rolling.
This is why I lost some part of cake skin while rolling it and had to dust my cake with tiny amount of green tea powder to cover the flaws! I asked myself, are these additional hurricane cake baking steps really necessary?Besides, rolling thick cake bases would require a LOT more CREAM filling than usual. And this is why I see that most Hurricane Swiss rolls with very pretty hurricane motifs are usually flat with oblong shapes. Or the perfect round ones are actually filled with A LOT of CREAM or other fillings!!!
Like I said before... What if I don't like my pretty Hurricane Swiss roll to be in oblong shapes or filled with excessive amount of cream or other fillings? Well, this is exactly my problem!!!
To overcome this problem, I see that some bakers filled the middle of their Hurricane Swiss rolls with round fruits or other non-cream fillings such as banana, strawberries, small oranges, cooked beans and even a thick strip of the cake! These are great ideas but I reckon that chasing these perfections wasn't really necessary because all I want to bake is just a delicious Swiss roll... Simple and it doesn't have to be complicated!
So to speak, I'm done with the idea of baking hurricane Swiss rolls! Yup... No more Hurricane Swiss rolls for me! LOL!

I can't bake Hurricane Swiss rolls any better than this.
And I have decided... This will be my LAST Hurricane Swiss roll!

If you are not fussy with its oblong shape and patchy cake skin...
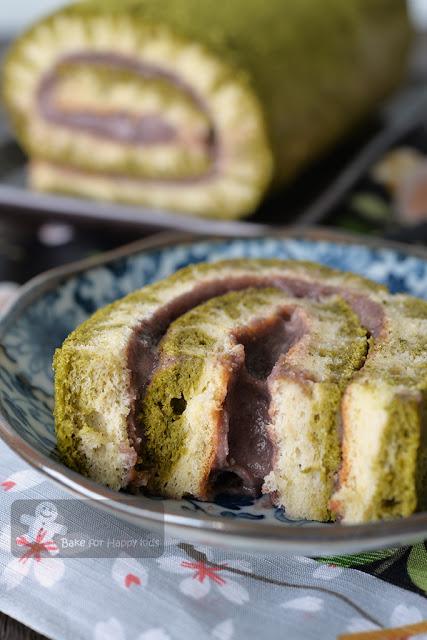
I must say that this Hurricane Swiss roll is pretty nice and yummy!
... with its cottony soft texture and smooth delish red bean cream filling!
Yes... I will bake matcha (green tea) red bean chiffon Swiss roll again but without the Hurricane motifs!
Nevertheless, here's a video showing how I baked my last Hurricane Swiss roll.
I must admit I did have lots of fun baking hurricane Swiss rolls. It was rewarding especially when I saw slices of hurricane-like streaky motifs but somehow, I saw the light...Like my baking stories and recipes? To get the latest updates, you can follow me at either my Facebook at here or here or my Instagram @zoebakeforhappykids
Too much baking and cooking? Yes! It's time for me to take a break. Yay!!!
For the next 2 weeks, we are going to Singapore for a short break. If you wish to "come along" with us to see what we will eat in Singapore, please follow me at my Instagram @zoebakeforhappykids See ya!
And here's the recipe if you are interested.IMPORTANT: Please use the exact weight and make sure that all cake base ingredients are at room temperature.
Make one Swiss roll (unrolled size: 35 x 25 cm / 10 x 14 inches)
For the plain batter:
A140g egg whites - about 4 large but please use exact weight.
60g caster sugar
B
60g egg yolks - about 4 large but please use exact weight.50g milk
50g vegetable oil, preferably something neutral tasting
70g cake flour
1/4 tsp baking powder
a pinch of salt
10g cornflour
For the green tea batter:
C70g egg whites - about 2 large but please use exact weight.
30g caster sugar
D
30g egg yolks - about 2 large but please use exact weight.40g milk
25g vegetable oil, preferably something neutral tasting
a few drops of natural green colouring if desired
30g cake flour
1/4 tsp baking powder
a pinch of salt
5g green tea powder
For the filling:
60ml (1/4 cup)* cold whipping cream with 35% fat150g sweetened red bean paste to fill, preferably the Koshian (smooth) type, store bought or homemade (recipe at here and here)
Extra green tea powder to dust, if desired
*If this amount of whipping cream is too little to whip, you can whip a minimal amount first (ie. about 100ml) and then use the required amount subsequently.
Preheat oven to 180°C / 350°F. Line baking tray with baking paper.
For A and C:
Using an electric mixer with a whisk attachment, beat egg whites in lowest speed for at least 10 mins to stabilise the egg white mixture.Hint: You can beat 210g egg whites (from A and C) all in one bowl (adding 90g subsequently) and divide the stiff egg white mixture by weight into 2:1 (2 parts for A and 1 part for C). For my bake, the total meringue (mixture A and C) weight is 280g and so 187g belongs to A and 93g belongs to C.
While beating, proceed to B and D.
For B and D:
In a large mixing bowl, combine egg yolks, milk and oil plus green colouring (optional, for green tea batter only) and use a hand whisk to mix until combined. Sift cake flour, baking powder, salt and cornflour (for plain batter) or green tea powder (for green tea batter) into egg yolk mixture and use a hand whisk to mix until all are well-incorporated. Set aside.Back to A and C:
Increase beating speed to the next higher speed. While beating, add sugar gradually. Increase beating speed to the next higher speed and continue to beat until stiff peaks form. The egg white mixture should be very smooth with tiny bubbles. Do not over-beat the mixture or use too high speed to beat the mixture.Combine A+B and C+D:
Using a hand whisk or a spatula, gently fold in the egg whites to the egg yolks mixture in 3-4 batches. It is ok to mix the 1st batch of egg white more vigorously into the egg yolk mixture but the subsequent portions must be folded in very gently. Make sure that most of the white is not visible after folding.Pour plain batter into the prepared baking tray and use a spatula to spread the batter evenly.
Spoon green tea batter onto plain batter very gently. Use a spatula to spread the green tea batter evenly and very gently.
To create the hurricane / typhoon pattern in the cake:
Start from one corner of the pan, use a chopstick to draw multiple (about 15-25) lines from left to right, from bottom to up, up-and-down along the long side of the pan, leaving about 0.5 to 1 cm in-between two lines.Then, start from one corner of the pan, use the same chopstick to draw multiple (about 25-35) lines from left to right, up-and-down along the short side of the pan, leaving about 0.5 to 1 cm in-between two lines.
Bake for 18-20 mins or until the cake is well-risen and fully cooked. Please note that under-baking the cake will make the cake skin not dry and firm enough to handle but over-baking the cake will make the cake too dry and not flexible to roll. For me, I prefer to lose the cake skin rather than yielding a cracked Swiss roll and so I baked mine for 18 mins.
When done, remove cake (with its baking paper) from the tray immediately and transfer it onto a wire rack to cool. After about 5 mins of cooling, flip the cake onto a clean baking paper and remove the used baking paper at its bottom. Allow the cake to cool completely.
To assemble:
Using an electric mixer or a cream whipper, whip cream until stiff peaks form. Then, stir whipped cream into red bean paste in 3-4 batches and do it gently and it is ok if the filling is not thoroughly mixed or rather streaky.Place cake with the skin side down on a clean baking paper. Use a knife to trim off about 0.5 cm from both the shorter sides of the cake.
Spread thin layer of red bean filling evenly on the cake. Roll the cake from the shorter end (that is closer to you) along the longer side to form a Swiss roll.
Wrap in clean baking paper and then in cling wrap. Allow cake to firm up into its shape for at least 1 hr or overnight in the fridge.
Trim off both sides of the cake. Slice and serve. Enjoy!!!
Happy BakingPlease support me and like me at Facebook...

