Unfortunately, we have not!!! Why?
My son and I love cheesy breads and we have came across those yummy cheesy earthquake breads at BreadTalk bakeries when we were in Singapore. However, whenever we were back in Singapore for our holidays, we had really limited stomach space to indulge!
You know... we can only eat this much and can't eat all!!! Then, I remember my blogging friend, Diana has a good BreadTalk cheesy earthquake bread recipe in her blog at here and told my son... We will bake this bread when we are back in Melbourne and so we did!
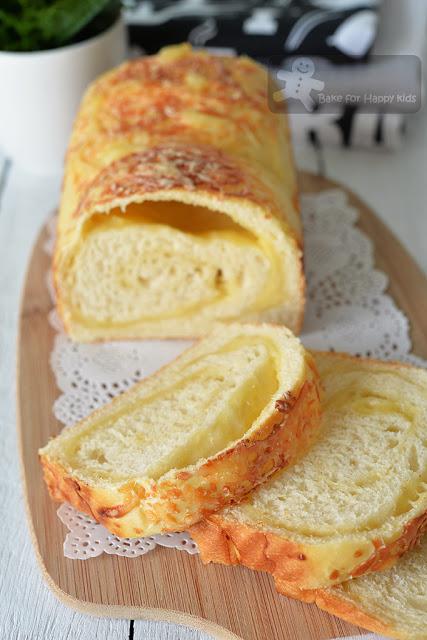
Like BreadTalk Cheesy Earthquake Bread
Despite the fact that we have not taste the real BreadTalk cheesy earthquake bread in Sinagpore, we have NO regrets at all that we have to bake this fabulous bread at our home in Melbourne and I will tell you why...
As the curious me was searching for "fluffy white bread recipe" at Google, I saw The Fluffiest White Bread in the World at Saveur. As I was looking at the recipe closely, I realised that this fluffiest white bread recipe is actually quite similar to the basic white bread base at Diana's Cheesy Earthquake Bread but has two rather long proofing steps instead of one and so I incorporated the slight differences in The Fluffiest White Bread in the World at Saveur to bake our version of Cheesy Earthquake Bread and it is really yummy to extent of being extra extra extra awesome!!!
Extra awesome because we have incorporated Jarlsberg cheese instead of any common grated cheeses. And we all know that the money-making BreadTalk bakeries won't use non-cost-effective exquisite cheese to bake their breads! Right?
Why Jarlsberg? It is a mild cow's-milk cheese with large regular holes. We love Jarlsberg because of its semi-soft creamy stretchy texture and nutty flavours! And of course, you can incorporate any kind of semi-hard or hard cheese that you like into your cheesy bread and my son and I were thinking of incorporating the extra flavoursome Swiss Gruyère for our next bake. ke ke!
Another thing... Instead of shaping the loaf with three portions of dough just like what Diana did, I have shaped my loaf into one long log like Sandra did at Bake Life and I yielded a rather short loaf!!! Why? I have actually used the same shaping method to bake another loaf with more bread dough (see the next photo) and it didn't rise any much taller. Clearly, this one-long-log shaping method is NOT the method to use if you want to bake a tall well risen bread but it is the method to use if you are after a pretty cheesy swirl inside your cheesy bread.
Regardless of the height of the bread, I must say that I won't change this fabulous recipe any further because I like it!!! And I won't mind being a bread traditionalist using this recipe with two proofing steps!
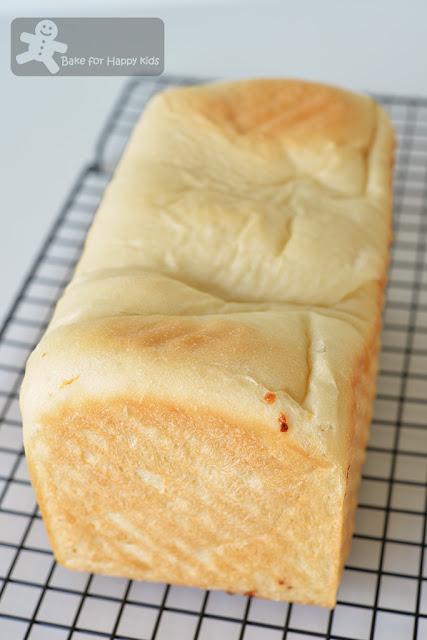
This is the another loaf that I have baked with more bread dough.
It is not taller. With less proportion of cheese, it didn't taste any better!!! Hmmm...
So. Let's stick to this recipe...
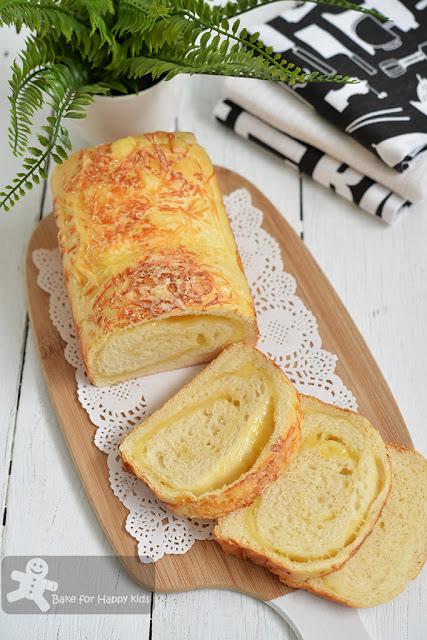
I named this recipe... Like BreadTalk Soft White Cheesy Earthquake Bread Recipe One.
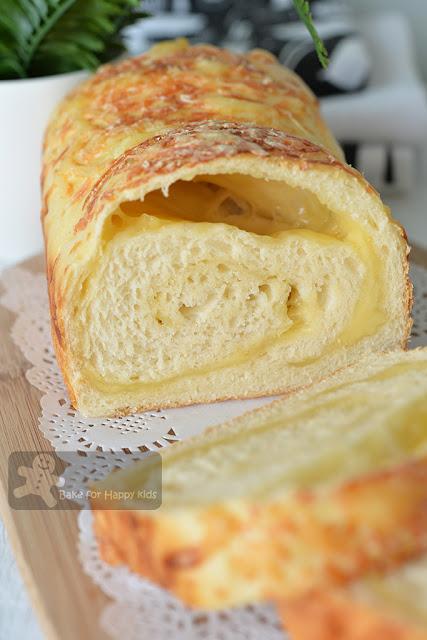
The bread is not tall but REAL cheesy, moist, soft and delicious!
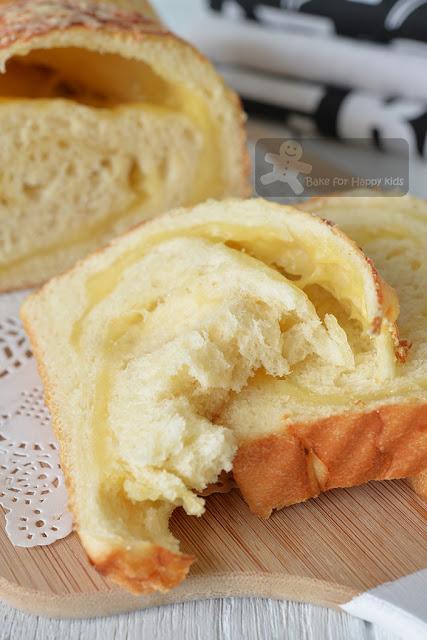
Indeed... I must say that it is one of softest moistest white bread that I have ever tasted.
Extra tasty, chewy, stretchy and cheesy with generous swirls of Jarlsberg cheese. SO YUM!!!
"Mum, can you bake this bread for my school lunch too?"
"Yes, Sweetie. I will." I'm happy to see that my son loves this bread. Whether it is like BreadTalk or not, I would still HIGHLY RECOMMEND this recipe all because this bread is simply extra extra extra awesome and very delicious. Try baking it and you will see :)
Here's a video showing how I baked this awesome cheesy bread with two proofing steps.
I love this recipe but but but... I must admit that this short cheesy bread does not look like the real BreadTalk cheesy earthquake bread enough. The BreadTalk one that I have seen is a square and tall loaf with a lighter and fluffier texture.
I will try to bake a more BreadTalk-like cheesy earthquake bread with a completely different white bread recipe... So stay tune if you are interested. Meanwhile, you can bake this recipe first because this bread is truly very very very cheesy!!! Very very very yummy!!! LOL!
To stay tune, you can follow me at either my Facebook at here or here or my Instagram @zoebakeforhappykids
Here's the recipe incorporated with the recipes from Domestic Goddess Wannabe, Bake Life and Saveur
Make one 10 x 20 x 10cm loaf
For the bread dough:
120g (1/2 cup) pasteurised fresh milk, not UHT, lukewarm* at about 30°C / 85°F30g (2 tbsp) water, lukewarm at about 30°C / 85°F
40g whole egg, without shell, about 1 small egg but please use the exact weight.
260g bread flour
40g (5 tbsp) caster sugar
4g salt
50g unsalted butter, softened to room temperature
3/4 tsp instant dry yeast
*The milk in this recipe doesn't require scalding but need to be lukewarm or at least at room temperature for efficient proving.
For the filling:
100g grated cheese or any hard or semi-soft cheeses that you like - I'm using Jarlsberg.For the topping:
egg wash, 1 egg yolk + 2 tbsp milk, for brushingabout 20-30g grated cheese or any hard cheeses that you like, to sprinkle - I'm using Jarlsberg.
oil or oil spray to brush or spray for greasing the loaf pan
For the bread dough:
Place all the bread dough ingredients in a breadmaker according to the order of the above list. Use the dough setting to knead the dough until it is smooth and elastic and allow the dough to prove for 1 hr or until doubled in size.If breadmaker is not available, kneading by electric mixer with a dough hook is possible. As dough is sticky to knead, I don't recommend kneading by hand. Using an electric mixer with low mixing speed, mix all dough ingredients except the butter to form a dough first. Then, add butter and knead for about 30 mins or until the dough is smooth and elastic. Please note that dough will be sticky at the first 5-10 mins of kneading and need to be kneaded very well enough until the dough is smooth and elastic. Transfer dough into a large bowl and cover it with a cling wrap. Allow the dough to rise in a warm and humid place for about 1 hr or until doubled in size.
Grease loaf pan using oil or cooking oil spray.
To shape, transfer dough onto a lightly floured non-stick surface. Using your well floured hands, fold and lightly your dough into a smooth round dough. Using a lightly floured rolling pin, roll dough into a large round. Fold the flat round into a square envelope shape. Flip dough to have the folded side facing down and use a rolling pin to roll dough into a large rectangle. Flip dough again to the smooth side facing down. Roll further until dough forms a long rectangle shape (about 20 cm width x 30 cm length). Distribute 100g grated cheese evenly onto the dough, leaving a narrow border at the edges. Pick one shorter side of the dough and roll it up tightly into a Swiss roll and place it into the greased pan. Press the top of the dough lightly to form an even surface.
Allow the loaf to prove in a warm and humid for another 60-90 mins or until the dough looks puffy. Note: Due to the nature of this recipe and the use of unscalded milk, this will be a short loaf and the bread can only reach about half of the height of the loaf pan.
Brush the top of the bread with egg wash and sprinkle with the extra 20g grated cheese. Preheat oven at 170°C. Bake at 170°C for 25 mins or until thoroughly baked.
When the bread is removed from the oven, unmould the bread immediately. Transfer bread on a wire rack to cool until it is slightly warm.
Slice and serve. Best to consume within the same day of bake especially bread is slightly warm. This is what we always do... To reheat bread to its best comforting, fluffy, chewy, moist condition, microwave bread for a short 5-10 secs of high power or until they are warm enough for your consumption.
Happy BakingPlease support me and like me at Facebook...
