Whenever my son and I buy our favorite pork floss buns from Asian-style bakeries like BreadTop at Melbourne / Australia or BreakTalk at Singapore, we will take our time to choose the buns that have the most amount of floss topping!!! LOL!
Despite all our effort of choosing and picking, we still think that the bakeries are stingy giving us not enough floss topping and often complain to each other while we are enjoying our bread... LOL! *cheeky cheeky*
We can't help to be like these... Or maybe we are simply kiasu???
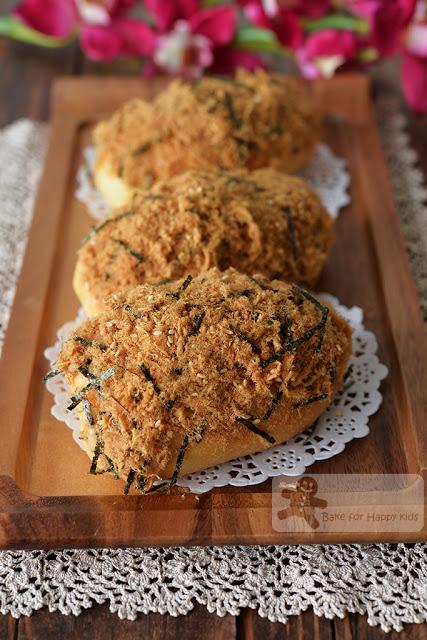
Let's be honest. Are you the same? Maybe not... but if you are a pork floss buns lover, will you reject soft "QQ" pork floss buns that are generously topped with pork floss topping?... Especially the ones like these???
"QQ" in Chinese term means chewy food with bouncy texture.

Like BreadTalk / BreadTop Pork Floss Bread Buns
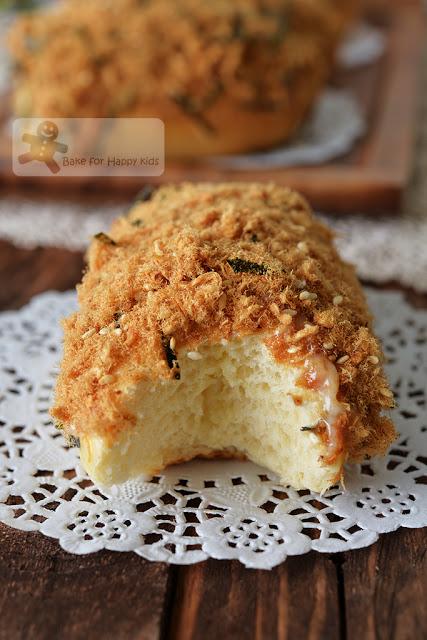
... even softer, fluffier and better than the ones selling in the shops!
Not bragging... but I think our homemade pork floss bread buns are awesome!!!
So good that I think that they are better than the store-bought ones *cheeky cheeky* because we won't complain that the pork floss toppings on our buns are not enough... LOL!!!
Due to the fact that our buns are freshly baked, all optimally and compactly packed with pork floss topping... Now tell me... Is there anything that we will complain about these breads??? LOL!!!

How can you reject freshly baked soft pork floss buns that are so generously topped like this???
I won't.
You can bake these awesome soft "QQ" pork floss buns too... It is really easy! Watch my one-minute video to see how I baked these bread buns.
Here's the recipe that is very adapted from here using the semi-cooked dough method.
Please make sure that the ingredients are in their exact weight or volume.
Make 12 medium buns
For the buns:
A120g bread flour with 12% protein
120g hot boiling water
B
100g pasteurised milk (not UHT), at room temperature*100g cream with 35% fat, at room temperature*
1 large egg, 50g without shell, roughly beaten, at room temperature*
380g bread flour with 12% protein
70g sugar
1/4 tsp salt
1 3/4 tsp instant dried yeast
50g butter, softened at room temperature
extra milk for brushing
For the floss topping:
1/3 cup mayonnaise, preferably Japanese kewpie mayonnaise2 tbsp condensed milk
1 tbsp light corn syrup
1 tbsp lemon juice
about 1 cup (~ 100g) or more pork or chicken or fish floss
2 tbsp roasted white sesame seeds
2-3 tbsp shredded seaweed
* does not require to be lukewarm or scalded but can't be cold!
To bake the buns:
Line two baking trays, each with one sheet of baking paper.For A:
Combine boiling water and flour in a medium heat-proof bowl. Using a spatula or your hand, mix until it forms a sticky gluey dough. Keep mixing and the dough will firm up when it is slightly cooled. Use a spatula to scrape all sticky dough to form one soft dough and it is ok if the surface of the dough is not smooth. Cover with cling wrap and set aside to rest and cool for about 15 mins at room temperature or until it is cool enough to touch.For B:
Add all ingredients from B and the cooled dough from A into the pan fitted in a breadmaker according to the order of the above list. Use the dough setting to knead the dough until it is smooth and elastic and allow the dough to prove for 1 hr.If breadmaker is not available, kneading by hand or an electric mixer with a hook attachment is possible. Combine flour, sugar, salt, yeast and the dough from A in a large mixing bowl or the mixing bowl of your electric mixer. Make a well in the flour mixture, add milk and cream to form a dough. Using your hands or the electric mixer with low speed, start kneading the dough. While kneading, add butter and keep kneading until it forms an elastic and smooth dough (at least 20 mins) and then allow the dough to prove for 1 hr or until doubled in size.
Divide the dough into 12 equal portions (about 80g each) and mold it round. Cover and allow the dough to rest for another 10 min.
To shape, use a rolling pin to roll each portion into a flat oval shape. Arrange the rolled dough lengthwise. Roll them up from bottom to top. After rolling up the dough, seal the seam and both ends. Arrange the shaped dough with the seam facing down in the prepared tray. Repeat this shaping step with the rest of the portions. Arrange the shaped dough onto the prepared with about 10-15 cm apart. Allow the bread to prove for 1 hr or until doubled in size. Note: If your shaped dough has an excessive flap after proving, you can roll it very gently to let the flap nicely tucked under it.
Brush the bread dough with milk and bake (one tray of bread at a time) at 180°C for 14 min or until the buns are thoroughly cooked.
Transfer buns immediately to cool onto a cooling rack.
To assemble:
Ideally, please assemble the exact number of buns that you will consume within the same day of bake as the buns won't taste as good as the freshly made ones on the next day.
Whisk to combine mayonnaise, condensed milk, corn syrup and lemon juice in a bowl.
In another bowl, combine pork or chicken or fish floss, sesame seeds and shredded seaweed.
Make a slit from the top in the middle of each bun. Spread thin layer of mayonnaise mixture in the slit and also evenly on entire top of each bun.
Dip the mayonnaise coated area of the buns into the pork or chicken or fish floss mixture and press the floss mixture onto the mayonnaise coated area as much as you can or desire. Serve and enjoy!
Store any uneaten plain bread buns in airtight container and in room temperature for up to 2 days. As these bread buns are made with relatively significant amount of fat from cream and butter, they are the softest to eat when they are slightly warm. To achieve that, it is best to warm them by wrapping them well in a foil and placing them in a hot oven for 2-3 mins just before serving.
Happy BakingPlease support me and like me at Facebook...

