Hi there!
Over the years I have done plenty of bread recipes, with the exception of bagels, I have made sure that all of the recipes were simple and easy so everyone could create their own bread.
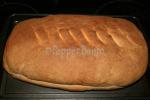
Today I have a bread that is a bit more of a challenge for you more seasoned bread buffs out there.
The dough, as with just about every bread is simple enough and requires the usual kneading technique but when it comes to shaping, well lets just say if you get it right your family could be quite impressed indeed.
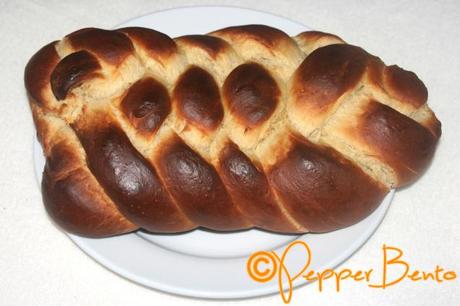
Now, I’m not saying I am one of the bread buffs this recipe was made for so do excuse the slight irregularity of mine, it was my first time after all.
Still, it looks quite impressive and once you master it you’re bound to put people in awe!
If you are used to braiding hair, which I certainly am with the length of my own, you will find the process pretty similar creating this, apart from it’s dough instead of hair which is why it is a litttttttle bit trickier.
This style of bread is called Challah Bread and is made by Jewish people to be eaten on Sabbath and holidays.
It is sweetened with sugar and eggs are added so it tastes like a cross between a cake and bread to me.
Use savoury or sweet additions and see what you think!
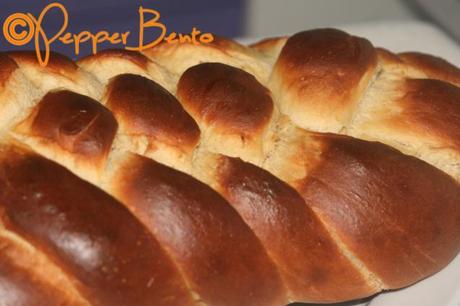
Challah Bread
Makes 1 loaf
Ingredients
2 teaspoons instant yeast
8 ounces lukewarm water
20 ounces plain flour, plus extra if dough is too sticky and for dusting
1 3/4 ounces granulated sugar, plus an extra pinch
2 teaspoons salt
3 large eggs, one separated yolk from white
2 ounces vegetable oil
Method
Sprinkle the yeast over the lukewarm water and add a pinch of sugar.
Stir until it has dissolved then leave it to sit until it becomes frothy and bubbly.
In a large bowl, whisk together the flour, sugar and salt.
Make a well in the centre and add the 2 eggs, the yolk from the third egg and the oil.
Whisk together until smooth.
Pour the yeast water over the egg mixture in the bowl and mix until it becomes a rough dough.
Turn the dough out on to a clean surface and knead for about 10 minutes, until elastic, adding in more flour very gradually if the dough is too sticky.
Place the dough back in a bowl and cover with cling film, leaving it in a warm place until it has doubled in size, 1-2 hours depending on the heat of your home.
Once doubled, weigh your dough and separate it by weight into 6 equal pieces.
Flour a big work surface and roll each of the 6 pieces into a long “rope” about 1″ thick and 16 ” long.
Once you have 6 ropes, lay each next to each other with a little space in between on a floured large moveable board which will make moving your bread easier without ruining the shape later!
Gather the tops of the “ropes” on the end furthest from you and squeeze them together so they are all fastened together.
Carry the rope on your far right over two of the ropes of dough, under one of them then over another two ropes of dough and let the end of that piece stick out over the edge.
Do the same with the next dough rope, over two, under one, over two again and repeat the same with all of the ropes until all the dough has been used.
The loaf may end up “travelling” to the end of your board so move it to the centre again to make the braiding easier.
Once you’re at the end of your ropes, hopefully only literally, squeeze the dough ropes together again, the same as the first step, and tuck both squeezed ends of rope carefully under the ends of the loaf.
Plump up the loaf like a pillow to make it more rounded rather than skinny then lift it into a baking tray lined with baking paper and let it rise until it looks puffed, about an hour or so depending on warmth.
20 minutes into the rising of your loaf, whisk the reserved egg white with a tablespoon of water and carefully brush it all over your loaf.
Heat the oven to 180oc/160oc Fan.
When ready to bake, place in the oven for 30-35 minutes rotating it halfway through the time.
If you have a food thermometer, it’s cooked when it’s 85-90oc inside.
Let cool on a cooling rack until slightly cool, then tuck in!
Enjoy!


