Starting a WordPress blog will take only a few hours if you know what you are doing. When you are looking for a simple way to start a blog, we have something for you. For helping beginner bloggers and website admins, we have come up with an A to Z guide.
In this article, we will show you how you can start a blog using GreenGeeks WordPress hosting.
GreenGeeks- GreenGeeks is the #1 Eco-Friendly Web Hosting service in the hosting industry
- Over 600,000 websites across the globe are powered by GreenGeeks
- Web Hosting starts at just $
10.95$2.49 per month (Offer Ends Today!) - Offer valid only on New Accounts only!

Why Choose GreenGeeks For Your Blog?
You can see hundreds of web hosting companies on the internet. But why Choose GreenGeeks for your new WordPress blog or website. Well, let’s take a look at the popular features of GreenGeeks.
- Unlimited Storage and Bandwidth
- Unlimited Domains Hosting
- Free CDN Integration
- SSL Certificate
- Custom Cache
- Secured Environment
- Quality Support Team
Etc
Unlimited Storage and Bandwidth
Some web hosting companies will limit the storage space, bandwidth on each plan. Here, GreenGeeks comes with unlimited storage and bandwidth. So, you can add as many media files as you want. And you can have unlimited website visitors on your website.
You do not need to upgrade your hosting plan to keep your disk space optimized. GreenGeeks got you covered.
Unlimited Domains Hosting
You can host unlimited domains on GreenGeeks hosting. Some of us would like to start multiple WordPress blogs or websites instead of focusing on one.
Without purchasing additional hosting plans, we can start our websites on a single hosting plan. This will help us to save money.
Free CDN Integration
GreenGeeks can be integrated with the popular Cloudflare CDN. Once you have logged in to the GreenGeeks cPanel, you will see an option for Cloudflare integration. From there, you can connect your Cloudflare account with the website.
SSL Certificate
SSL is no more optional.
If you plan to purchase an SSL certificate, it will cost you a good amount of money. Here, GreenGeeks will give you a free SSL certificate if you are using their nameservers.
Once you have created a website and attached your domain name with it, the SSL will be installed automatically. No manual actions are needed. Plus, they will be automatically renewed.
Custom Cache
LSCache is a server-side caching system that will help you with speeding up your WordPress website. You can always combine this with your existing speed tricks and use an external caching plugin like WP Rocket, WP Super Cache, or W3 Total Cache.
Your website will be blazing fast.
You need to also spend time with your image optimization for better image delivery and reducing the page size.
Secured Environment
They have a secured hosting environment. If your website is affected by any malicious code or viruses, the server will automatically freeze the websites and help you. You can perform a security cleanup and get your website back online.
Plus, they have an experienced team for cleaning up your website. You can rely on them too.
Quality Support Team
They have a good support team. And you can get support via
- Phone
- Live Chat
- Ticket
For pre-sale questions, the live chat or phone support is good enough. On the other hand, if you have more technical doubts, the ticketing option is the best choice.
How To Start a Blog Using GreenGeeks?
For a beginner, the shared hosting/ managed WordPress solution is good enough. We will go with the basic plan for this tutorial. The very first thing you need to do is, visit GreenGeek’s website and select a plan.
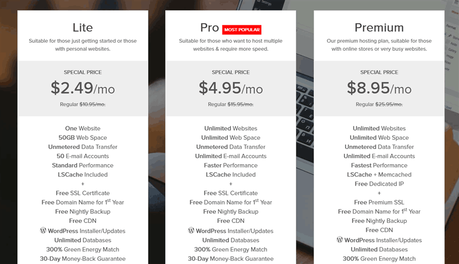
You will see three shared/ managed WordPress hosting plans there.
- Lite – $2.49/ month
- Pro – $4.95/ month
- Premium – $8.95/ month
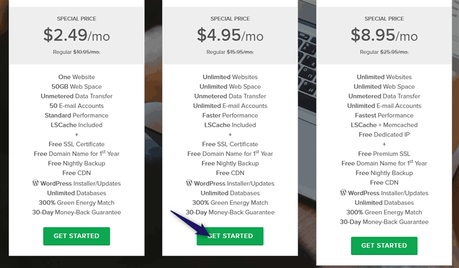
The Pro plan is good enough for bloggers. Click on the Get Started button.
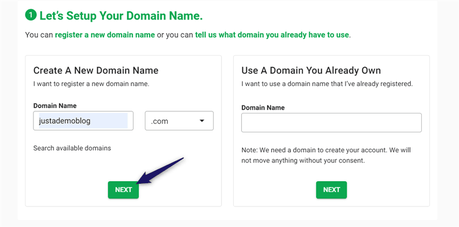
In the next step, you need to choose a domain name for your website. GreenGeeks comes with free one-year .com registration. If you haven’t purchased a domain name yet, you can get it from them for free.
Or, you can use your existing domain.
In this case, I will be registering a new domain for the website.
You will be redirected to the checkout page now.
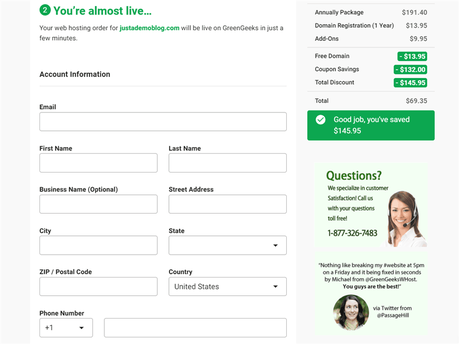
From here, you can complete the purchase. From the package information section, you can change the plan and data center location.
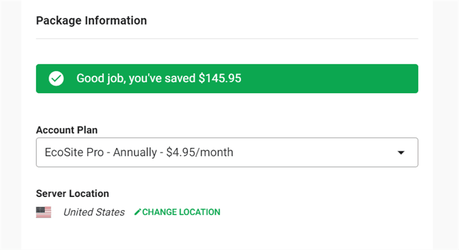
Annual billing will give you the maximum discount. Once you have configured the account plan, you can look at the add-ons available.
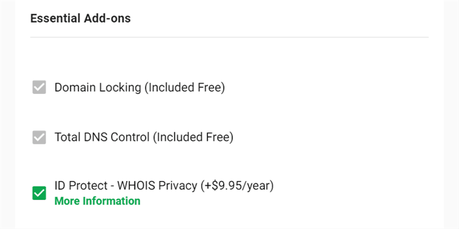
For the WHOIS guard, you need to spend almost $10 every year. After that, complete the purchase using your Credit Card.
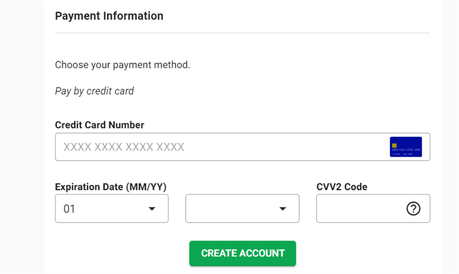
Once you have completed the purchase, you are good to move forward.
Installing WordPress Using The GreenGeeks cPanel
Now, you have successfully created a GreenGeeks account and purchased a hosting plan with the domain attached. The very next thing you need to do is, install WordPress on the domain. From the GreenGeeks panel, you will be able to do it. Using your account credentials, log in to your GreenGeeks account.
You will see a quick launch wizard there. Keep in mind that every new customer will be redirected to the Quick Launch Wizard automatically.
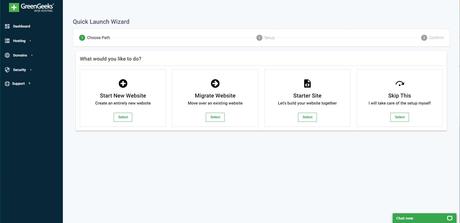
If you are an existing customer, take a look at the service management section. You will see an option to run the setup wizard there.
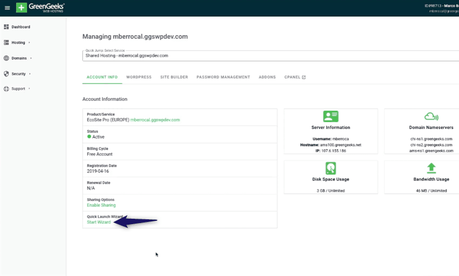
We haven’t created our website yet. So, click on the Start New Website button.
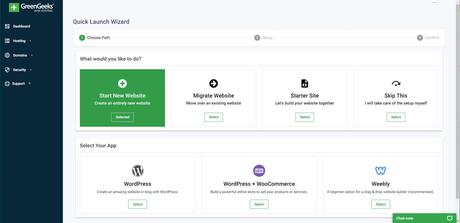
From the next section, you can choose your app. If you are planning to create a blog, choose the WordPress CMS. On the other hand, if you need to integrate an online store with your website, the WordPress + WooCommerce app is the best option for you.
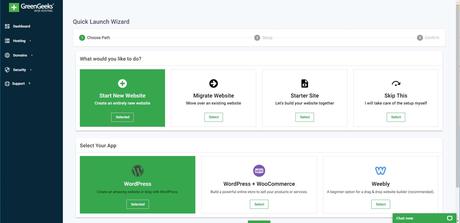
In the next step, you need to add some site information and configure the SSL option. After that, you can choose a WordPress theme.
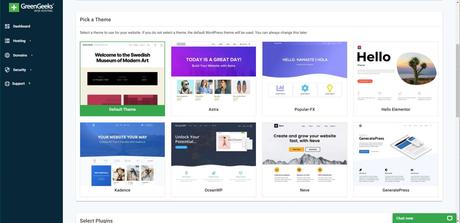
They have integrated eight free WordPress themes with their setup wizard. You can choose any of them from there.
You can also configure the plugins from the same screen.
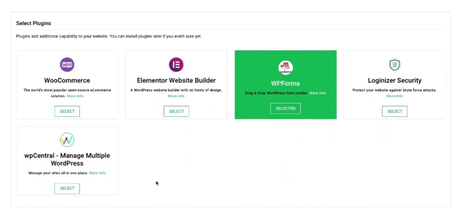
Once you have done the theme, plugin configuration, click on create my website button. Now, the setup wizard will start deploying WordPress, themes, and plugins you requested.
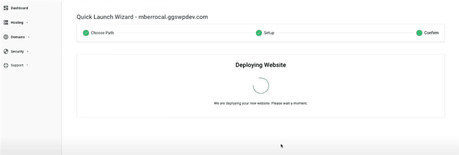
Within some minutes, the setup wizard will deploy WordPress on your domain.
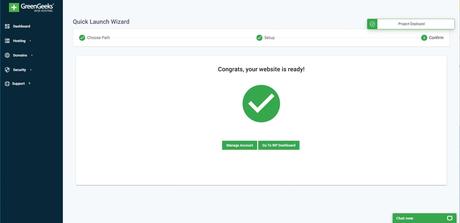
You will see the account credentials on the same screen.
This is how you can install WordPress on a website. Quick Launch Wizard is the best option for installing WordPress on any GreenGeeks website. It will not take much time, and you can get started with the WordPress site in minutes.
Logging In To The Admin Area
For logging in to your new WordPress site, you have two options.
- Manual Log In
- One-Click Log In
The simplest and fastest way to log in is the one-click log-in. Without entering your email address/ username and password combination, you can log in to the WordPress backend! Or, if you prefer the traditional method, go to the wp-admin section and enter the username and password the wizard generated for you.
From there, you can create posts, pages, change the theme, install and activate WordPress plugins.
Get Started With GreenGeeks
You can get affordable premium hosting from below.
$This is an affiliate link
This is how you can start a blog using the WordPress CMS and GreenGeeks hosting. We hope you have found this article helpful and enjoyed the read. If you did, please consider sharing this post with your friends and fellow bloggers on social media.
For more WordPress tutorials and blogging tips, you might want to check out our blog archive.
Related Articles You Might Like:
- Why cPanel Hosting Is Best For Beginners (Reasons Covered)
- How To Reduce The Server Response Time of a WordPress Blog?
- GreenGeeks Coupon Code: How To Get Cheap WordPress Hosting With Free Domain?
- How To Host Website On Google Cloud (Step-By-Step)
- 6 Best and Almost Free Web Hosting For Non-Profits (List Updated)
Did you find the article useful?
Then pin me to your Pinterest Board, so that more people will find me
(Remember: The more you give to the Universe, the more you will get from the Universe)
So, Pin me