Ready to start a blog?
A lot of our users got asked how we created our blog, managing it. We are in 2021. Creating a blog will take only 30 minutes nowadays. And in this post, we will share how to start a blog in India in 2021 and manage it.
There are so many CMSs available for creating blogs and websites like Joomla, Weebly, Wix, Blogger, etc… But we always recommend the best one – WordPress.
When You Need a Blog?
No matter you are running a small offline business or a multimillion business. You need to create a website, showcase your work or business information. This is one of the best methods for increasing business visibility and for reaching your target audiences.
For example, let’s say that you are running a food court.
By creating a website for your business and optimizing it, you can get more clients! You just need to optimize your website for local SEO. On the other hand, you can integrate an online food delivery system with the website.
Both ways will give you more revenue and credibility. Cool, isn’t it?
And Blogs in India became famous because of the passive income opportunity it offers. You can start earning money right from your home. Many Indian bloggers who started as part-time bloggers made more money with Google AdSense and Affiliate marketing than their 9-5 job gives. Eventually, they quit their job to become a full-time blogger.
How much does it cost to start a blog?
Creating a WordPress blog typically costs around $50 a year (including 1-year hosting and 1-year .com domain registration). So, it is a good investment.
Choosing a Blogging Platform
Like I mentioned above, there are so many blogging platforms are available. Some of the top ones are:
- WordPress.org
- WordPress.com
- Weebly
- Wix
- Tumbler
- Blogger
- Medium
- Squarespace
- Ghost
Etc…
We have tested almost all famous blogging platforms. And in the end, we will always recommend WordPress for hosting the blog. There are two types of WordPress CMSs are available. The first one is free WordPress, a.k.a WordPress.com, and the other one is self-hosted WordPress (WordPress.org).
Blogger is a hosted service that is run by Google. But still, we prefer WordPress over Blogspot. We have covered the difference in this article.
WordPress.org is free software for creating blogs and websites. All you need to do is host it on your web server and manage it! Easy to customize, manage, and SEO-friendly CMS.
How To Start a Blog?
Mainly, you need two things.
- A Domain Name.
- A Web Hosting Account.
A domain name acts as your address. For example, look at our domain name: BlogHeist.com. When someone enters our domain name in their browser, it will be redirected to our website.
The web hosting account is using for storing your files online. So when someone accesses your website, these files will be served to them. Many WordPress hosting companies are available, but we will show you the best ones below.
Choosing The Right Web Hosting
Choosing a web hosting company is a crucial task. You need to make sure that the hosting company provides the best services, uptime, support, etc… Yet, we have used several web hosting companies for our projects and also client works. So, we probably know which one’s best.
We can categorize web hosting plans like:
- Shared Hosting.
- Managed WordPress Hosting.
- Cloud Hosting.
- And Dedicated Server Hosting.
If you are a pure beginner, you just need to choose a shared hosting package. According to other plans, the shared hosting plans will be much cheaper.
When you need more power, you can always upgrade to a higher plan like managed WordPress or cloud.
Note: We recommend you choose HostGator / Bluehost / Cloudways as your hosting platform. These are the most popular web hosting in terms of speed and performance.In this tutorial, we will guide you with creating a website using HostGator. And, you could also get a 60% discount on every plan!
Wondering how? Feel free to check out our HostGator coupon.
Hostgator- Hostgator is one of the most popular Web Hosting service available
- Web Hosting at just $2.75/mo (60% off on Web Hosting)
- Free SSL + Free Domain Name for a year
- Use the Coupon Code — ORH60 (Offer valid only for a limited time)

Purchasing HostGator Hosting
Now, let’s purchase hosting for our blog.
First of all,
Go to HostGator
$This is an affiliate link
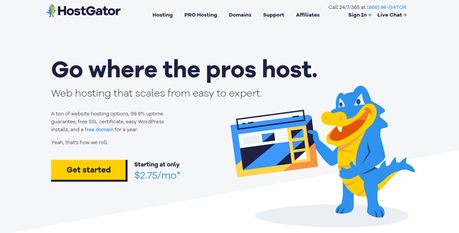
Like I mentioned above, when you are a pure beginner to blogging, you don’t want a managed WordPress hosting or cloud hosting. You could start your blog with shared hosting.
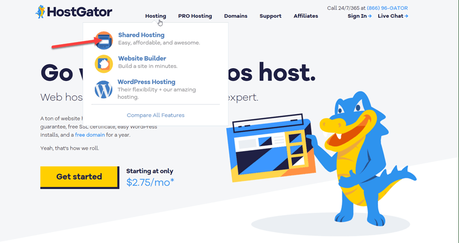
There, you could see 3 plans.
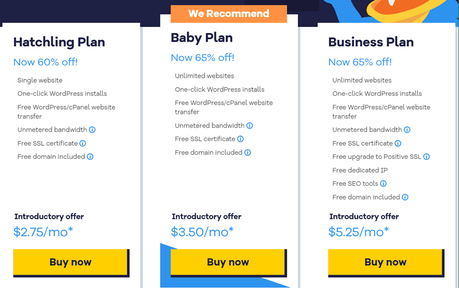
- Hatchling – $2.75 a month.
- Baby – $3.50 a month.
- Business – $5.25 a month.
In the Hatchling plan, you can host only one domain name. So, if you need to host multiple domains in the future, this is not a viable solution. In that case, you need to choose the Baby or Business plan. Well, for single blog hosting, the Hatchling plan is good.
So, we could choose that plan for our blog.
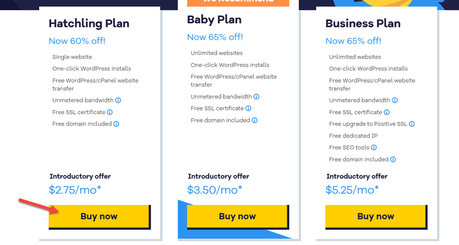
You need to choose a domain. There you have two options.
- Register a New One.
- Use Existing.
If you already have a domain purchased from somewhere like GoDaddy, Namecheap, etc… You could transfer it to them/ update the nameservers. In our case, we are going to buy a new domain name.
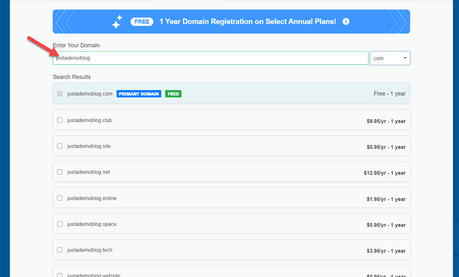
Just enter your domain, select an extension. Your domain will be added to the cart automatically. Some domain registrars will give you domain privacy (WHOIS Guard) for free. Here, you need to pay for it. I personally highly recommend using the privacy guard for all your registered domains.

Configure the hosting plan.
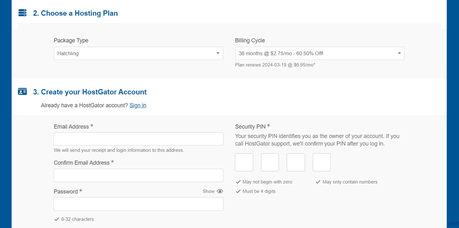
The recommended hosting term is 36-months. In that plan, you will get maximum savings. Just $2.75 a month. Also, choose a login email address and PIN for your account.
Complete your personal details and the mode of payment.
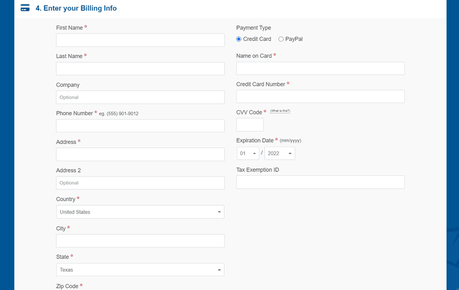
There you can pay for the hosting using your credit card or PayPal. In our cases, we always prefer PayPal for payments. They also got some add-ons for you.
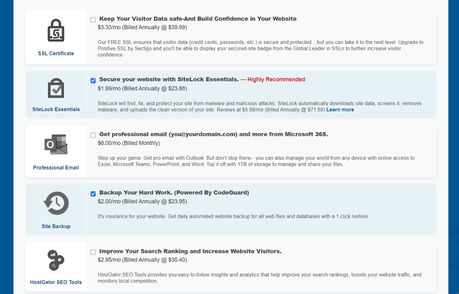
You can disable add–ons which you don’t need. Now, your chance to claim discount coupons. If you check our HostGator coupon code, you already know it. Use our coupon ORH60 there. You will get a 60% discount on all plans!
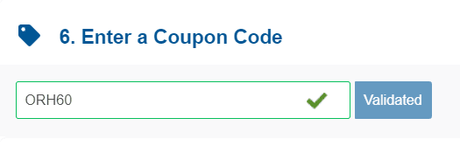
And below that, you can see the newly updated pricing.
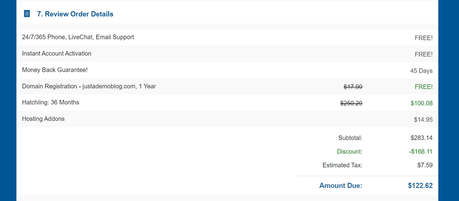
As you can see, we have got around a $170 discount on the purchase. If you check the pricing, it’s a great deal for you. $123 for 3-year hosting and one-year domain name? Pretty cool!
They also offer a 45-day money-back guarantee on all their plans. So if you are not completely satisfied with their service, you can get your money back.
So, complete the payment, and a cPanel account will be created for you on their server.
Installing WordPress on HostGator
Once you got the domain name propagated, this is time to install WordPress on your hosting account. You could do it manually or by using the one-click installer. The second method is the easiest method for installing WordPress.
We will show you how.
First of all, log in to the cPanel. Under the software section, you could see something called QuickInstall.
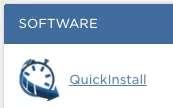
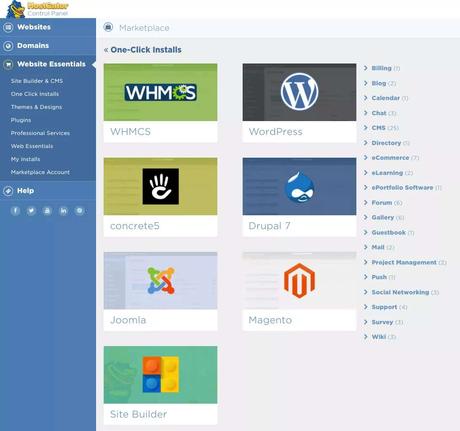
It will open up a page where you can see all the CMSs for installing. Click on the one-click installer button there.
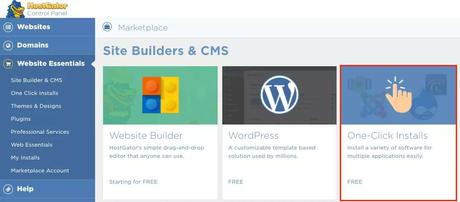
Choose WordPress from there.
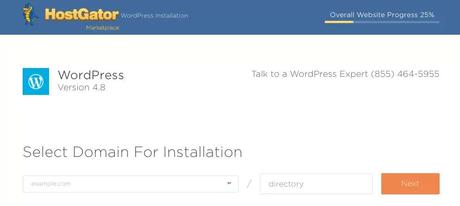
Choose a domain name that you need to install WordPress.
Then, configure your installation basics.

Click on the install button. Within a few seconds, your installation will be completed.
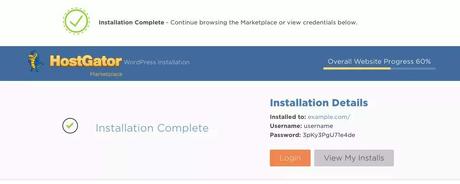
You can see the username, password from there. Log in to your WordPress blog to start managing it.
You just need to add /wp-admin/at the end of your WordPress installation directory. For example, let’s say that we have installed WordPress on the example.com domain name.
When you need to access the backend, you just need to enter the URL like example.com/wp-admin/ It will show you the admin login page.
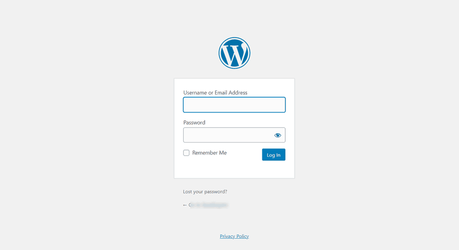
Using the username and password, simply login to the system.
Basic Configurations
Once you got installed WordPress on your HostGator hosting plan, you can start managing the blog. However, before we write posts and pages, we need to do some basic configurations in the WordPress installation.
1) General Settings
From the WordPress general settings, you need to configure the site title, description, website address, etc… If you have an SSL certificate, you need to enter the HTTPS version address in the fields.
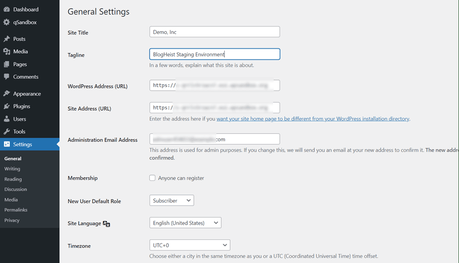
If you are not running a membership website, turn it off. Save the changes after verifying them.
2) Changing Permalinks
Usually, the installation will give us an ugly permalink structure. An example is below.
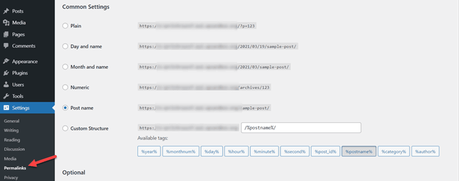
But, the permalink structure is customizable. We can do whatever we need and make it truly ours. Some of the best permalink structures are:
- /%postname%/
- /%category%/%postname%/
- /blog/%postname%/
If you check our blog, you can see that we are using the post name structure. It’s an SEO-friendly structure and comes clean. For changing it, you just need to choose a structure, save the changes.
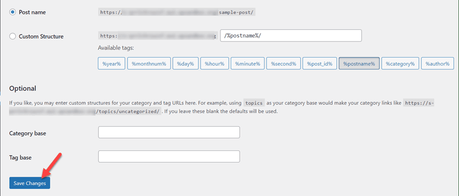
You are done.
3) Complete User Profile
Completing the profile means you need to add your first name, last name, social media accounts, website URL, and a short bio in the profile. This is how users will know you, the author.
For doing this, go to the profile settings, your profile.
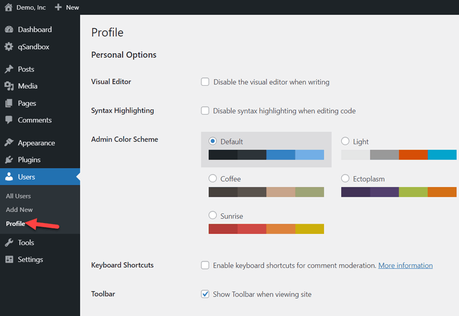
Under that section, you could see the user settings. Just enter your details and save the changes.
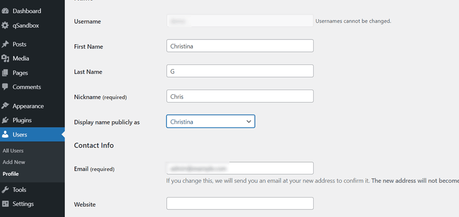
Now, the new display name will be visible in all your posts and custom post types. In post meta and also in the author box.
Writing Your First WordPress Post
If you are ready to write your first WordPress blog post, go ahead. Make sure that you have installed the Grammarly extension on your Google Chrome browser. Grammarly will help you to write with confidence, without any spelling, grammar mistakes. We have covered all the features in our Grammarly review. Feel free to check it out.
Now, go to the add new post section.
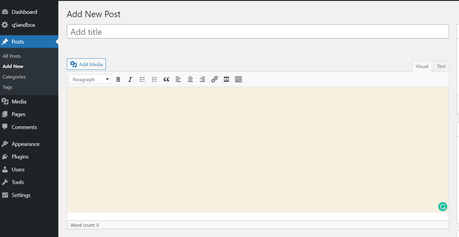
You need to enter a heading for your post.
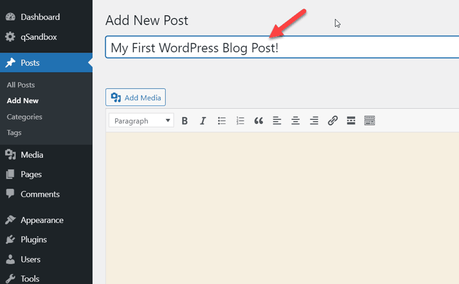
This will be the H1 tag. Now, write content in the content area.
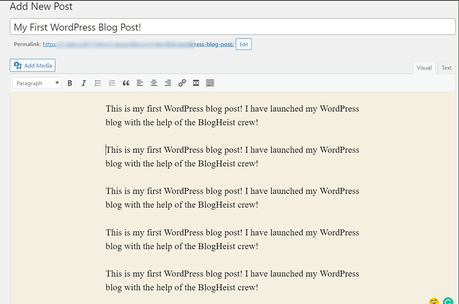
Choose a format.
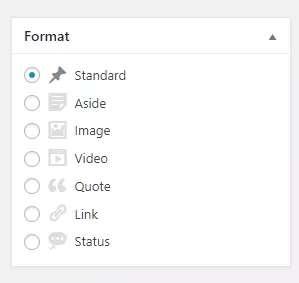
While writing regular posts, we will leave this to the standard format. Now, you need to choose a category for the post.
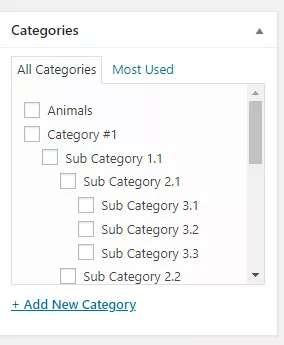
When you handle a new blog, you can see only one category in the section – Uncategorized. But, you can simply create one by clicking on the add new category button.
Tags are another way to optimize your blog.
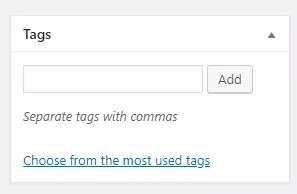
You can add as many tags as you wanted. Some themes come with the layout customization feature. In our case, we are using the GeneratePress theme, and it got the feature.
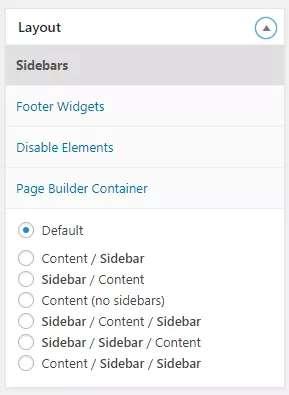
You can choose a different layout option for specific pages. Or it will pull out the default layout options from theme settings.
And after that, you need to choose a featured image.
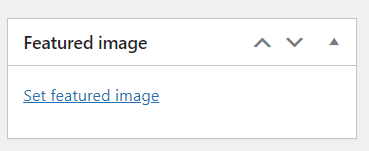
This can be chosen from the media library. Choosing a featured image is essential. This image will be visible on your archive pages. An example is below.
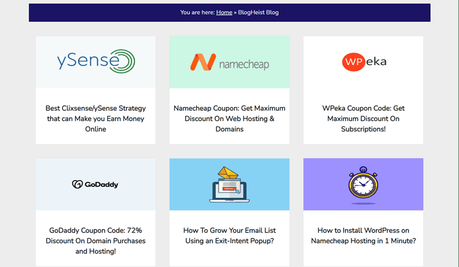
Impressive, isn’t it?
Also, you need to use an SEO plugin for your blog. The recommended one is Rank Math. The same plugin that we use here. You can optimize your title tag, meta description, and the entire post for a keyword using it.
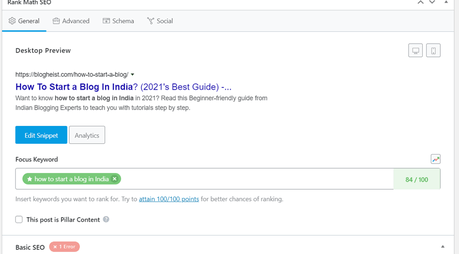
Once you are good to go, hit the publish button.
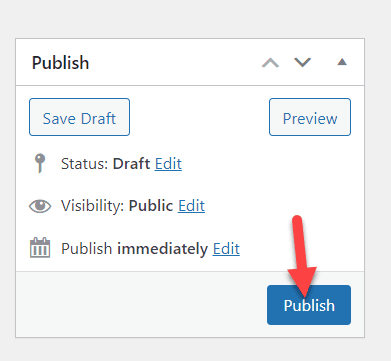
The post will go live. If you still need more time to write, optimize, you can always save the post to the drafts section.
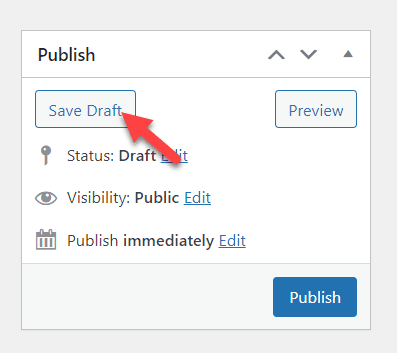
By doing this, you can write this post later. This is how you can write and publish a post in the WordPress editor. I know this is just limited information. We’ve added a dedicated article for this.
Creating Essential Pages
In every blog, about, contact, and privacy policy pages are essential.
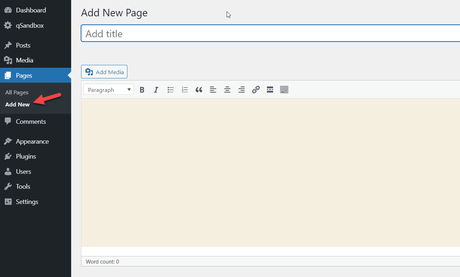
You can create unlimited pages that you want. If you completed adding content to the page, simply publish it.
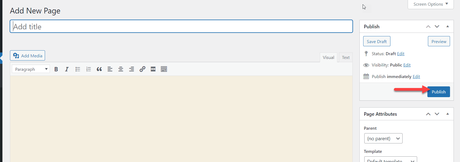
Using an SEO plugin like Yoast or All In One SEO Pack, you can optimize the page for search engines.
Changing Theme
By default, WordPress comes with the Twenty Twenty WordPress theme. However, that theme is fundamental and got only limited features.
Choosing a suitable theme for your business is essential. Many WordPress themes are available like GeneratePress, Genesis Framework, Divi, Astra, etc… If you check our blog, we are using a custom child theme of Genesis Framework.
There are so many WordPress themes are available in the WordPress repository too. Here, we are going to show you how you can change your WordPress theme.
First of all, go to the Appearance menu. There you can see your currently active WordPress theme.
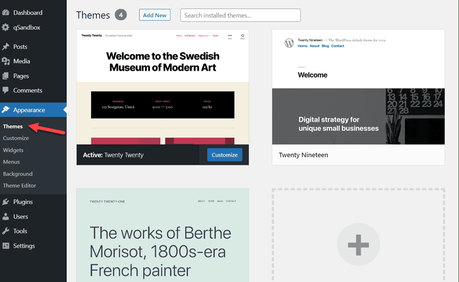
Click on the add new button.
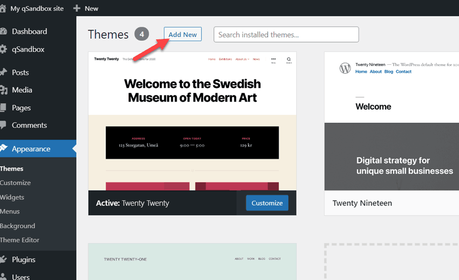
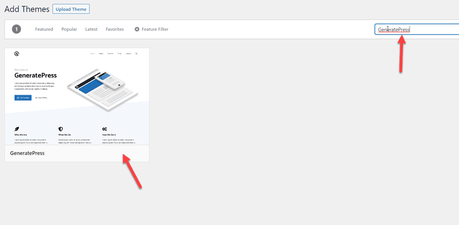
Search for a WordPress theme and activate it on your blog.
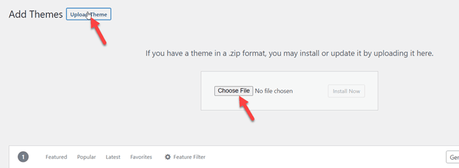
If you have a premium version theme, you can upload it.
Once you got installed the theme, simply activate it.
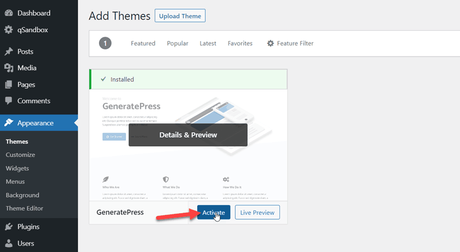
You can see the changes on your website almost instantly.
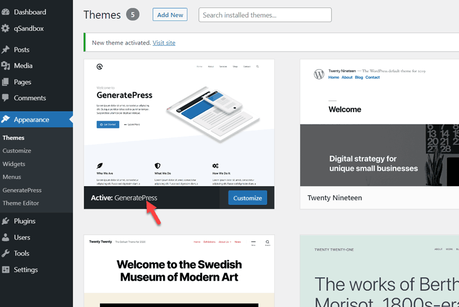
You can choose any theme you like. If you are starting a blog to make money online from display ads like Google AdSense, feel free to check out our list of best Google AdSense optimized WordPress themes.
Best WordPress Plugins
WordPress plugins extend the blog’s functionality. Here, we are going to list the must-have WordPress plugins on your blog. As you know, you can see several plugins for the same purpose. We will show you the best one here.
- WPForms – Best WordPress form builder plugin – WPForms review
- Yoast SEO – WordPress SEO plugin. Take care of the on-page SEO.
- Akismet – Say goodbye to spam comments
- JetPack – One plugin, multiple uses!
- Classic Editor – Disables Gutenberg editor and brings the old editor
- Social Warfare – Social sharing plugin for WordPress
- WP Super Cache – Free WordPress caching plugin
- Weglot – Translate your Content to any Language – Weglot Review + Tutorial
- MonsterInsights – A freemium WordPress Google Analytics plugin – MonsterInsights review
- OptinMonster – Lead generation made simple! – OptinMonster Review
- ThirstyAffiliates – Affiliate link cloaking and managing
- Sucuri – WordPress security
- BackupBuddy – Complete WordPress backups
etc…
Managing Updates
When an update is available for your WordPress core, themes, plugins, or translations, you could see it from the WordPress updates page. From there, you can update those.
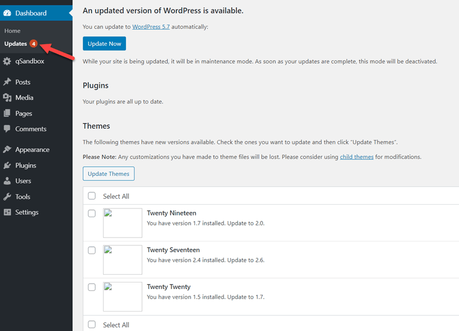
However, when you handle 3 or more blogs, it’s pretty hard to update them individually. Yet, we have got an excellent solution for you. For keeping all my WordPress blogs up to date, creating backups, monitoring the uptime, I personally use a service called ManageWP.
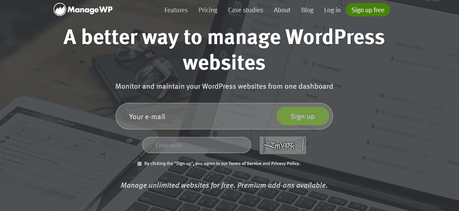
ManageWP is a freemium service that is handled by GoDaddy. I highly recommend using this service when you run more than 3 WordPress blogs. From a single dashboard, you will be able to update all your themes, plugins, core, and translations.
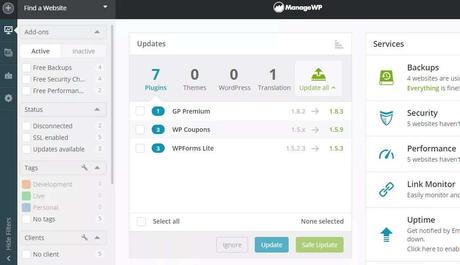
They have premium add-ons that will help you monitor your website uptime, SEO efforts, broken link checking, etc… Anyway, if you are not planning to create more WordPress blogs, you don’t need to use this service.
Frequently Asked Questions
Some of the frequently asked questions regarding starting a blog are:
Can We Start a Blog For Free?
Yes. There are so many free WordPress hosting companies are available. If you need to start a free WordPress site, you can get hosting from them.
How Much Does It Costs To Create a WordPress Blog?
That totally depends on your budget. You can get a domain name, web hosting service for $50 a year. On top of that, you can also choose premium hosting services for a higher price. Well, when you start your first blog, any shared hosting company is fine.
How To Get WordPress Support?
If you check the internet, you can see thousands of WordPress troubleshooting tutorials. Also, if you need a personal hand, feel free to contact us through our contact form. We will help all our readers!
How Much Time Is Required For Starting a Blog?
If you are ready, you can launch your first WordPress site in 1 hour. When you use WordPress, everything will be pretty new to you. But, it is fun and entertaining. You'll learn it as soon as you create a site.
Conclusion
So you finally know how to start a blog and maintain it. Why don’t you give it a try?
We hope you found this post helpful and enjoyed the read. If you did, please consider sharing this post with your friends and social media followers. If you need more awesome blogging tutorials, feel free to check out our WordPress resources.
Related Articles You Might Like:
- 100+ Best Blogging Tools for Beginners and Experts to Manage Blog Effectively (2021)
- 21 Best Work From Home Jobs To Start Earning From Your Couch In 2021
- How To Start a Fashion Blog With WordPress?
- How to Make a Gaming Website with WordPress?
- Cloudways Review: How This Performance Optimized Hosting Will Help You?
Did you find the article useful?
Then pin me to your Pinterest Board, so that more people will find me
(Remember: The more you give to the Universe, the more you will get from the Universe)
