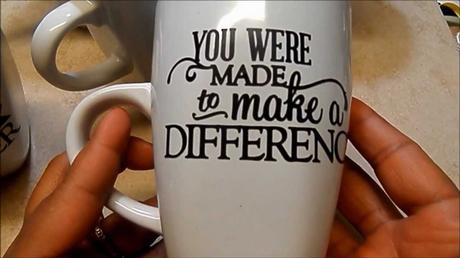
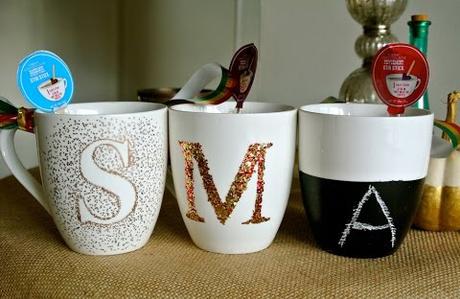
One of the coolest things you can do with a vinyl cutter is to customize your mugs with your preferred designs. A customized mug can also make a perfect gift for someone close to you.
That said, you’d want your design to last longer on that mug and not peel off easily. You don’t want all your hard work and the cash you spent on the supplies to go to waste.
Luckily, you can make the vinyl strongly bond with your mug and last longer by sealing it in place.
But how exactly do you do that?
Below is a step by step guide on how to seal vinyl on a mug.

Why should you seal vinyl on a mug?
As we have just mentioned above, the main idea behind sealing vinyl on your mug is to keep it in place and make your design last longer.
Many crafters have reported cases of the vinyl coming off their mugs. And in 99% of these cases, the vinyl was sealed. This further shows how important sealing the vinyl designs you apply on your mug is.
If you’re customizing that mug to gift it to someone special, sealing the vinyl will ensure you give them a quality gift that lasts a lifetime.
While still at it, you might have heard some folks say that vinyl should never be sealed because it needs to breath. However, this is just a myth, and you shouldn’t fall for it.
With that in mind, it’s worth noting that sealing the vinyl on a mug can be a challenge at first. But once you figure out things, it becomes super-easy for you.
In our next section, we’ll show you how to properly seal vinyl on your mug and make it stay in place.
How do you seal vinyl on a mug?
What you’ll need for this job:
- The vinyl containing your design
- Transfer tape
- Scrapping tool
- Mug
- Sealant (we’ll share with you the different types of sealants available)
How to seal the vinyl:
Assuming you have already cut your vinyl image with the help of a vinyl cutting machine and it’s ready for application, follow these steps to get the job done:

1. Clean the mug.
Firstly, you’ll need to give your substrate (the mug) a thorough clean. This will help eliminate all the dirt, oils, etc. on its surface which can make it hard for your design to stick.
Once you have cleaned the mug, put it in the drying rack to enable it to dry completely. Moisture, too, can hinder the vinyl’ ability to stick to the mug.
You can also use a clean paper towel to dry the mug quickly.
2. Transfer the design to your mug.
Next, grab the transfer tape and stick it to your design. Ensure everything lines up correctly, and the tape doesn’t go past your design.
For beginners, the tape will help you easily apply the design on your mug.
3. Now stick that design on your mug.
Needless to mention, you’ll be applying the design on the side of your mug.
And when applying it, keep the design as low as possible. This will help ensure it doesn’t affect where you’ll be drinking from your mug.
Make use of the scraping tool to help smoothen out your design and brush out any bubbles and make the vinyl stick to the mug.
4. Seal the vinyl.
The last and most crucial step involves sealing the vinyl design. There are several sealant options available. And which one to use will depend on your budget as well as the level of durability you’re looking for.
For beginners, consider using the Mod Podge sealant. For experienced crafters, you can go for epoxy. (See more options below)
Once you apply the sealant, you should let your mug sit for a couple of days to give the vinyl time to settle and cure. Or you can simply bake the mug in the oven for fast curing process.
Which sealant should you use?
We already know that adhesive vinyl is the most popular type used for customizing mugs. This simply means that the sealant you use on your mug should be compatible with this type of vinyl.
Let’s take a closer look at some of the most popular sealants you can use for this project:
- Mod Podge: This is one of the most popular and highly versatile vinyl sealants you can find on the market today. It comes in matte, glossy, and glitter finishes to let you pick your desired sealant.What’s more, this sealant is incredibly affordable and readably available in the local craft stores. The fact that it’s quite easy to use makes it the perfect choice for beginners.
- Polycrylic: this is an all-purpose sealant that comes in spray form. When using this sealant, you’ll need to apply it in thin layers. Otherwise, applying a thick coat will make it curl on itself.NOTE: if you decide to use this sealant, make sure it’s 100% acrylic and not polyurethane. The latter tends to turn yellow over time and can ruin the look of your mug.
- Epoxy: This is another popular vinyl sealant you can use for this project. It’s a heavy-duty sealant that will give your mug a beautiful, glossy finish. The sealant is also 100% dishwasher safe and offers you long-lasting results. However, using this sealant takes more time as you have to mix it before applying it. And once you mix it, you can’t reuse it.
- Triple Thick: if you want a glittery feel on your mug, this is the perfect sealant for you. Once you apply it, Triple Thick offers your mug surface a thick and glossy coat.Like the previously discussed sealants, it’s also 100% non-toxic and safe to use around your kids and pets.
Final Verdict
That’s it! You have successfully sealed the vinyl on your mug. Now you can use the customized mug to sip your hot coffee or chocolate. You can also clean it in the dishwasher (if the sealant is labeled as dishwasher safe) without worrying about the design coming off.
