 The number one tip I offer and often do for my clients to save them money when decorating for a party, it’s to make the containers or vases for florals. Especially when it comes to mercury glass, the bigger the vase the more expensive. So I often encourage creativity when saving money, like interpreting the look already finished vases on your own. Whether it’s a simple coat of different spray paint, or a few extra steps of wetting and sanding, when you put a DIY take on those expensive pieces you ended up creating totally unique and customized pieces for your specific party.
  I’ve always loved the look of vintage painted mason jars, which seem to have aged and chipped at the paint in such a perfect way. Well you don’t have to go scouring vintage markets, you can make these yourself. They are quite easy, and when done with chalk paint, even quicker. They just require a well ventilated space, so I highly suggest doing these outside on a lovely sunny afternoon. And just some patience. I did 26 jars, in 3 different afternoons, but I’m sure you could get these all done in one day.
  I was making these for a baby shower coming up, but I think this is a great DIY project for any Spring and Summer party, or just to have on hand during this season when there will be lots of garden flowers to be brought indoors.
  You’ll Need:
- Glass Jars
- Chalk Paint {I found this brand at Michael’s Crafts}
- Sponge Paint Brushes
- Kraft Paper, Paper Grocery bags, etc.
- Fine Sand Paper
- Mod Podge Clear or Other Sealant Spray
 If you’re starting with a new case of mason jars, you’re good to go. But if you’re using old jars that have been used for other purposes, you’ll want to give them a thorough cleaning. {Wipe down with rubbing alcohol and then wash with hot, soapy water. Dry completely.}
Setup your area with kraft paper and paper bags laid out. If the weather is nice, go ahead prop up a seat and paint yourself some mason jars. Plus, doing these outside is much better for when you have to sand the jars. 
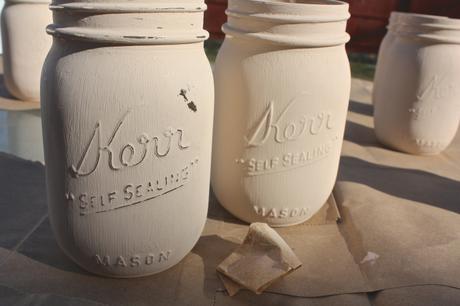
Paint the jars with two coats of paint, allowing to dry after first coat. 


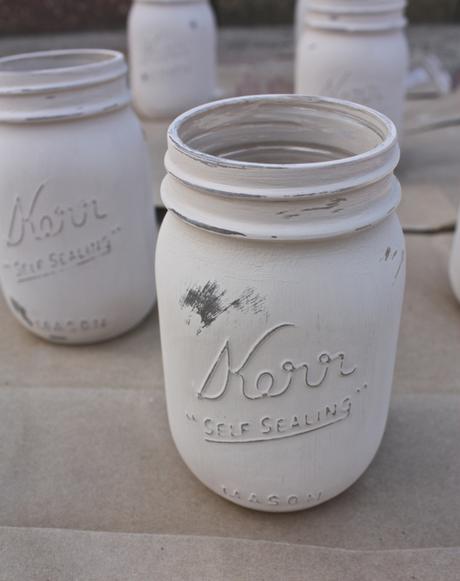
Cut rectangles of the sand paper, then fold over. Starting at the top rim, then roughen up its sides.
Then, sand raised words, and the jar’s sides slightly. Definitely make sure the brand name and mason are clearly visible.


To clean, simply wipe down, don’t submerge jars in water or wash in dishwasher. Take care when filling with water.
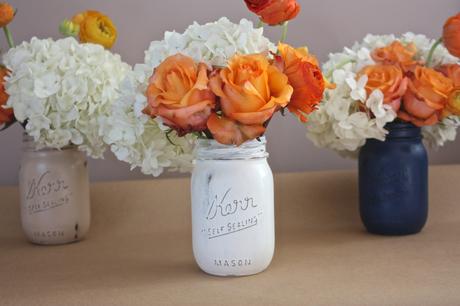
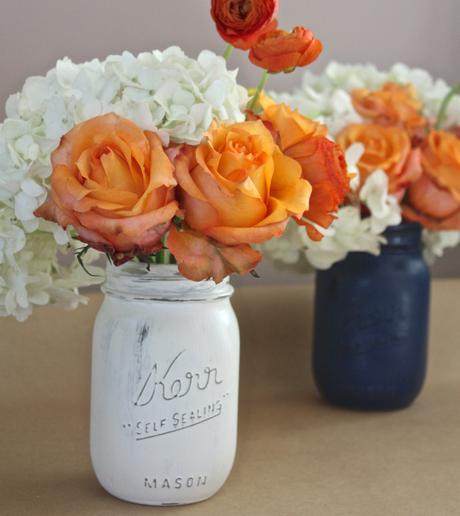
These look great grouped as three in different colors.
 The number one tip I offer and often do for my clients to save them money when decorating for a party, it’s to make the containers or vases for florals. Especially when it comes to mercury glass, the bigger the vase the more expensive. So I often encourage creativity when saving money, like interpreting the look already finished vases on your own. Whether it’s a simple coat of different spray paint, or a few extra steps of wetting and sanding, when you put a DIY take on those expensive pieces you ended up creating totally unique and customized pieces for your specific party.
 I was making these for a baby shower coming up, but I think this is a great DIY project for any Spring and Summer party, or just to have on hand during this season when there will be lots of garden flowers to be brought indoors.

