A heated towel rail is a great way to keep your bathroom warm and cosy. They also look a million times better than they used to and you can find plenty of beautiful designs to help you create your dream bathroom.
But like other heating devices, it’s not an entirely self-sufficient appliance and occasionally requires maintenance. Just like radiators, one of the most important parts of any heated towel rail is its bleed valve.
The bleed valve allows air to escape from the towel rail by releasing excess pressure that builds up over time. This keeps the device working efficiently and prevents any cold spots along the top of the radiator.
In this guide, we will take you through the process of how to replace a heated towel rail bleed valve and what to look out for if you think you need to buy a new bleed valve.
Do I need a new bleed valve?
If you notice that your heated towel rail doesn’t work as well as it used to or if you notice any damage or corrosion on the bleed valve itself, then it might be worth replacing it with a new one.
You don’t want to risk trying to bleed the towel rail with a dodgy bleed valve as it might break, get stuck, damage the inlet or crack the rail creating a more costly issue. Not ideal!
You should buy a new towel rail bleed valve if:
- The towel rail is leaking from the bleed valve
- The bleed valve is broken or stuck
- The bleed valve is worn down and corroded
Where is the bleed valve on a heated towel rail?
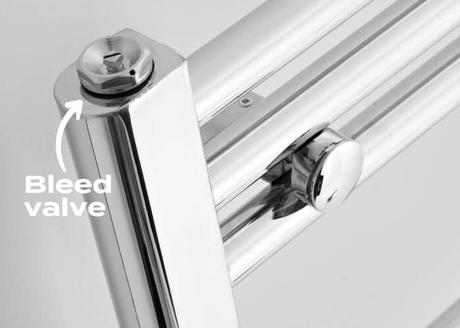
The bleed valve usually sits at the top of your towel rail. However, some models feature the bleed valve at the back of the rail.
If you have a modern ladder-style towel rail, you should be able to locate the bleed valve on the top of one side and the blanking plug on the other.
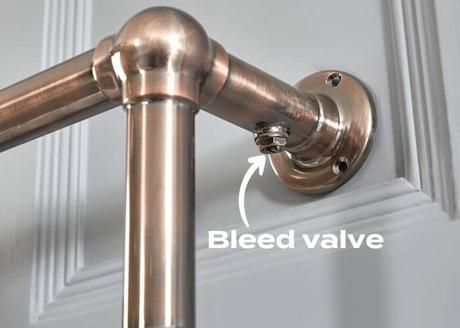
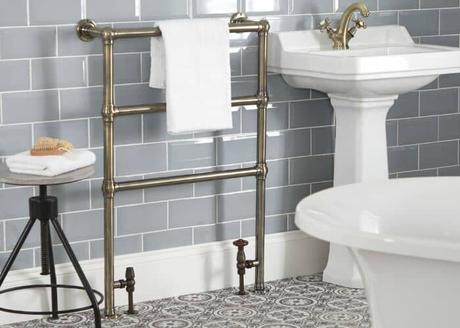
If you have a Victorian towel radiator like our Milano Elizabeth or Derwent collections, you will also find the bleed valve at the top on one side, but it usually sits underneath the top rail where the radiator connects to the wall.
The towel rail bleed screw itself tends to be hexagonal or square, just like on a radiator. In most cases, you will also notice a thin slot to fit a flathead screwdriver if you don’t have a bleed key.
How often should you bleed a towel rail?
It is a good idea to bleed a heated towel rail at least once a year. The best time to bleed a towel rail is after summer to prepare it for the colder months ahead.
If you fail to bleed your towel rail, then you’ll find yourself with a much less efficient radiator that doesn’t heat as well and takes longer to warm up after being switched on.
This means it can also cost you more to heat the towel rail up and with rising heating bills this is the last thing you want!
Can you replace a towel rail bleed valve yourself?
Yes, replacing a heated towel rail bleed valve is not a difficult task and one that you can do yourself. It does require some skill, but with the right tools and materials in hand, you should be able to complete this job with ease.
Swapping a damaged bleed valve will ensure that your heated towel rail works efficiently and helps prevent any possible future damage.
The most important thing to remember when replacing your bleed valve is to make sure that you choose the correct thread size for your particular model of towel rail before purchasing one from your local hardware store or online supplier.
Can you change a towel rail bleed valve without draining the system?
Yes, the good news is that you can change a towel rail bleed valve without having to drain the full system. It will save you a lot of time and effort if you do not do a complete drain down! You can even replace thermostatic or manual valves on radiators and towel rails. Head over to our valve replacement guide to find out how.
Do electric heated towel rails have a bleed valve?
Some electric heated towel rails may have a bleed valve at the top. However, you do not need to bleed electric heated towel rails. They simply have one because they come from the same collection as the central heating towel rails, but they are supplied with an electric heating element ready to be connected to your mains electricity.
The reason you do not need to bleed an electric heated towel rail is because they are filled with glycol instead of water and they are isolated from the central heating system. This means that there is no way for air to enter the towel rail.
How do you replace a towel radiator bleed valve?
Follow this simple step-by-step process and you will replace your towel rail bleed valve in no time!
Grab your tools
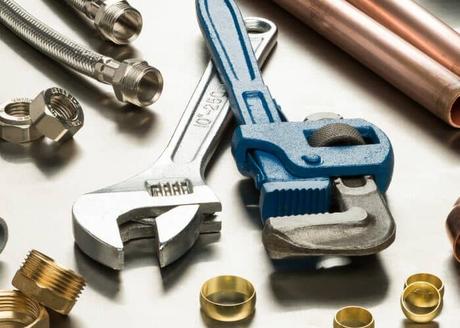
- Bleed key or flathead screwdriver
- Replacement bleed valve
- Adjustable spanner
- Towel or bucket to catch any water
Step 1: Turn the heating off
Turn the central heating off and wait for the towel rail to cool down completely. It may sound like an obvious step but it is an easy one to forget when getting heating maintenance jobs done and the last thing we want is any burnt hands!
Step 2: Isolate the towel rail
Since you are going to be removing the old bleed valve, you don’t want water from the heating system to continue to flow through the towel rail and burst out!
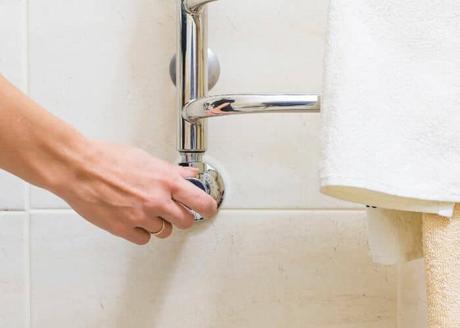
To avoid this mess you need to isolate the towel rail by turning both the towel rail valves off. If you have a thermostatic valve with a numbered dial, turn it down to zero.
Then move over to the other side of the towel rail to the lockshield valve. To shut off the lockshield valve use the adjustable spanner to turn the lockshield valve clockwise all the way.
It is a good idea to remember or make a note of the number of turns it took to close the lockshield valve. This is because you will need to turn it back the same number of times later to open it again and balance the towel rail.
Step 3: Prepare your new bleed valve
Your new towel rail bleed valve is already prepared and can be installed straight away if it has a rubber washer around it. If you find that your new valve does not have a washer, you will need to PTFE tape around the thread a couple of times. This will help secure the seal and avoid any potential leaks.
Step 4: Locate the old towel rail bleed valve
Have a look around your heated towel radiator and find the original bleed valve. As we mentioned before, on ladder-style towel rails the bleed valve is usually at the top on one side, or underneath or at the back on other models.
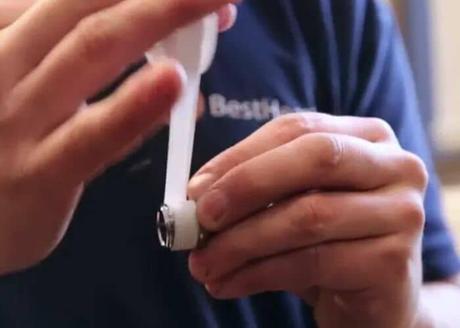
Step 5: Bleed the heated towel rail
Use the radiator key, adjustable wrench, or screwdriver to open the bleed valve by turning it anti-clockwise to remove any trapped air. When the air starts to escape it will make a hissing noise. Place a towel or bucket on the floor on the side of the bleed valve. Once the hissing stops and all the air has been removed, water will start to leak out of the valve.
Step 6: Remove the old bleed valve
Secure the adjustable spanner around the bleed valve and keep turning it anticlockwise until you can easily remove it. Some towel rails have bleed screws instead of a bleed valve. If that is the case you can easily remove it by unscrewing it with a screwdriver.
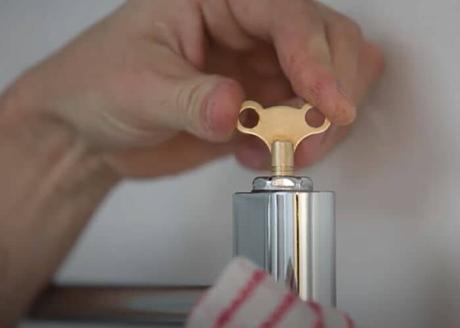
Step 7: Insert the new towel rail bleed valve
Install the new towel rail bleed valve where the old one once was. Simply turn it by hand a couple of times to get it in place, then secure the valve by tightening it with your spanner in a clockwise direction.
Step 8: Turn the towel rail valves back on
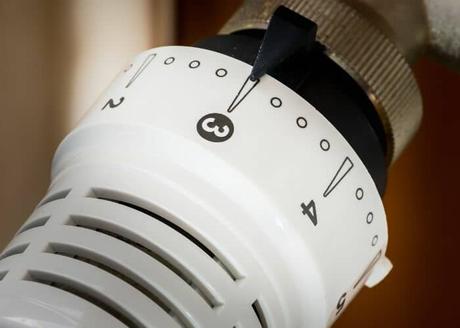
Reset your towel rail valves back to their original position to connect them back to the central heating system. All you need to do is turn the thermostatic valve back to the number you would like it on. Next, move across to the lockshield valve and turn the spindle anticlockwise the same number of times as you did earlier.
Step 9: Bleed the towel rail
Grab your bleed key or screwdriver and bleed the towel rail to release any air that entered when you swapped out the old valve. Head back to step 5 to repeat the bleeding process.
Step 10: Check for any leaks
Finally, check the new bleed valve for any drips or leaks. It is a good idea to monitor your towel rail for a few days to ensure that the replacement bleed valve is working properly.
If the new bleed valve is leaking and you have checked that it is secure, you might be able to stop it by removing it again and wrapping more PTFE tape around the thread.
Unfortunately, if this doesn’t fix the leak it could mean that the thread inside the towel rail is too corroded which means you will need to replace your towel rail.
If that is the case and you are looking for a new towel rail you are in the best place to be. We have plenty of clean modern and beautiful vintage-style heated towel rails for you to choose from and complement your bathroom decor.
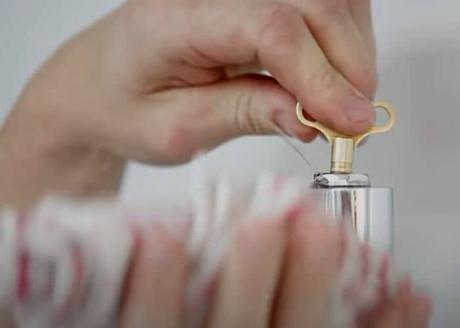
Replacing a towel rail bleed valve review:
- Turn the heating off
- Isolate the towel rail
- Prepare your new bleed valve
- Locate the old bleed valve
- Bleed the towel rail
- Use the spanner to remove the old valve
- Insert the new bleed valve
- Turn the towel rail valves back on
- Bleed the towel rail again
- Check for leaks
Job done
Congratulations, you have just replaced your towel rail bleed valve! We hope you found this blog post helpful. If so, please share it!
As we mentioned earlier, replacing a bleed valve is a pretty quick and easy job that you could try yourself or with the help of a friend or family member.
However, if you have any concerns and you would prefer to call in the professionals make sure to get in touch with a Gas Safe registered engineer.

