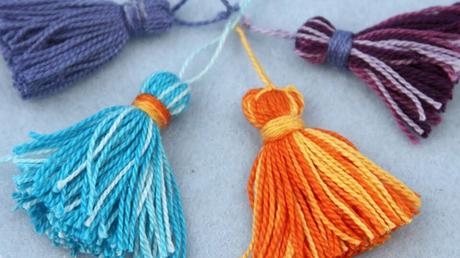
Tassels! After hearing this word, colorful decoration by tassels come in mind. You can find tassel everywhere. They are being used in jewelry, on the lining of clothes, kimono, they are hanging from the bags, even we see them in the lady’s shoes, and they definitely add color and beauty to the product.
With a few touches of tassels, you can completely change the look and vibrancy of your coat or kimono. Even you can prepare a tassel-earring on your own! In this article, we will be including easy steps on how you can make tassels with embroidery thread.
We urge you to read the full “how to make tassels with embroidery thread” guide. Because once you learn how to make tassels, then you can easily go crazy making them!
You can literally choose any material like leather thong or embroidery thread or silk ribbon to prepare one. But for simplicity, we are using embroidery thread to make tassels.
How to Make Tassel with Embroidery Thread?
Firstly, you have to choose the thread of your size or length. You may choose a small one for your boots or shoes and the over-sized one for your saree’s drape. And you can also use the tassel-stash to make beautiful and unique gift-toppers. You can make yourself stand out by wearing a multi-color tassel necklace with your regular t-shirts.
Also, you can get fluffy tassels by combing them regularly. This helps to separate the floss of the thread. Then, you can make easy and beautiful tassels from embroidery thread.

If you happen to have an unused ball of embroidery thread, then tie a thread at the center (or on the crease of one side if you like lighter tassel) and fold over.
Then you have to place a folded thread a little bit above the skin, after repeating the step, tie a same colored thread at the neck, that will hold all the threads together. Don’t worry. We are going to describe the steps in easy detail to help you out to make the beautiful necklace at home.
-
Step 1
The first step is important because this step will decide how long your tassel would be. So, decide the length of your need. Then cut out a small part of cardboard, which will be 1 or 2 inches longer than the thread.
If you are in a hurry, you can use your fingers instead of cardboard. Some even use forks to make tassels. If you are not tapping the cardboard, then we suggest you make a ball of threads that is 18″ long. Because it’s a lot easier to start longer and then trim rather than using small pieces because they give the maker a hard time.
-
Step 2
This is a relaxing and easy step. In this step, you have to wrap embroidery thread around the cardboard or finger some around 20 times. One thing to remember, when you wrap the thread, the tassel will become of the same thickness on both sides of the cardboard.
So, you have to be careful in keeping the threads at the center of the cardboard, not spread out on one side.
Also, don’t wrap too tightly that the cardboard piece is bending or don’t tie so loosely that the loops are slipping out of the board. You should put equal tension on both sides. Stop the wrapping of threads if you think you have reached your desired thickness.
-
Step 3
This step has to be executed carefully. Now is the time to remove the threads from the form.
You have to cut a piece of thread and pit it insert a thick needle. Then, slip the needle in between the thread loops and cardboard. Now, tie a knot over that. While slipping the loop from cardboard, you have to be careful. After the slip is off the board, then cut away any excess tails.
-
Step 4
In this step, you have to tie the tassel at the neck. The neck is placed some before 1/4 inch from the top.
So, now you have to cut out 6 inches of a full thread of embroidery cord or light metal wire so that you can secure and add the loops of tassels. To secure them, you have to wrap the wire over the tassel loops 1/4 inch down from the knot that you have made in the previous step.
For this step, you can also use thin satin or silk ribbons.
-
Step 5
In the last step, your tassel is almost in its form. You have to cut the ends of the tassels equally and evenly with a scissor. Now, separate the yarns form the tassel and thread some beads. And your tassel is ready to rock your key chain or necklace.
Conclusion
So, if you are following us along, you may have a bunch of tassels of different colors. Wondering what to do?
You can make videos on how to make wired earrings with tassels and make a bunch of them. Also, you can spend your free time in making different types of tassels and then decorate your dresses as you like. It will not only stand out in the crowd; it will also help you to add some vibrancy to your regular clothing-line.
