 photography by Trisha Zemp
I was holding onto my templates to publish a book on it all, but it looks like there are just too many paper flower books out or on the horizon :( I was too late! So, I'll start sharing some tutorials with you from time to time. This one was requested by a reader in Copenhagen who has been taking my paper flower class on Skillshare and whose son calls them "Brittany flowers". I nearly died when I heard that as you can imagine.
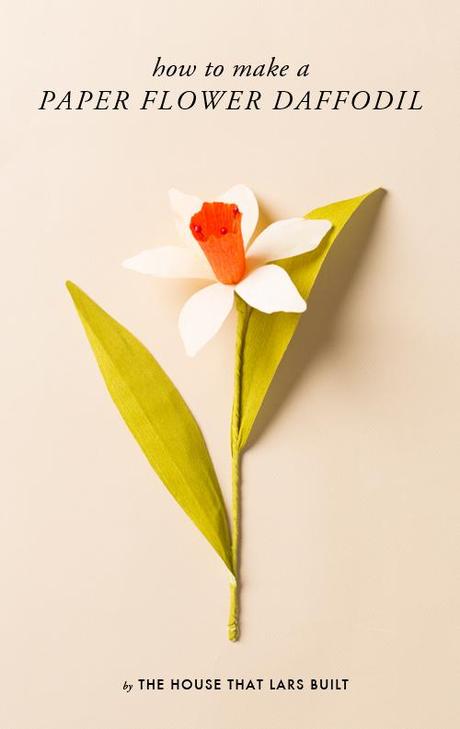
Daffodils are the ultimate spring flower, but the beauty of paper flowers is that you can make them all year long so why not bring in some sunshine now? I adapted this one from a vintage paper flower book. It's the same one I made at all my workshops this past year.
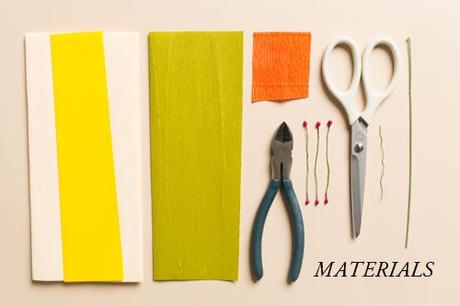
Materials: double sided crepe paper in the color of your choice, double sided green paper, single sided crepe paper (for the orange), wire cutters, scissors, glue gun, floral wire, thicker 18 gauge wire (I cut mine in half so it's about 9"), stamen (the middle of the flower, the red thingies above--I got mine from an antique store but you can search vintage stamen or just stamen on Etsy), template (download here)
Step 1. Cut out the templates. I cut mine out on chipboard so they are sturdier and last longer
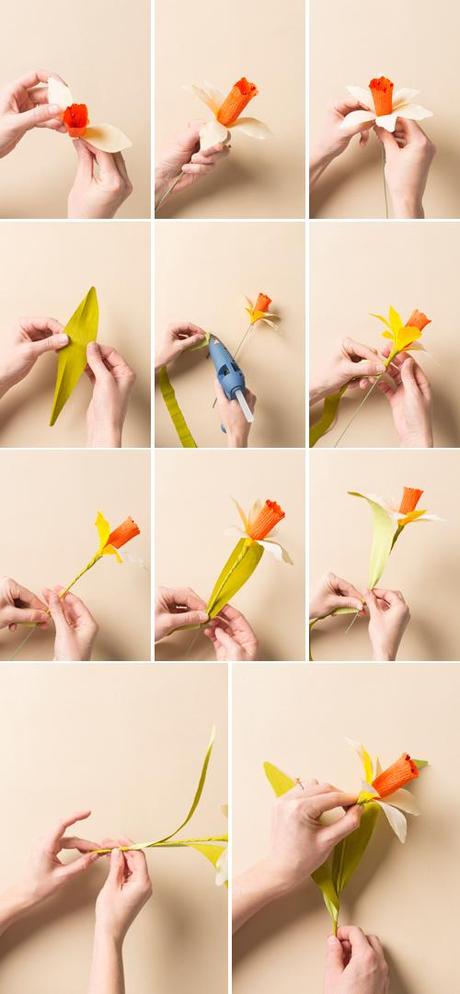
Step 2. I started with what I call the "buttercup" which is the orange in the first picture. The three lines on the template indicate the grain of the crepe paper so align that first. The side of the right angle is to be placed on a gold.
Step 3. Bring the two ends together and glue them together to firm a circle.
Step 4. With your thumbs and forefingers, do what's called "fluting" and shape the wavy pattern at the top by going back and forth so that it creates a wave effect.
Step 5. Now cut out the petals. It's easier to cut out multiples if you accordion fold them. Cut out 6. Make sure you have aligned them with the grain of the crepe paper.
Step 6. With the edge of your scissors, gently curl each petal. Not too much. It should be an easy curl.
Step 7. With your thumb and forefinger, "flute" each side of the petal so that it's wavy.
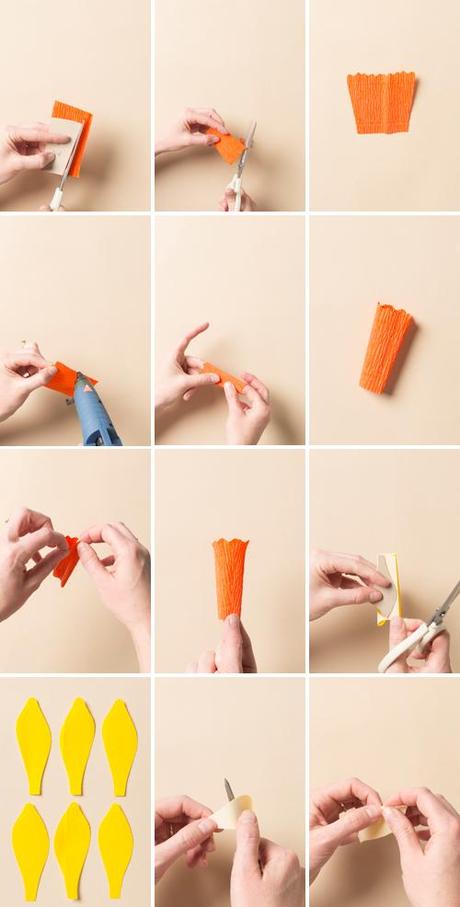
Step 8. Gentle stretch each petal. Again, not too much. This will create a firmer, more natural shape.
Step 9. Cut out your leaves.
Step 10. Cut out what will be your stem by cutting a 3/4" width strip of crepe paper from the green going against the grain. I folded it to go more quickly.
Step 11. Stretch out the stem paper very gently.
Step 12. Insert your stamen into the buttercup.
Step 13. Insert your thicker wire that will be the stem.
Step 14. Tie it together at the bottom with a 3" piece of floral wire.
Step 15. With your forefinger, gently go around the inside of the buttercup to create a more rounded shape at the bottom.
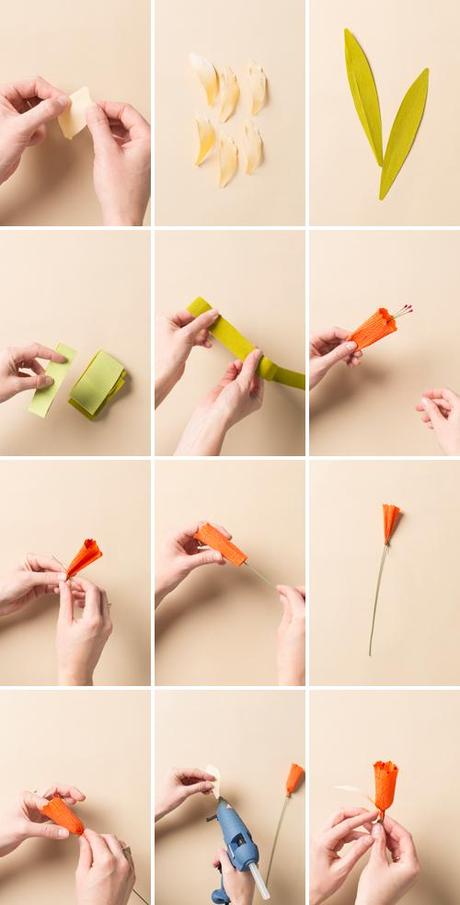 Step 16. Now it's time to attach the petals. Add a dab of glue at the bottom of each petal and attach it just above the wire. Evenly spread out the first three petals and then add in the remaining petals.
Step 17. Gently stretch your leaf out so it gives a bit of shape. I usually do it more at the top.
Step 18. Glue a strip at the edge of the stem paper and attach it to the bottom ridge of the petals, making sure you hide the wire.
Step 19. Wrap the stem paper tightly around the stem.
Step 20. When you would like to add in a leaf, simply pause the winding and insert it in. Then continue wrapping around. Add in another leaf if you'd like.
Step 21.When you've reached the end, glue it to the bottom.
Step 22. Style the daffodil by bringing the bloom at an angle. Remember, a daffodil always faces the sun!
Voila!
