Creating an online shop with WordPress is pretty simple – thanks to the WooCommerce WordPress plugin. Plus, if we need to increase our sales and conversions, one of the proven methods is offering coupons. If you check any online shops, you could see that they may be running limited-time coupon codes or something similar.
WooCommerce got default settings for creating coupon codes. Well, in this article, we will be expanding it to something else. A lot of stores will be promoting buy one get one deal. Compared to the normal discount strategies, BOGO deals will be more attractive.
When a user needs to buy something cheap, probably they will look for these type offers – I know it


If you do not know how to create a BOGO deal in WooCommerce, we are here to help. In this article, we will be showing you the step by step method for creating a BOGO deal inside WordPress in a few mouse clicks.
What Is Advanced Coupons
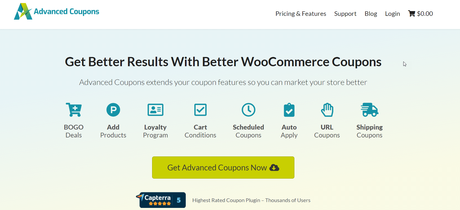
Advanced Coupon is a freemium WooCommerce plugin that will help you to extend your coupon features. This way, you’ll be able to set custom rules for your coupon, cart, shipping, etc.
The free version plugin (Advanced Coupons Lite) is available on the WordPress plugins repository.
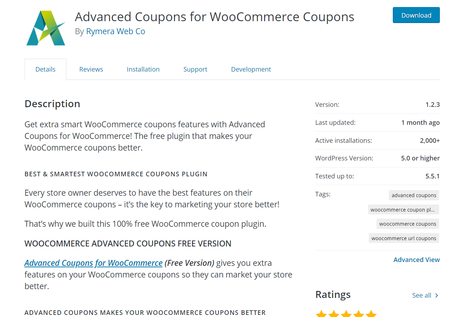
With the free version plugin, you can run BOGO deals, set custom rules, configure cart conditions, coupon by URL, restrict coupon by the user roles, etc.
On the other hand, if you have the premium version plugin, you will get advanced BOGO settings. Well, if you are running a big online shop, you might want to consider purchasing the premium version. As of today, there are two premium plans.
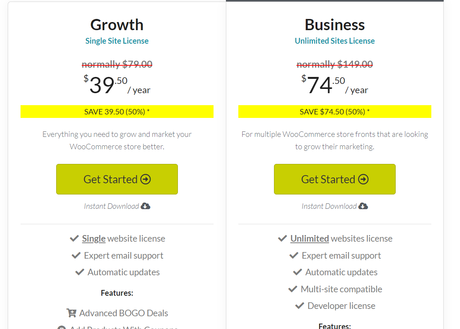
Choose a plan according to your needs.
How To Make a BOGO Deal In WooCommerce?
Now, let’s see how we can make a BOGO deal in WooCommerce using the Advanced Coupons WordPress plugin.
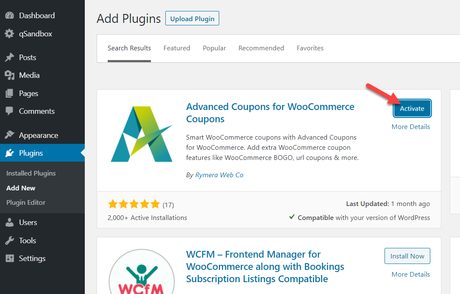
If you are planning to use the free version plugin, log in to your WordPress blog, install the Advanced Coupons Lite WordPress plugin.
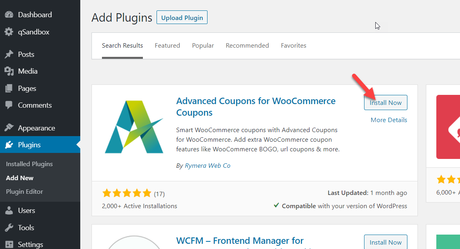
Once you have installed it, simply activate the plugin.
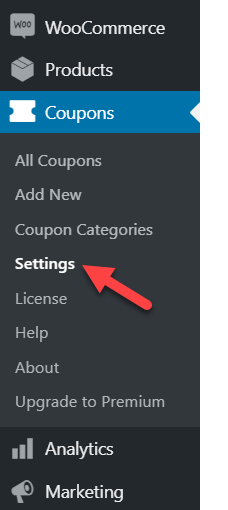
You can see the plugins’ settings under the coupons section.
You can configure the global BOGO settings from there.
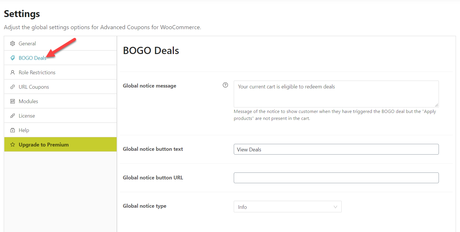
If you do not want to change any values there, leave it blank. The main configuration will be happening when we create coupons. In the coupon rules section, we can configure the BOGO deal.
So, create a coupon for your WooCommerce shop.
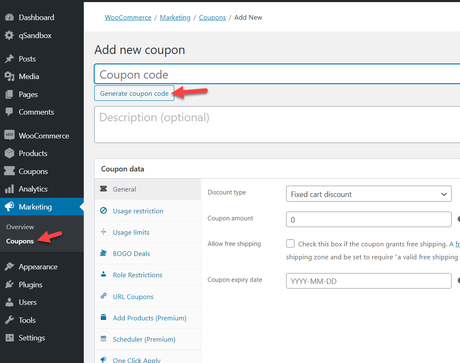
You can enter a code manually or generate one. That’s totally up to you.
Under the coupon data section, you can see an option for configuring BOGO deals.
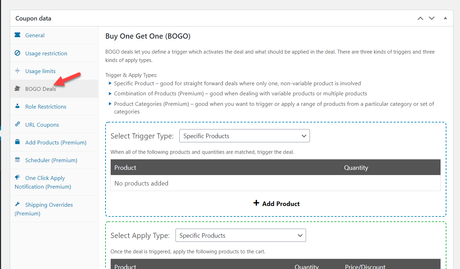
And that’s the settings we need to modify. You can see two main rules there.
- Trigger Type.
- Apply Type.
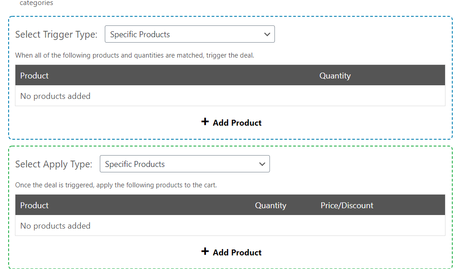
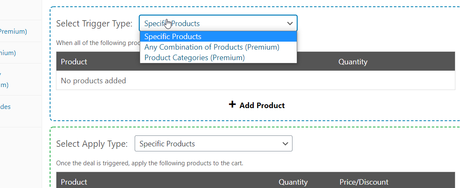
In the free version plugin, you can only select Specific Products as the trigger type and the apply type. But if you are using the premium version plugin, you can choose Any Combination of Products and Any Categories in the field.
In our demo WooCommerce store, we have several dummy products. So, we will show you the tutorial using any of those products.
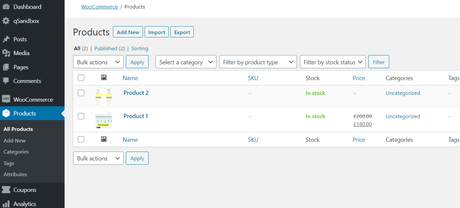
Add a product to the trigger type section.
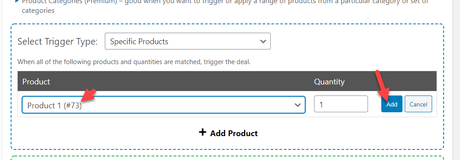
In the apply type, you will be able to customize the discount.

There are three discount options.
- Override Price.
- Percentage Discount.
- Fixed Discount.
If you need to set a custom price for the second product, choose the first option. By choosing the percentage discount option, your users will be able to get a custom percentage discount on their order.
The third option will allow you to set a custom amount discount for the product. In our case, we are going to set a 100% discount on the order. So, choose the second option, add 100% in the field.
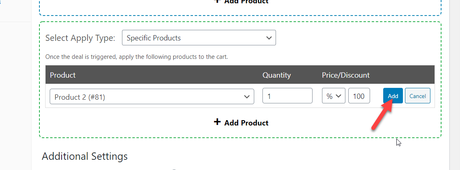
If you are planning to create a BOGO deal for multiple products, you might want to add them all in the apply field. Once you have done this, move to the bottom section. There, you will see the additional settings.
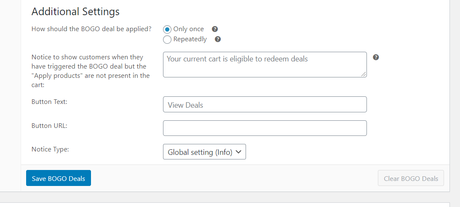
After configuring everything, click on the Save BOGO Deals button. It will go live now. When a user adds the first product to his cart, apply the coupon just we saved, he will get a notification in the screen. From there, he will be able to add the second product to his cart, without paying extra!
That’s it!
So this is how you can create a BOGO deal inside WooCommerce.
How To Promote BOGO Deals?
We have successfully created a deal inside our shop now. The next thing we need to do is, promote it, let the website visitors or your customers know. Thankfully, there are several methods available for it.
Send Email Newsletters
If you are running an online shop, probably you got an email list. Try to send newsletters regarding your limited-time deals. If you have entered the URL in the mail, the subscribers can land on the page in a single mouse click.
This can be done from your email marketing service. The famous ones are MailChimp, SendInBlue, AWeber, ConvertKit, etc.
Use Popups
With a powerful lead generation plugin like OptinMonster or Bloom, we will be able to create popup campaigns without using any codes. And we can use the same for promoting our deals. Let’s say that we have created an exit-intent campaign using the OptinMonster app contains our deal information.
So when a visitor goes back, the popup will be triggered. If you have added a direct URL to the deal, the user will probably check it.
This way, we can reduce the lost leads.
Read our OptinMonster review for knowing more about the app and how it works!
Get Started With Advanced Coupons
You can get started with the premium version of Advanced Coupons from below.
Get Started With Advanced Coupons
$This is an affiliate link
We hope you have found this article helpful and learned how you can create a BOGO deal inside WooCommerce. If you did, please consider sharing this post with your friends and fellow bloggers on social media. It will probably help any store owner to increase their conversions.
You can read more WordPress tutorials, theme/ plugin reviews, and marketing tips from our blog section.
Related Articles You Might Like:
- How To Set WooCommerce Coupon Rules With Advanced Coupons Plugin
- How To Enable Enhanced WooCommerce Tracking Using MonsterInsights
- Shopify vs. WooCommerce: Which Is The Best Platform For Online Stores?
- WooCommerce Direct Checkout Review: Simplify Your Checkout Process!
- WooCommerce Checkout Manager Review: Here’s a Userful Plugin For Online Shops
Did you find the article useful?
Then pin me to your Pinterest Board, so that more people will find me
(Remember: The more you give to the Universe, the more you will get from the Universe)
