The Android platform has got ample options to customize your Android devices and tablets. You would be able to modify the system software with these methods quite easily, which the OEM would normally restrict you to perform.
You can consider this mod if you are thinking of rooting this device or add third-party features.

Magisk was originally developed by topjohnwu, back in the year 2016 and gradually, it got new features added to it, like the MagiskSU. It is also classified as a replacement for SuperSU.
This mod is potent of rooting any Android device running Android Lollipop, Marshmallow, Nougat, and Oreo.
- Pass Google's SafetyNet tests though your phone that is to be rooted.
- Make use of banking and security applications on rooted devices.
- Modify the software without tampering the system (vendor) partitions.
- Use open-source root solution to root any Android device.
- Manage root permissions.
- Make use of the fingerprint scanner to allow superuser requests.
- Remove kernel features like forceencrypt and dm-verity.
- Add third-party features by using Modules.
Prerequisites
- Method 1 needs to install TWRP Custom recovery.
- Method 2 needs to install ADB and Fastboot tools.
- Take a complete backup of your personal data.
See also: Official Galaxy S9 wallpapers, themes, sounds and apps [port] - download 'em here
Install Magisk Universal Systemless Interface:
The first method uses TWRP to flash the latest Magisk zip. In case TWRP is not available for your device, or you do not want to use it, opt for the second method.
WARNING: All the custom ROMs, Official Firmware, How-to guides, tutorials, roots, hacks, and tricks mentioned on our site belong to the respective developers. We are not responsible if anything goes wrong with your device. Perform it at your own risk.
Method 1: Flash Magisk using TWRP Recovery
- Download the latest stable/beta Magisk zip.
- Connect your phone to the PC.
- Transfer the downloaded zip file to the internal storage or SD card.
- Make use of the special button combination to boot your Android device into TWRP recovery.
- You can also use the following ADB command after connecting your device:
adb reboot recovery
- Tap on the "Install" button in the Main menu.
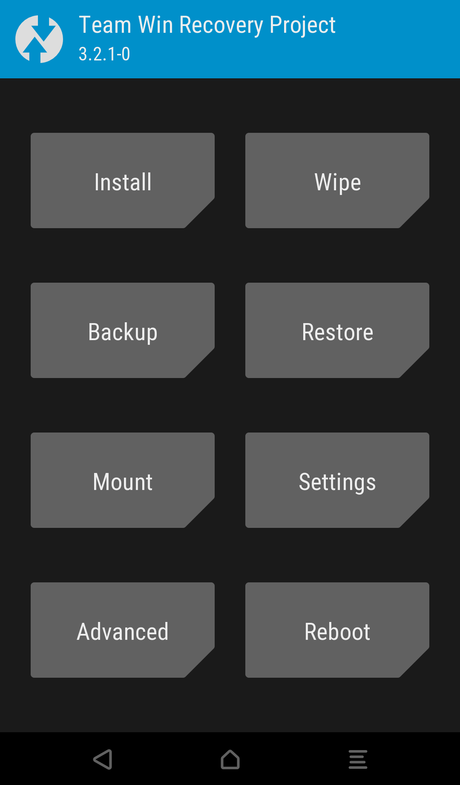
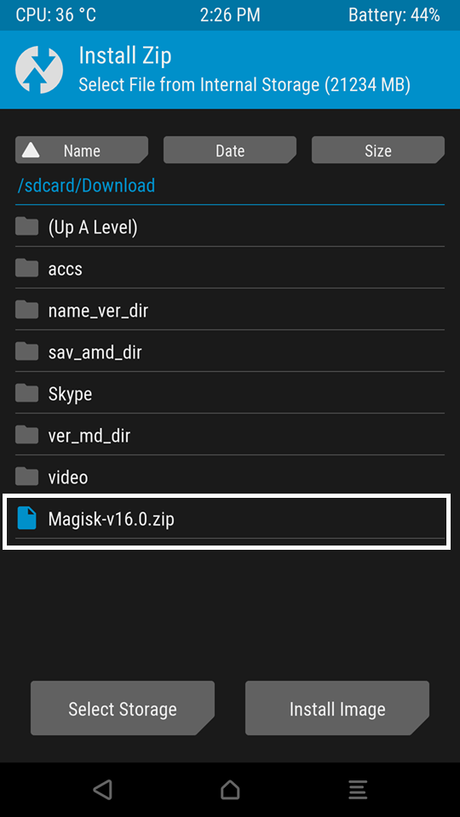
- Navigate to the internal storage.
- Select the Magisk 16.3 ZIP file.
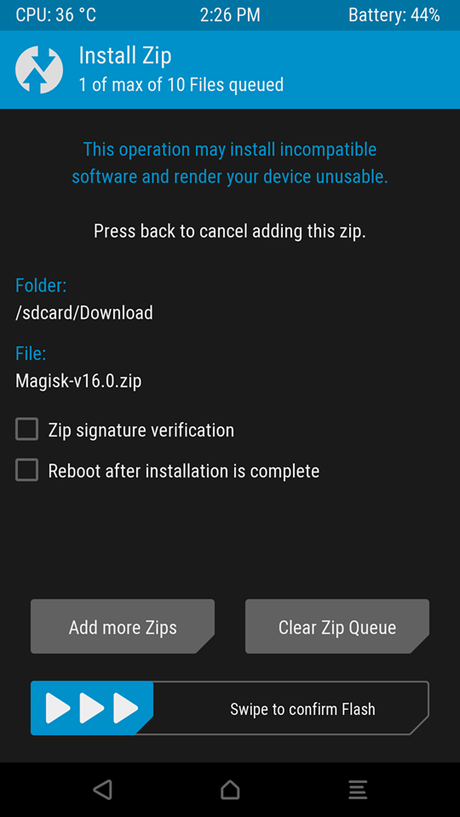
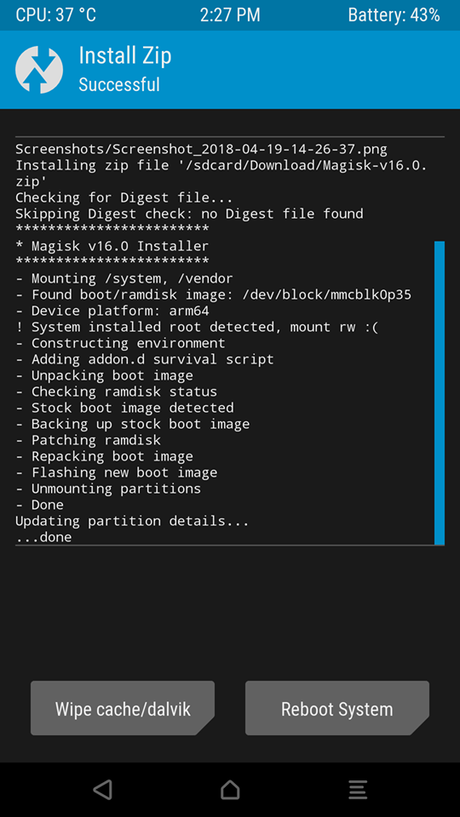
- Now, swipe the button on the screen to install Magisk on your Android device.
- HIT "Reboot System" button as the flashing process completes.
See also: Install Official ViPER4Android Audio Effects on Android 8.1 Oreo
Method 2: Patch Stock Boot Image
- Grab the stock boot image for the current firmware that is installed on your device.
- Now, place the boot image on the phone's internal storage or SD card.
- Download the Magisk Manager APK.
- Install the APK on your device.
- Open "Magisk Manager".
- Tap on the "Install" button.
- Choose "Install" again.
- Select "Patch Boot Image File".
- Navigate to the storage.
- Next, select your phone's boot image that you have already transferred before.
- Let Magisk do its job and patch the boot image.
- After it is patched, copy the "patched_boot.img" file from /sdcard/MagiskManager/ to C:\adb on your PC.
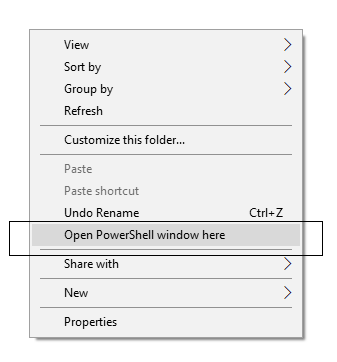
- Hold the SHIFT key and right-click on an empty space in that same folder.
- Now, select "Open PowerShell window here."
- You need to boot your Android device into Bootloader/Fastboot mode.
- The phone needs to be connected to the PC.
- Flash the "patched_boot.img" in order to install Magisk and root your Android device:
fastboot flash boot patched_boot.img
- Use Fastboot reboot to reboot your Android device:
fastboot reboot
- Confirm that the installation procedure was successful by opening the Magisk Manager.
You may further check out the Collection of Magisk Modules V2.0 from the official repository (XDA)!
See also: Top 50+ Android Apps for Rooted Devices!
If you encounter any problem, please comment below, and we will get back to you as soon as possible.
Please don't forget to share if you have found this post helpful!
