Every WordPress site got its own popular articles. If your content is good enough and you have optimized it with the best SEO practices, you will see a hike in the website traffic.
If you are getting too many visitors in your popular posts, make sure that you have optimized your website for even more.
In this post, we are going to show you how you can display popular posts using the MonsterInsights WordPress plugin. If you want more traffic to your popular posts, you need to display them on your sidebar/ inside content or on any widget areas. With a popular plugin like MonsterInsights, it is possible!
MonsterInsights- MonsterInsights is the Best Google Analytics Plugin for WordPress
- Over 2 million Professionals use MonsterInsights to grow their Business
- Up to 50% off on MonsterInsights Subscriptions - Limited Time Deal (Only for Today!)

MonsterInsights
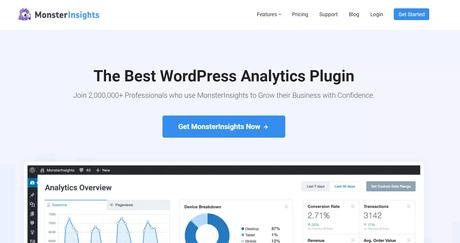
MonsterInsights is a freemium WordPress plugin created by the Awesome Motive team. Without editing any theme files or adding codes, you will be able to complete the Google Analytics property authentication with MonsterInsights. The good thing is, the free version comes with all basic features and the premium version will give you more unique features.
MonsterInsights Lite is available on the WordPress plugins repository.
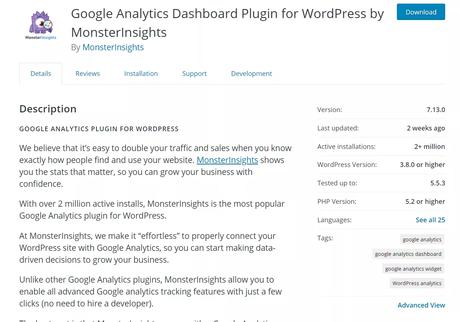
As you can see above, the free version plugin is used on more than 2 million active WordPress websites. The premium version MonsterInsights comes with unique features like universal tracking, eCommerce tracking, affiliate link tracking, forms tracking, scroll tracking, author tracking, post type tracking, file download tracking, etc.
When you run an eCommerce shop or something, probably you will need to get the premium version plugin on your site.
Well, if you need to learn more about the plugin, you might want to check out our MonsterInsights review. There, we have already shared what this plugin can do and all its features.
How To Display Popular Posts Using MonsterInsights?
Now, let’s see how we can display popular posts on your WordPress site with the MonsterInsights WordPress plugin.
The very first thing you need to do is, purchase any premium plan. As of now, for displaying the popular posts on your site, you will need the Dimensions add-on.
For the Dimensions feature, you will need to purchase the Pro or Agency plan. As of today, the Plus plan doesn’t come with this feature.
Once you have purchased the Pro/Agency plan, log in to your MonsterInsights account. From there, you will be able to download the premium plugin files and access the licensing information.
What you need to do is, install, and activate the premium plugin on your site. After activation, you would want to verify your license key.
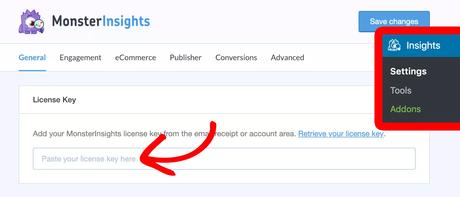
Now, enable the Dimensions add-on from the add-on settings. After installing it, activate it. Now, you are good to move forward.
Under the Conversion Settings, you will be able to see the Custom Dimensions configuration.
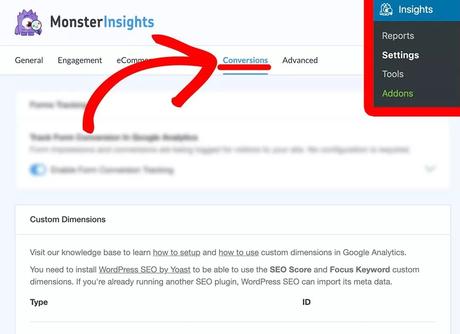
Thankfully, MonsterInsights will help us with setting up dimensions like:
- Logged In.
- User ID.
- Post Type.
- Author.
- Category.
- Published At.
- Tags.
- SEO Score.
- Focus Keyword.
From the above, we need to choose the Post Type custom dimension. After choosing the Post Type custom dimension, click on save changes.
Next, we need to set up the same on our Google Analytics property. For it, log in to your Google Analytics account and go to the analytics property.
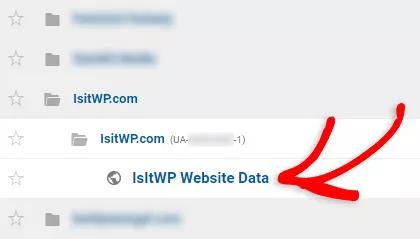
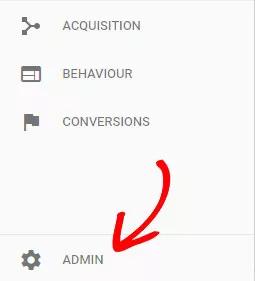
Now, go to the property admin section.
Under the Custom Definitions settings, you will see the Custom Dimension settings.
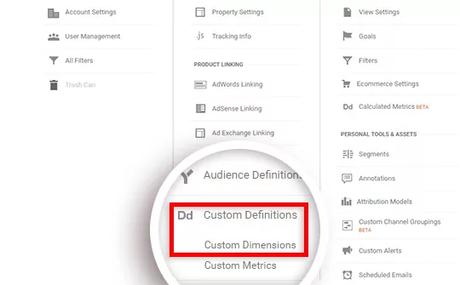
From there, you will be able to add new custom dimensions, assign them to your property.

We will need to name our dimension. This is just for identifying it. And once you have entered the dimension name, click on create.
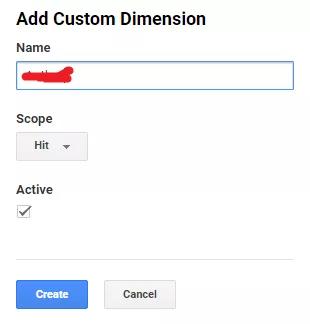
On the next page, Google Analytics will give you something like this:
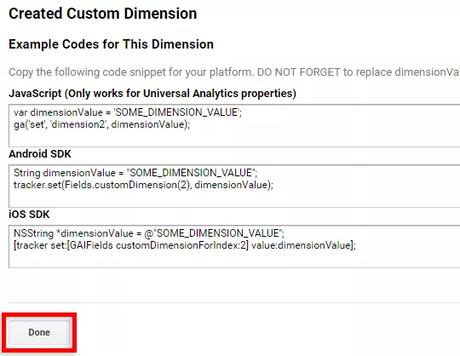
No additional configuration is required. You can just click on Done and you are good to move forward.
After creating custom dimensions, you will be able to see all of them in your dimension section. Also, the Google Analytics site will assign a custom ID for your custom dimensions.

What you need to do is, copy the ID from there, paste it into your MonsterInsights settings.
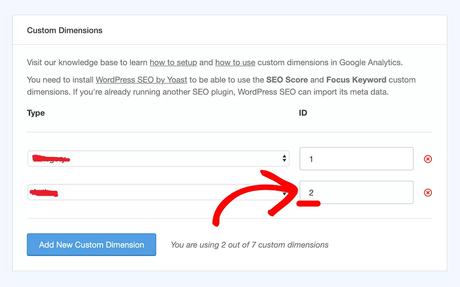
And that’s it! You have successfully installed, activated the Custom Dimensions add-on, and configured it on your site.
The plugin will take a minimum of 24 hours to a maximum of 48 hours for fetching data from your Google Analytics property. So, you will need to wait at least 2 days before further configuration.
Here comes the main settings.
You will need to go to Inline Popular Posts Section. You could see this under the Insights > Popular Posts.
in the Sort By section, you can choose the posts you wanted to display on your site. In our case, we will be displaying custom posts from our site. So, we need to choose the Curated option from there.

Right after selecting the Curated option, you will see a text box below it. You can use it for adding your blog posts. All you need to do is, type two or three words of your post title, and the plugin will show you the complete title.
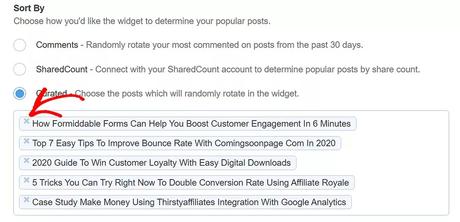
For removing posts from your selection, click on the X button.
MonsterInsights comes with an AutoSave feature. So, you do not need to save your MonsterInsights settings after modifications. The next thing we need to do is, enable the Automated + Curated feature on your site.
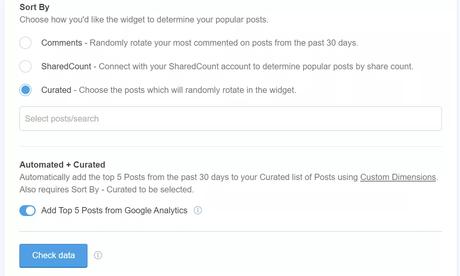
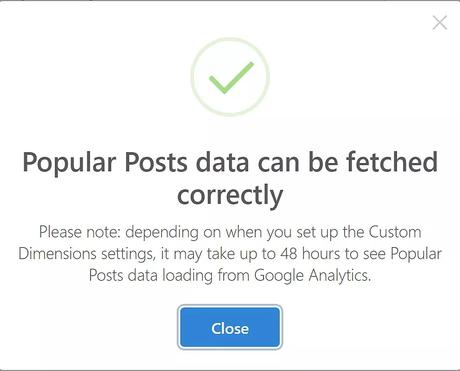
Click on the Check Data button.
If you have configured everything correctly, you will see a success message.
From the Popular Posts settings, you can configure the display type.
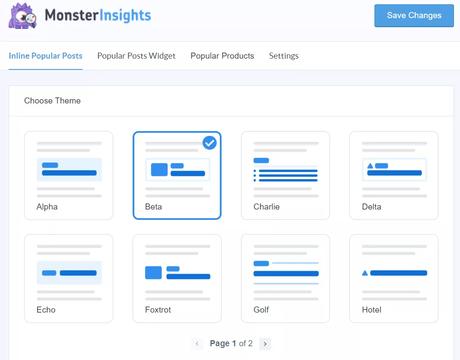
You could see several display types like:
- Alpha.
- Beta.
- Charlie.
- Delta.
- Echo.
- Foxtrot.
- Golf.
- Hotel.
You can choose any of them from there. The good thing about it is, you do not need to know any CSS for alignment. You can choose a design from there and you are good to go.
That’s it!
With MonsterInsights, tracking and reporting are simple!
Get Started With MonsterInsights
You can get the premium version of MonsterInsights premium from below.
Get Started With MonsterInsights
$This is an affiliate link
So this is how you can display popular posts on your WordPress website. We hope you have found this article helpful and enjoyed the read.
If you need more WordPress tutorials, check out our blog section.
Related Articles You Might Like:
- MonsterInsights Review 2021: A Powerful Google Analytics Plugin For WordPress!
- How To Share Your Google Analytics Stats With Others (MonsterInsights Method)
- How To Configure Author Tracking On Your Website and Find The Best Authors?
- How To Enable Enhanced WooCommerce Tracking On Your Online Store?
- How To Make Your Google Analytics CCPA Complaint (Method Published)

Did you find the article useful?
Then pin me to your Pinterest Board, so that more people will find me
(Remember: The more you give to the Universe, the more you will get from the Universe)
