Do you want to create high-quality photos for a website? If you are looking for a step-by-step guide, we have something for you!
Images are essential for every website. We all can agree on that. When you run a WordPress blog where you teach tutorials, you should upload multiple screenshots and related files.
On the other hand, when you handle a WooCommerce or Easy Digital Downloads store, you might want to upload images of your product pages to make more conversions.
Uploading images to a website is simple. If you use WordPress as the CMS, you can easily upload media files through the Media Library and embed them inside posts, pages, or custom post types.
But are you sure you are uploading high-quality image files?
If you need clarification, we can help you with the problem. This article will mention why and how to create high-quality images with no effort.
First, let’s learn why high-quality images matters.
Why Do You Need to Use High-Quality Photos?
High-quality photos will help you build a reputable brand and stand out. Let’s start with an example. If you purchase something online, you will probably look for the product gallery, right?
There is STORE A with a high-quality product gallery and STORE B with low-quality images. Both websites are good, and they deliver the goods.
In most cases, people will use STORE A because it has better images and provides a good user experience.
Hence, high-quality images are necessary when you handle an online business.
6 Steps to Create High-Quality Photos for a Website
The six ways to make an image better are:
- Compress them
- Hire someone if you need
- Use the best file format
- Choose styling wisely
- The proper resolution can be helpful
- Enhance photo
Let’s take a closer look at each option.
1) Compress the Image

When you add too many images to a blog post or a page, the page size can be larger. It could be a better practice for website speed and performance.
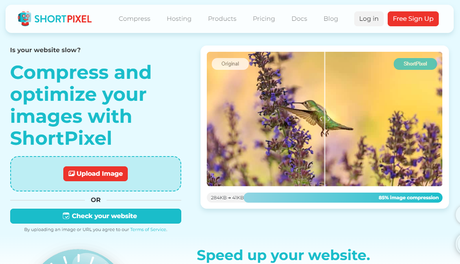
Compressing images will help you optimize the website’s speed without losing the image’s quality. There are so many online tools available to do the job. Three of the popular ones are:
On the other hand, if you use WordPress as the CMS, you can use any image compression plugin.
It is an excellent way to generate high-quality images with small sizes.
2) Hire Experts

If you deal with vectors, you should hire a graphics designer. On the other hand, if you deal with normal photos, hire a professional who knows the job.
Hiring experts will help you generate quality images without any hassle. Since they are good at their job, you can expect high-grade results.
When you need a graphics designer, you can look at freelancing platforms like UpWork, Fiverr, or Freelancer. You could get them every month or weekly basis according to the requirements.
3) Use the Best File Format

You can generate images in multiple formats. Some of the popular ones are:
- JPG
- PNG
- WEBP
- JPEG
And so on.
Make sure you are using a suitable format. If you care about the performance, you should be using WEBP-based images. This way, you can reduce the overall size of the image without losing the quality.
On the other hand, if you still prefer PNG, it is a good option too.
4) Stick with the Best Styling

When you handle a blog, you have probably got brand colors. When designing your images, ensure you are sticking with those colors.
Ensure the colors are not too bright, and it will attract users. Light colors could be a great addition since they won’t affect the user experience.
You can also give the images a CSS-based border to stand out from the content. When you run a content-based clog, this would come in handy.
Overall, styling matters in the quality of the photos.
5) Check the Resolution

Before uploading the image to your website, ensure you have the files in the proper resolution. Resolution plays a vital role in the quality of the picture.
There are four types:
- HD (1280 px *720 px)
- FHD (1920 px * 1080 px)
- 2K (2560 px * 1440 px)
- 4K (3840 px* 2160 px)
You can choose one according to your preferences. We recommend at least using HD resolution for the images.
This way, the image can handle & display every detail without hassle.
6) Enhance Your Photo

Photo editors come in useful in most situations. How to improve the quality of photos is a common trend among people.
The right tool can help you with the process.
- Exposure level
- Color balance
- Sharpness
- Cropping
- Effects
- Retouching
- Caption
And so on.
There are a lot of tools available for the same task. We recommend checking out them individually to see which one you should pick.
Also, if you are a beginner, we recommend using a free tool. As your business grows, you can upgrade to a premium license and get more cutting-edge features.
Recommended Read: BGremover Review: Remove Image Background With One Click
Conclusion
As we mentioned initially, images are very useful parts of any website. Whether you are running a personal blog or a business website, you should invest time in generating high-quality photos.
There are six things you need to note when developing high-quality images. They are:
- Compress them
- Hire someone if you need
- Use the best file format
- Choose styling wisely
- Check the resolution
- Enhance photo
Compressing the image can reduce the file size without losing the quality. An expert can help you with the image development process and help you get the best results.
Ensure you are using the suitable file format and styling so you won’t lose quality.
Finally, you can enhance the photo to make it more visually appealing.
We hope you have found this article helpful and enjoyed reading it. If you did, please share this post with your friends and fellow bloggers on social media. For more related articles, you should check our blog archive.
