Coupon popups are the best way to gain more sales and conversions. If you are looking for a simple way to create a coupon popup in WordPress, keep reading this article. At the end of this tutorial, learn how to create a coupon for your WooCommerce store, configure it and display it using a popup.
How To Create a Coupon Popup In WooCommerce?
For creating a coupon popup in WooCommerce, we need two tools.
- Advanced Coupons
- OptinMonster
We’ll describe them below.
Advanced Coupons
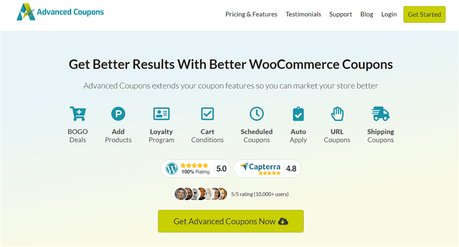
When looking for a powerful WooCommerce coupon system enhancement plugin, you will probably land on Advanced Coupons. It is one of the freemium WooCommerce coupon plugins for WordPress. And also, it comes with several unique features. Some of the features of Advanced Coupons are:
- BOGO Deals
- Loyalty Program
- Cart Conditions
- Coupon Scheduling
- Auto Apply
- URL Coupons
- Shipping Discounts
Etc.
Advanced Coupons- Advanced Coupons Plugin is the #1 WooCommerce Coupon Plugin
- Include Exclusive Coupon and Offer based features to your WooCommerce store
- 50% off ANY Advanced Coupons Premium plugin (a huge potential saving of $99.50!). Includes early renewals & subscription reactivations. (Offer valid only today!)

OptinMonster
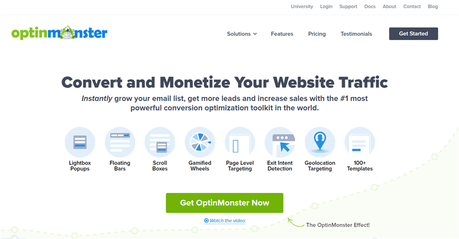
If you check the internet for the best lead generation tools, OptinMonster would be on the list. It is a famous and powerful lead capturing tool designed by Awesome Motive. We have tested several plugins like Bloom, Thrive Leads for managing the email optins. But still, OptinMonster is the best tool we have used so far.
Some of the popular features of OptinMonster are:
- Drag and Drop Editor
- Yes/ No Forms
- Countdown Timer
- Inline Forms
- Floating Bar
- Coupon Wheel Optins
- Exit-Intent
- Email Marketing Services Integration
- A/ B Testing
Etc.
You can read our OptinMonster review for more. We have mentioned everything about the plugin there.
OptinMonster- OptinMonster is the #1 Toolkit to boost your conversions
- Over 1 million Professionals use OptinMonster to increase their subscribers
- Up to 35% off on OptinMonster Subscriptions - Limited Time Deal (Only for Today!)

Now, let’s see how we can create a WooCommerce coupon popup.
1) Create WooCommerce Coupon
By default, WooCommerce or WordPress will never create a coupon. You need to do it manually. In this section, we will show you how you can create a WooCommerce coupon code.
The very first thing you need to do is, install the WooCommerce plugin on your website. If you have already done that, skip this step.
Go to Plugins » Add New and search for WooCommerce. After finding it, install it on your website.
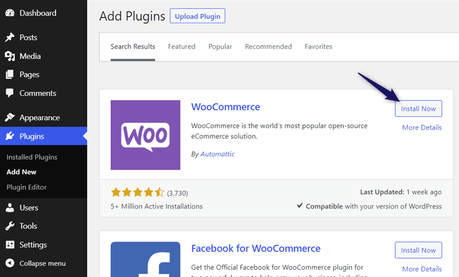
After installing it, activate the plugin.
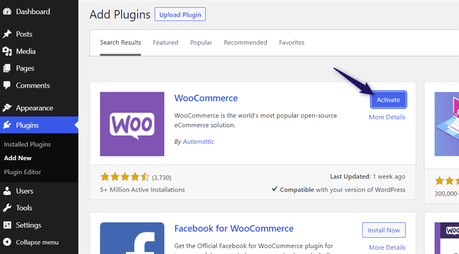
You will be redirected to the store setup process after successful activation. You can complete the setup from there or skip it. You can complete it later.
Under the WooCommerce marketing section, you will see a dedication option for creating coupons. Click on Add New to create a new WooCommerce coupon code.
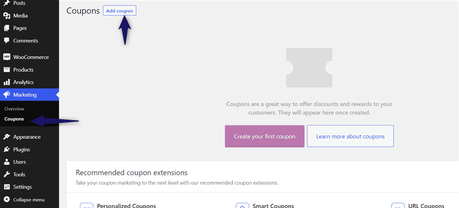
From here, you can generate a coupon code.
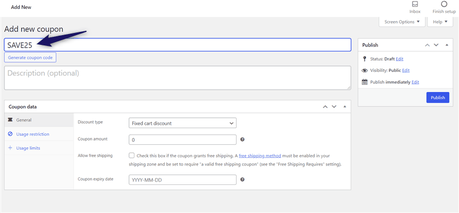
You can manually enter a coupon code or generate one. From the coupon data section, you can customize it. Well, for better coupon code customization, we need to use the Advanced Coupons WordPress plugin.
We will show you the step-by-step guide below.
2) Configure Coupon Using Advanced Coupons
Once you have paid for the Advanced Coupons, you can log in to the account, download the premium plugin files. Install and activate the plugin on your WooCommerce site.
After activation, the plugin will add several extra coupon customization options to the WooCommerce core.
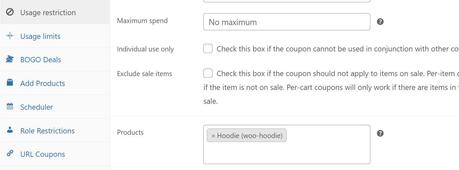
You can configure the usage restriction, usage limit, BOGO deals, add products, scheduler, role restriction, URL coupons from there. Cart Condition is another essential option you need to check.
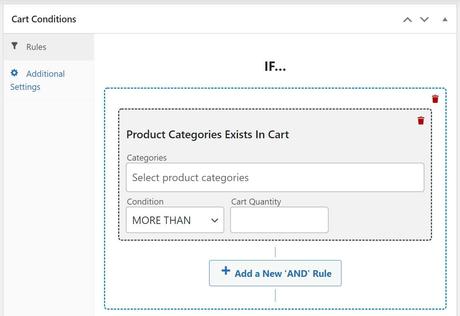
After using Advanced Coupons for managing our coupon, move to the next step.
3) Use OptinMonster To Display The Popup
Now, you have created a coupon and customized it. The next thing we need to do is, create a popup form, display the coupon code inside it.
We will be using OptinMonster for displaying the popup.
OptinMonster is a premium WordPress plugin. You need to purchase one of their plans for using it. By using your PayPal account or Credit Card, you can complete the purchase.
Install the OptinMonster plugin on your blog. After that, you need to verify your license key.
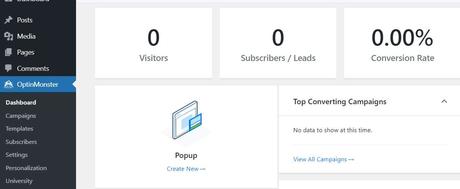
Now, you are good to move forward. From the OptinMonster dashboard, you can choose a template. In this case, we will be selecting the coupon template.
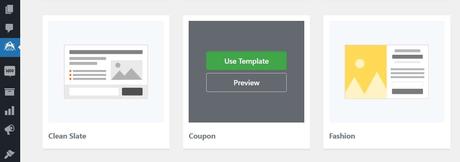
On the other hand, you can also create a custom template from scratch. In this case, the OptinMonster team designed a coupon template for us. So, we can move forward with that design. It will help us to save some time.
From the next step, you can design the optin.
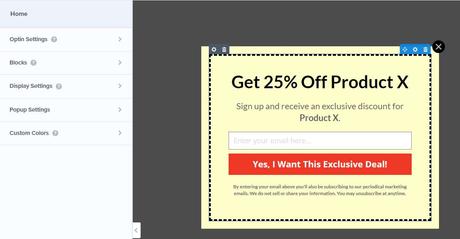
On the left panel, you can see the options. The right side will show a preview of the optin. You can see several optin customization options like:
- Optin Settings
- Home
- Display Settings
- Popup Settings
- Custom Colors
Etc.
You can modify the elements by clicking on them.
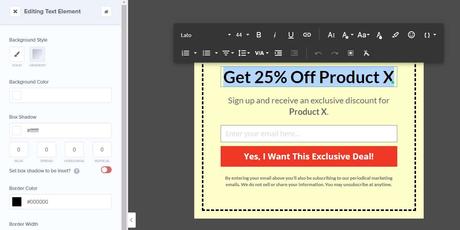
You will see options like:
- Background Style
- Background Color
- Box Shadow
- Border Color
- Border Width
Etc.
You can also select the email field, edit the placeholder text. After configuring the optin’s designs, you need to check out the success tab.
You can display the coupon code there.
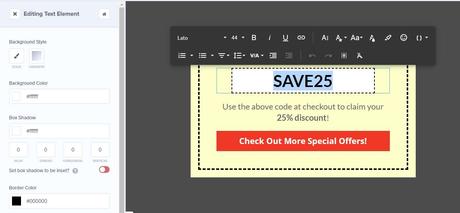
So when your users enter their email address and submit the optin, they will see the coupon code. That’s the plan. Now, you are ready to configure the optin display options.
From the display settings section, you can see the available customization options.
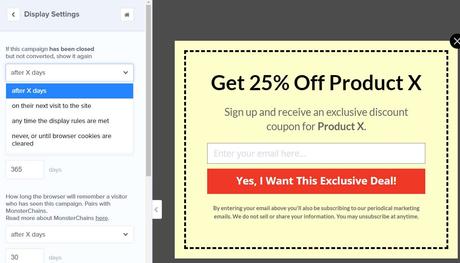
Display options available there are:
- After X days
- On their next visit to the site
- Any time the display rules are met
- Never, or until browser cookies are cleared
You can save the optin after customizing the optin.
From now on, OptinMonster will display the coupon popup for your website visitors. And when they enter the email address, OptinMonster will display the custom coupon code we created inside the optin.
Conclusion
Email list building is no more optional. When you are running an eCommerce site, you need to capture your website visitor’s email address. It will help you to get new customers. Using OptinMonster and Advanced Coupons WordPress plugin, you can start creating custom coupon codes, display them inside your website.
It will probably help you to capture new email addresses and gain more sales!
Get Started With Advanced Coupons & OptinMonster
You can get the Advanced Coupons premium plugin from below.
Get Started With Advanced Coupons
$This is an affiliate link
Check out the premium OptinMonster plans from below.
Get Started With OptinMonster
$This is an affiliate link
This is how you can create a coupon popup in WooCommerce. We hope you have found this article helpful and enjoyed the read. If you did, please consider sharing this post with your friends and fellow bloggers on social media. It will probably help someone to create a coupon popup in WooCommerce.
For more WordPress tutorials, you need to check out our blog.
Related Articles You Might Like:
- How You Can Set WooCommerce Coupon Rules Using Advanced Coupons?
- How To Run WooCommerce Flash Sales and Increase Your Revenue?
- How To Schedule and Auto-Apply WooCommerce Coupons?
- Why You Need To Start a Loyalty Rewards Program Inside Your WooCommerce Store?
- How To Give Free Shipping In WooCommerce
Did you find the article useful?
Then pin me to your Pinterest Board, so that more people will find me
(Remember: The more you give to the Universe, the more you will get from the Universe)
So, Pin me