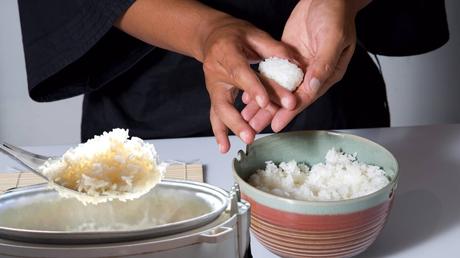
Are you looking to make sushi at home? Maybe you don’t cook rice too often, especially sushi rice, so you probably don’t own a rice cooker.
But don’t worry, you can make delicious sushi rolls without a rice cooker. So, grab a big pot, turn on the stove, and get cooking!
Most non-Asian households don’t own rice cookers since rice isn’t one of the main food staples so you’re not alone, and you’re totally fine!

Rice is a versatile grain, and there are many ways to cook it. Even if cooking sticky sushi rice seems like a challenge, it really isn’t.
How is cooking sushi without a rice cooker different?
When making sushi rice without a rice cooker, boil the rice in a pot with more than enough water to cover it. Instead of cooking the sushi rice for 20-30 minutes in the rice cooker, you must cook it for approximately 12 minutes on the stovetop. But the challenge of cooking sushi rice without a rice cooker is that you need to stir the rice as it simmers so that it doesn’t get clumpy and instead takes on that fluffy, sticky texture.
First, you bring it to a boil, then simmer it.
Let’s look a little closer at how to cook perfectly sticky sushi rice without a rice cooker.
The easiest way to cook the sticky sushi rice is on the stovetop in a pot.
The key to preparing sushi rice the right way is to follow all the steps, including washing the rice, simmering on low heat, and adding rice vinegar to give it the perfect texture and flavor.
How to cook sushi rice without a rice cooker: full recipe
Since we’re not using a rice cooker, all of the steps below are very important. Follow the recipe closely!
When you cook the sushi rice in a rice cooker, it becomes plump, chewy, and sticky. It also absorbs the rice vinegar and gains that perfect sour yet umami flavor.
But, when you cook it in a pot on your stovetop, you need to keep mixing and checking the water level until the rice has the desired texture.
After all, one of the risks of not cooking the rice in a cooker is that your texture may not be perfect.
Before you can cook the sushi rice, you need to prepare and gather your kitchen utensils and additional ingredients.
In order to get that perfect sticky sushi rice texture, you must use the best sushi rice.
I recommend the Nishiki Medium Grain Rice as it’s been the trusted sushi rice for decades.
If you don’t use sushi rice, it will be too mushy, too fluffy, or the shape and texture can be hard to work with.
For the rice vinegar, I always go for the Marukan Seasoned Gourmet Rice Vinegar.
Now, let’s see the process for cooking sushi rice without a rice cooker.
 Print
Print
Sushi rice recipe (without rice cooker)
This recipe makes enough rice for around 12 sushi rolls. Course Main CourseCuisine JapaneseKeyword Sushi Prep Time 40 minutesCook Time 20 minutes Servings 2 people Calories 737kcal Author Joost NusselderEquipment
- a large pot with a lid
- a large bowl
- wooden spoon (for mixing)
Ingredients
- 2 cups sushi rice
- 2 ½ glasses water (approximately)
- 4 tbsp seasoned rice vinegar (sushi vinegar)
- 2 tbsp sugar
- 1 tbsp salt
Instructions
Step 1: Wash the rice
- Put the rice in a large pot. Fill with cold water and then immediately drain the water.
- Next, repeat the process and rewash the rice. Rinse and drain.
- With your fingers, stir the rice to make sure any impurities are removed.
- Repeat the washing process two more times. The water you throw out must be completely clear. This means the rice is clean.
- Now, fill up the pot with water once again and let the rice soak for approximately 30 minutes.
- Drain the water after 30 minutes. Now, you’re ready to start cooking.
Step 2: Cook the rice
- Put the rice in the pot and fill the pot with water until it covers the rice well. Don’t cover with the lid yet. Make sure that there is about 20% more water than rice in the pot.
- Bring the rice to a boil, then reduce the heat to low. Make sure to stir continuously, so the rice doesn’t get clumpy.
- Now, put the lid on and reduce the heat to a minimum. Let the rice cook for about 12-14 minutes or as directed on rice packaging.
- Start to check if the water is evaporated after about 12 minutes of cooking time.
- Always check the water because once it evaporates, it takes a matter of seconds for the rice to stick to the bottom and burn. Thus you have to be very quick to remove the pot from the stove.
- The rice is ready after all the water is evaporated. At this time, you should have only rice in the pot.
- Now, take out the rice and put it in a large bowl where you can mix it.
- Tip: If the rice is stuck to the bottom, don’t use those bits at all. It will make the sushi taste bad.
Step 3: Rice vinegar
- In this step, you need to use seasoned rice vinegar (also called sushi vinegar) and mix it with the rice.
- In your bowl, mix the hot rice with the 4 tbsp of seasoned rice vinegar. Mix very gently and slowly to avoid crushing the rice. Use a wooden spoon because it makes it easier to mix, and wood doesn’t chemically react with sushi rice, which means it doesn’t alter the taste.
- Add in the sugar and salt and continue mixing.
- Once you’re done mixing, cover the bowl with cling film or a towel and let it cool until you make the sushi rolls.
- Tip: If you find it hard to mix the rice and vinegar, split the rice in the middle first. Then, keep turning in the opposite direction, then switch. Make sure to mix slowly and apply light pressure.
Nutrition
Calories: 737kcal | Carbohydrates: 163g | Protein: 13g | Fat: 1g | Saturated Fat: 1g | Sodium: 3517mg | Potassium: 144mg | Fiber: 5g | Sugar: 12g | Calcium: 33mg | Iron: 3mgRead more about Sushi Vinegar | Home made recipe + 3 best store bought vinegars
No rice cooker, no problem
As you can tell, cooking sushi rice without a rice cooker is pretty simple. You can prep and cook the rice in about 20 minutes.
If you’re not planning on making many rice dishes, you don’t need to invest in a rice cooker.
A large pot and your stovetop will do just fine!
The secret to getting that perfect texture is soaking the grains and cooking them until all the water evaporates but not a minute longer.
Also read: Sushi for Beginners | a little history & the best get started guides.
