If you are running a WooCommerce shop or offering any service through your WordPress website, you probably need to accept payments through the site. And thankfully, the technology is growing faster, and there are so many payment gateways are available for accepting payments from customers.
If we are about to collect payment through our blog, we will pick PayPal as the payment gateway for sure. PayPal is one of the most popular payment gateway used by billions of people worldwide.
And if you are looking for how to collect PayPal payments on your WordPress blog easily, we have got you covered. In this article, we are going to show you how you can integrate PayPal to your blog using the famous WordPress form builder plugin called WPForms!
WPForms
WPForms is one of the best freemium WordPress form builder plugin available in the market. More than 3 million active users use the WPForms Lite version! Also, for primary contact forms, the free version is good enough.
But the premium version comes with so many advanced features like file upload, conditional logic, email marketing integration, payment gateway integration, etc. In our WPForms review, we have mentioned them.
And for this tutorial, we will be using the WPForms premium version.
How To Collect PayPal Payments Using WPForms?
No matter you are selling digital products, physical products, or even accepting donations. With the WPForms PayPal add-on, everything would be too easy. So, let’s see how we can collect PayPal payments inside WordPress using this plugin.
First of all, you need to purchase the premium version of the WPForms WordPress plugin. It can be done from here. Once you got purchased the plugin, you need to log in to your WPForms account, download the premium plugin.
A license key also can be found on your account dashboard. You need to install and activate it on your blog and verify the purchase using a valid license key.
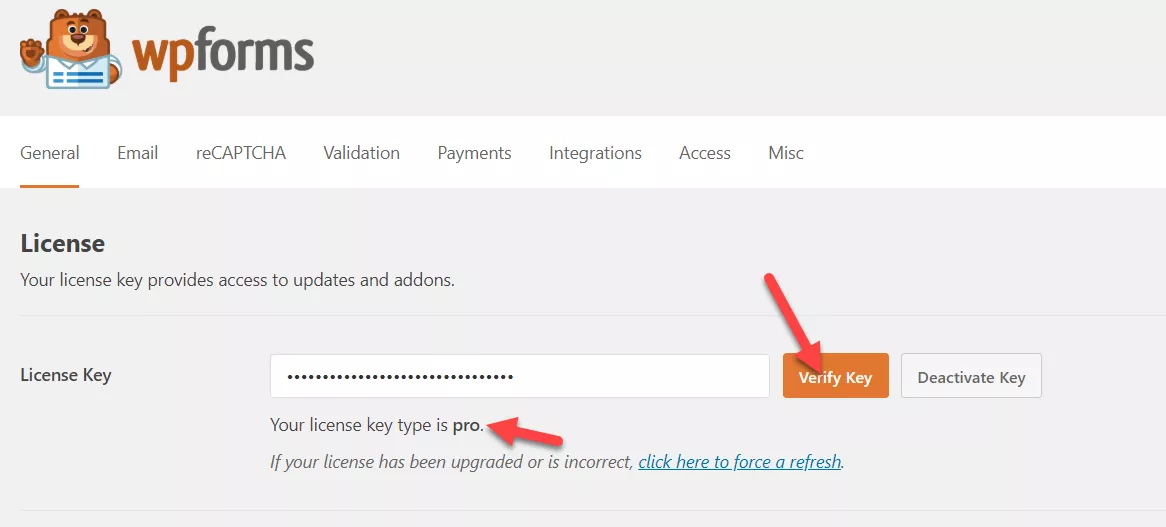
So, you will get access to all their premium add-ons and plugin updates.
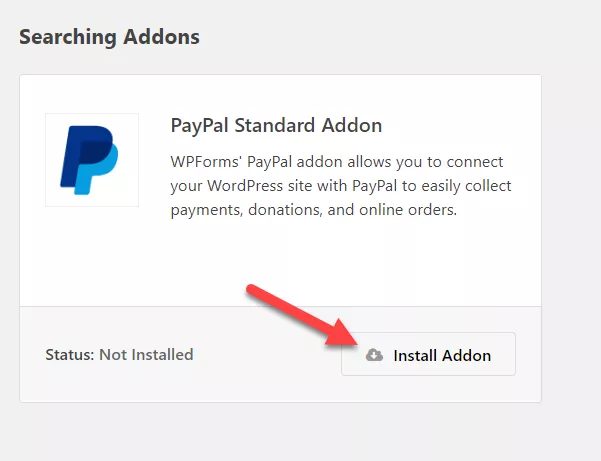
Now, we might want to enable the PayPal add-on on our website. This is mandatory for integrating PayPal with any forms we create through the WPForms plugin. For doing that, go to the WPForms add-ons section.
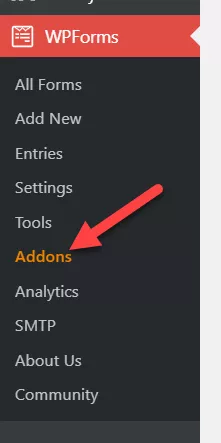
There, you can see all the available add-ons according to your subscription. And you need to search for the PayPal standard add-on there.
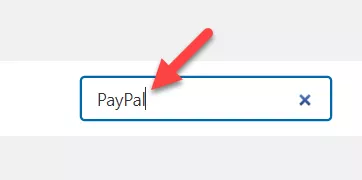
Once you got found the item, install it on your blog.
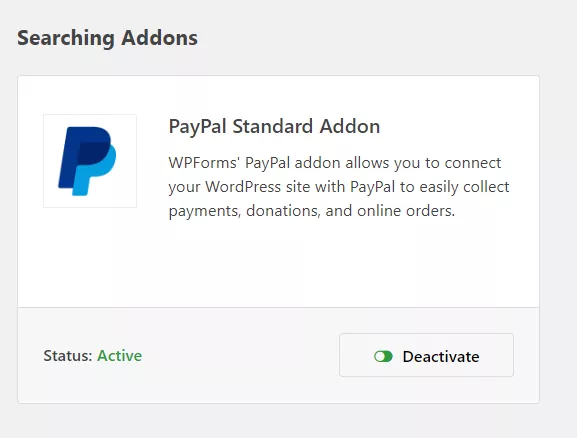
It will get activated automatically.
Now, we can start creating the payment form.
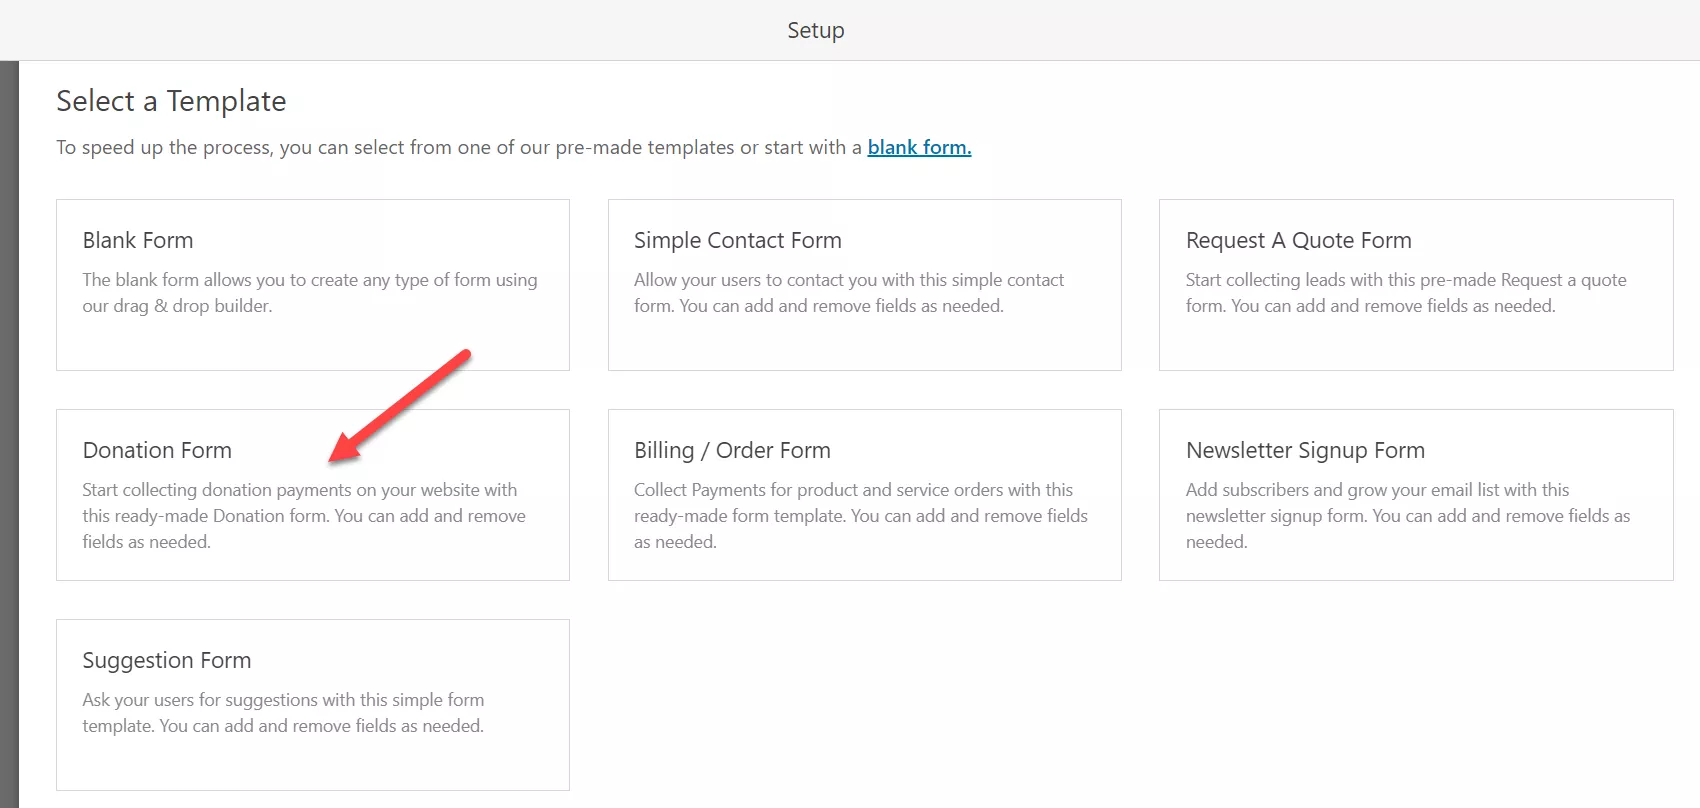
Thankfully, the WPForms premium version comes with pre-built form templates. There, you could see hundreds of pre-designed templates.
You can move forward with any of that or create a new one entirely from scratch.
Anyway, name your form.
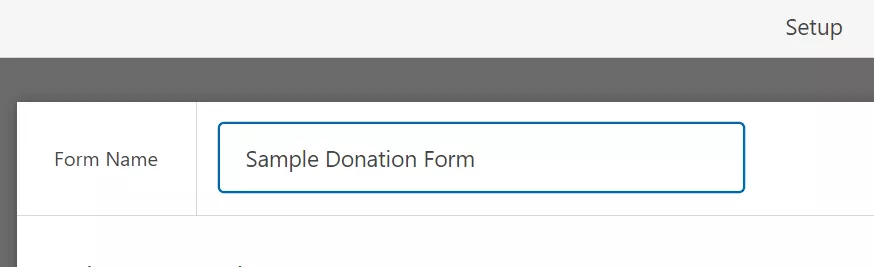
For this tutorial, we will be creating a donation form. You can move forward with any form type. The integration method would be the same. And choose a pre-made template or a blank one.
After selecting the form template, you will be redirected to the form building wizard.
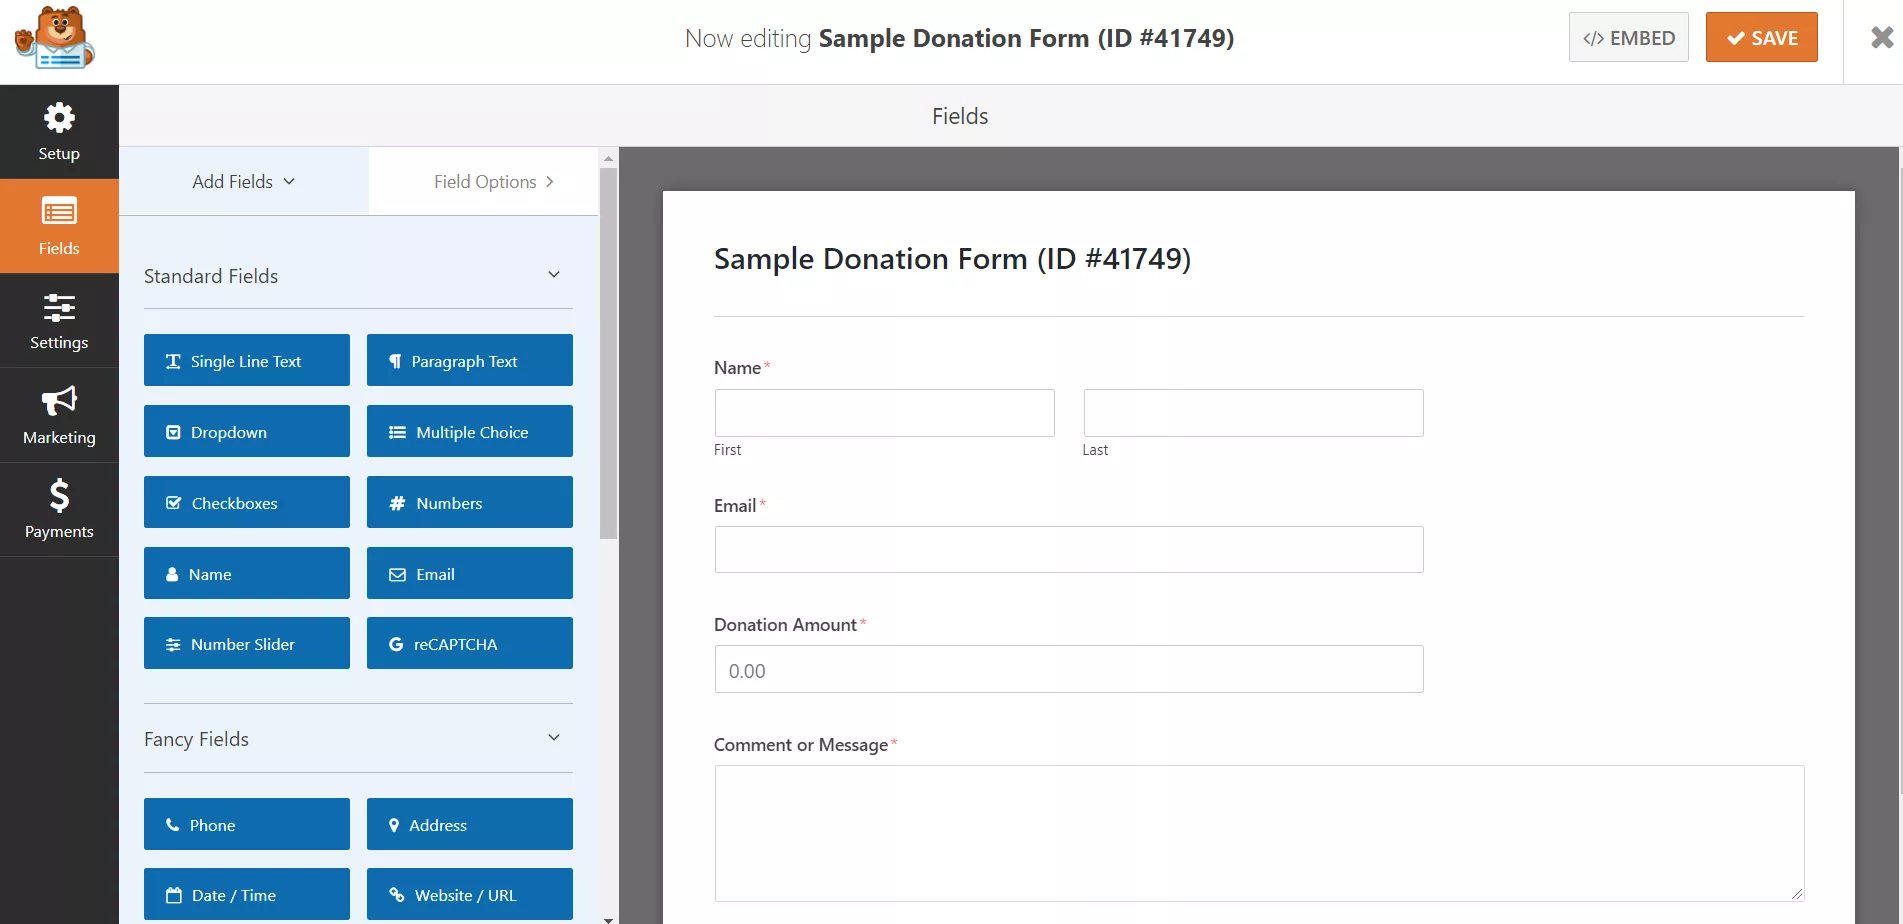
On the left side, you can see all the available fields. The right side will show you a preview of the form. You can drag fields from the left side, drop it in the builder.
As I mentioned earlier, no coding required.
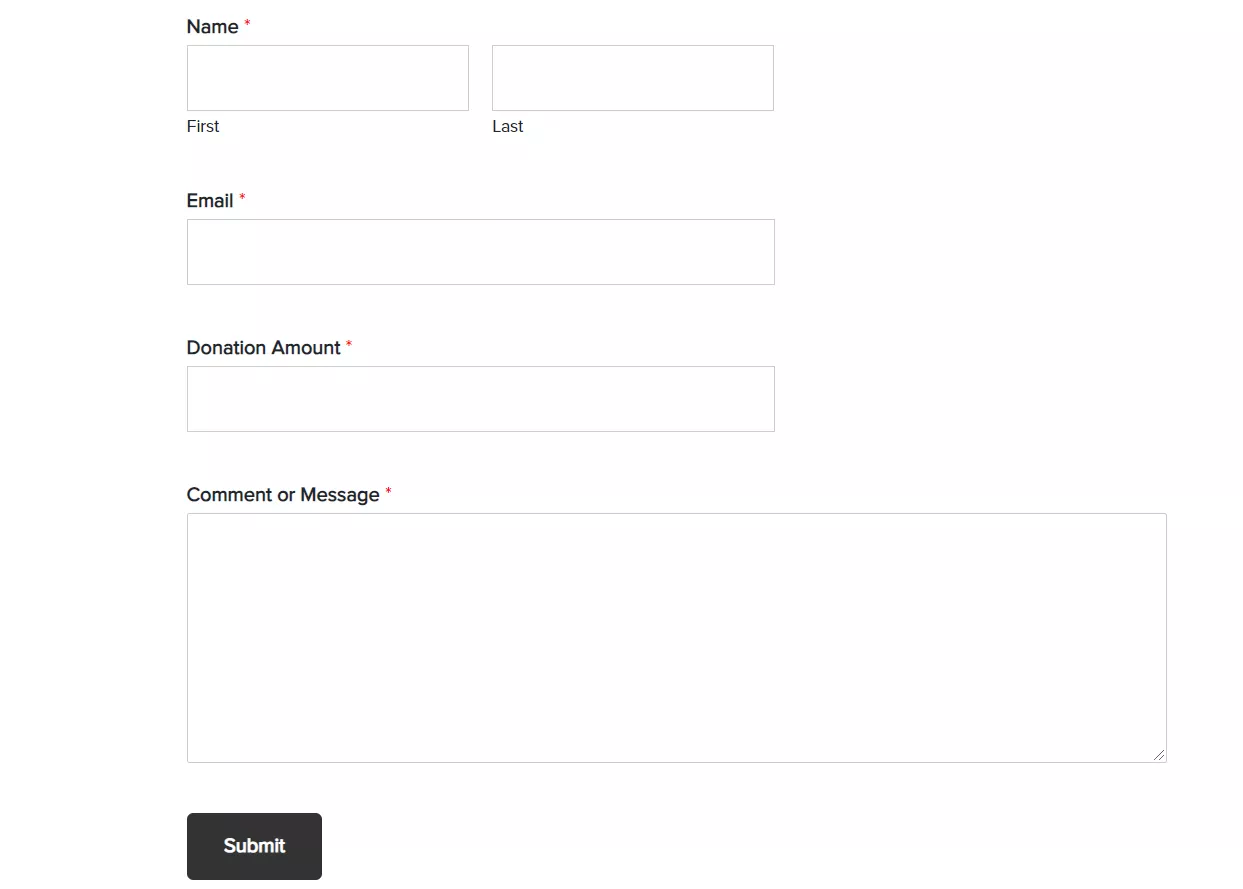
Here, in this case, there are fields available like:
- Name.
- Email.
- Amount.
- Message.
You can always modify the fields. For example, if you don’t want the message field, simply remove it. Also, if you need to add a multiple-choice field, you can drag and drop it in the form builder.
In our case, these are good enough.
So, we have done enough with the fields. The next thing we need to do is integrate our form with PayPal. So when someone sends us money through the form, it will get deposited in our PayPal account.
Go to the Payments tab. There, you can see the PayPal add-on.
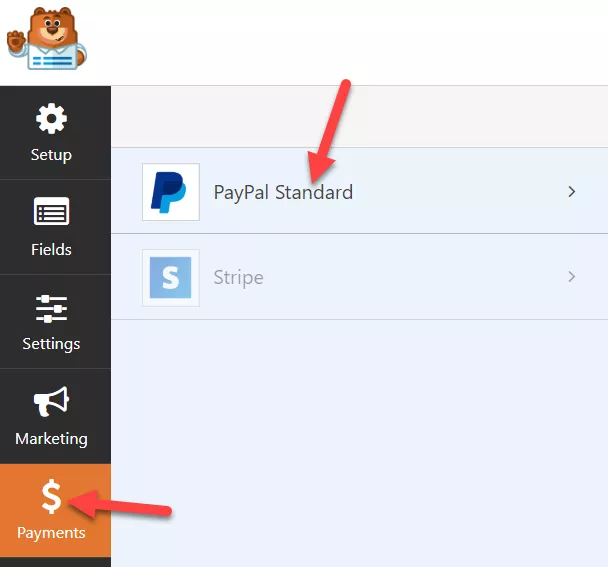
Select it, and then you can see the configuration.
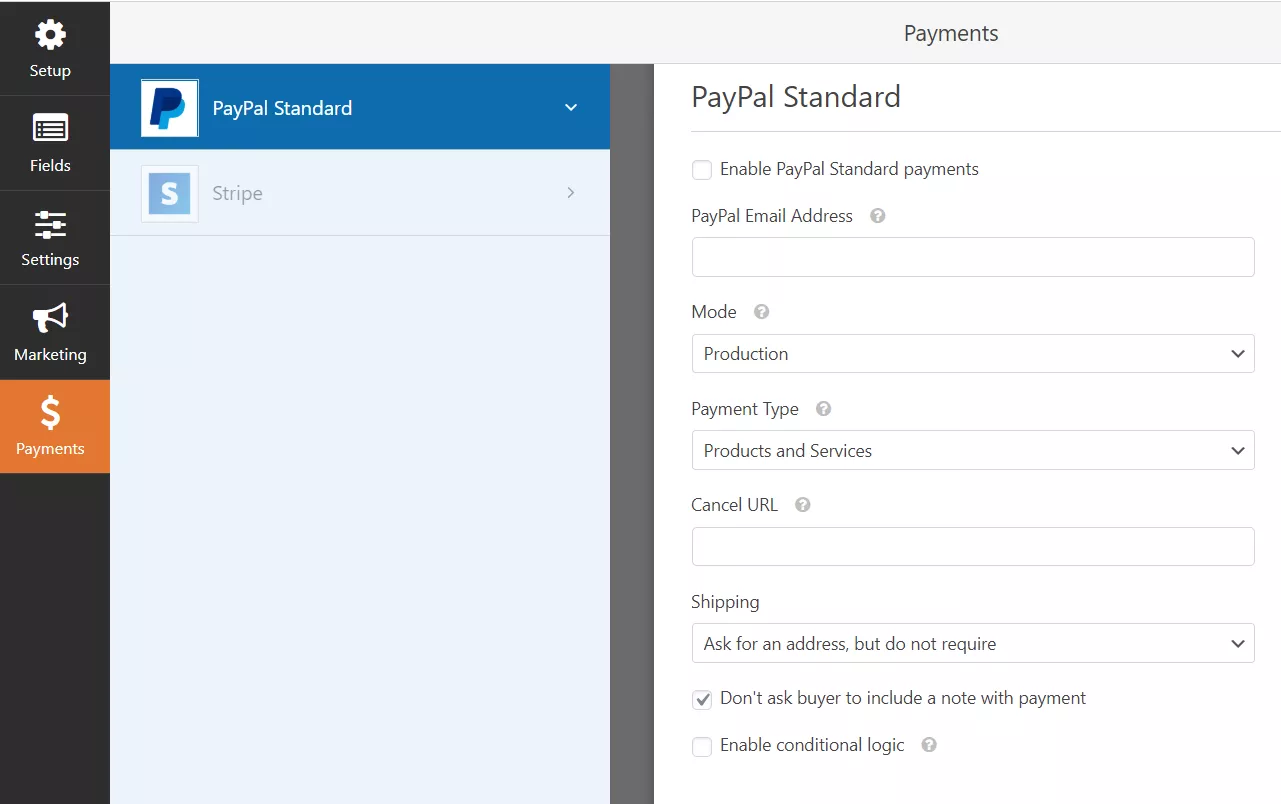
What you need to do is enable the PayPal payment system. Also, you need to enter your email address, which is associated with the PayPal account.
Make sure that you have enabled the payment mode as Production, not Test/ SandBox. You can select the payment type as products and services or as a donation.
If someone fails to complete the payment, you will be able to redirect them to a custom URL. This is a great feature. And above all, you can ask for your customers’ address or leave it.
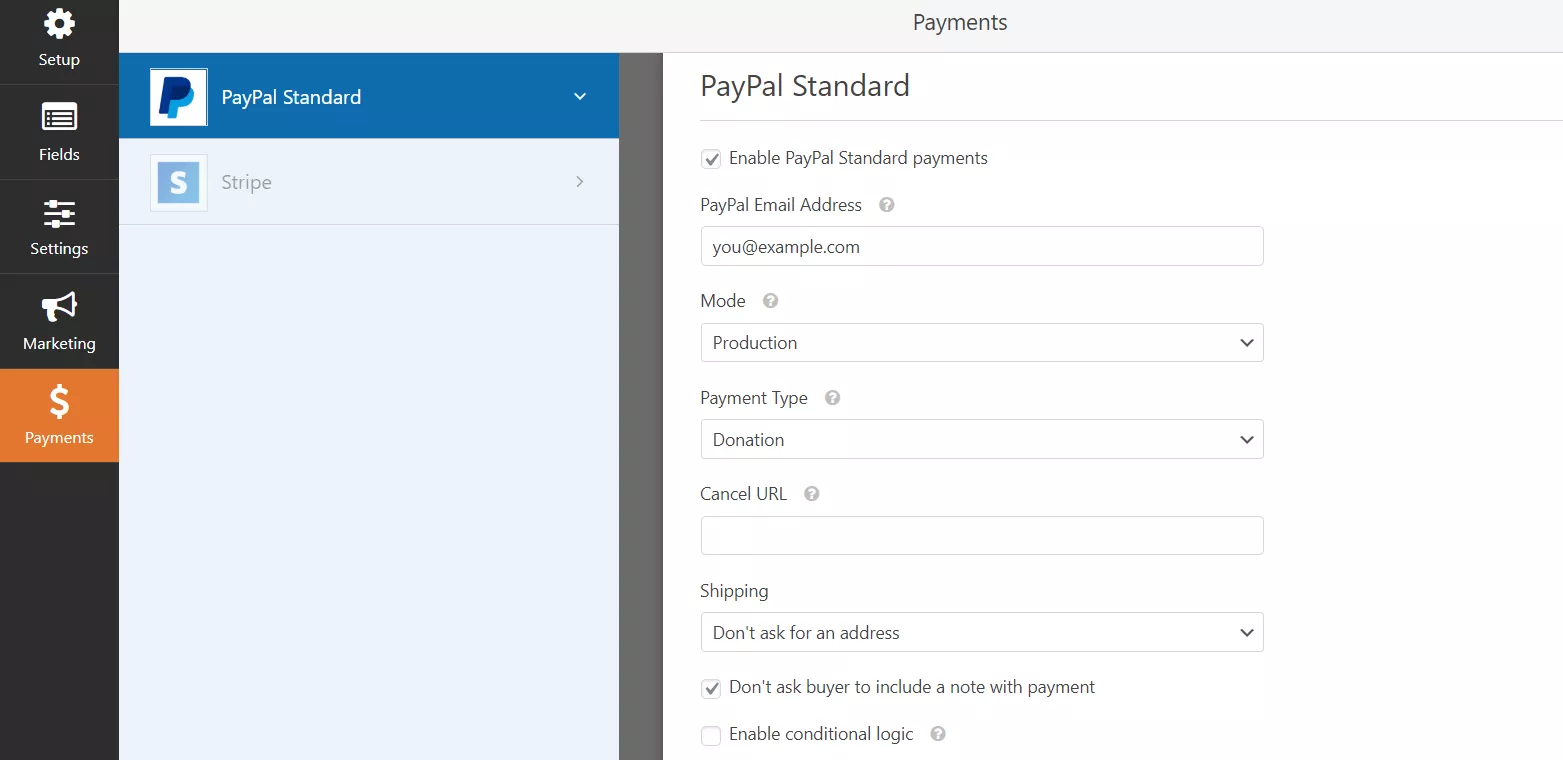
And also, WPForms comes with the Conditional Logic feature. This will help us to make the forms even more powerful. You can enable it and configure it for making the forms better. And in this case, we have done enough with the configuration of the form. So, save it.

Now, it is time to embed the form. WPForms is optimized for Gutenberg. So, if you are using the Gutenberg editor, no the classic editor, you will be able to use the WPForms block inside the editor and embed the form. If you are using the classic editor, you can use the form’s shortcode.
Anyway, go to a page where you need to display the form. In the editor, you could see a button called add form.
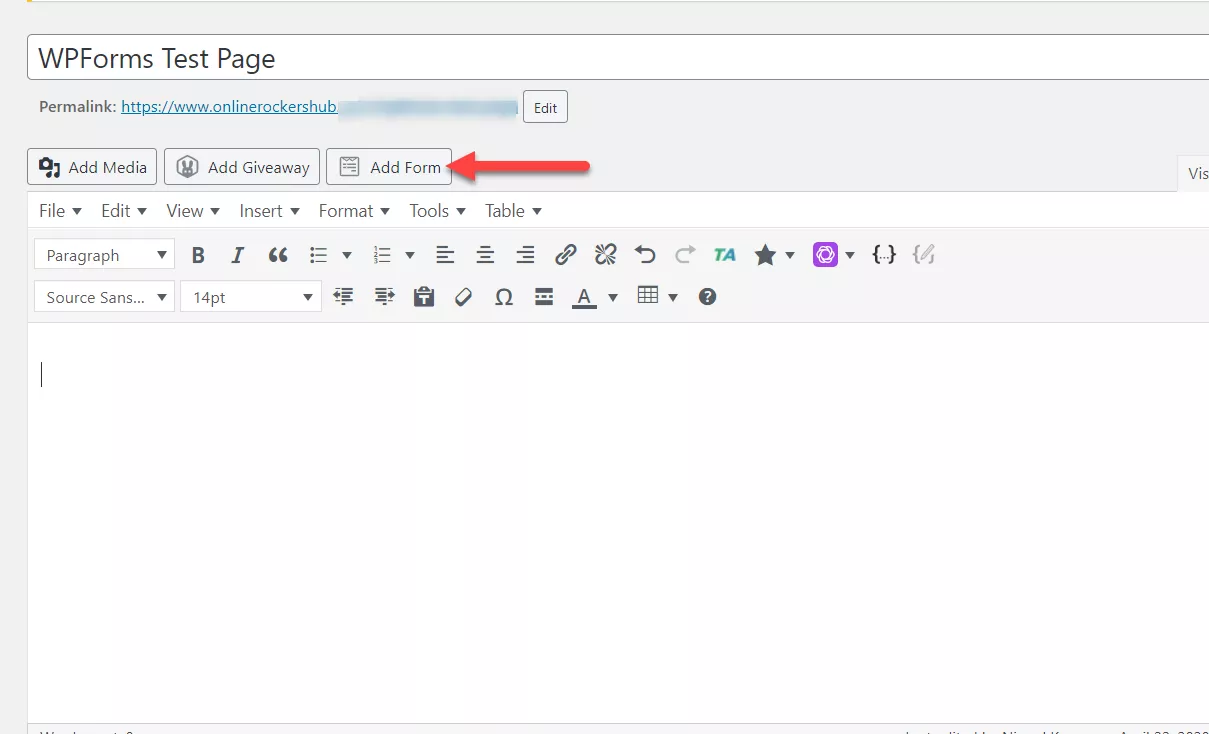
After clicking on the button, you can see all the available forms inside a box.
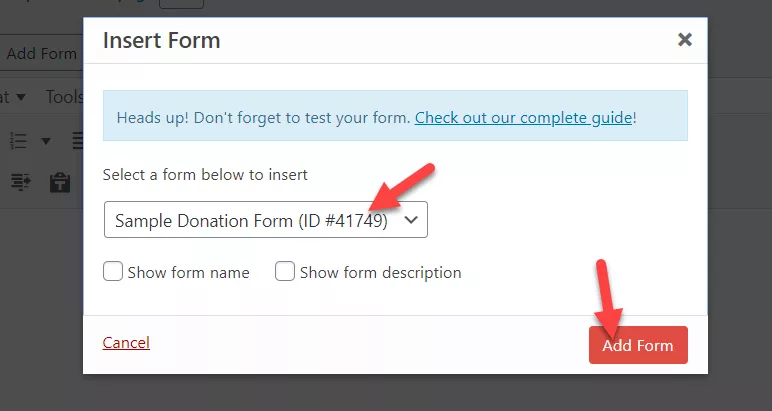
From there, select the form you created and insert it to your page. A shortcode will be visible on your page.
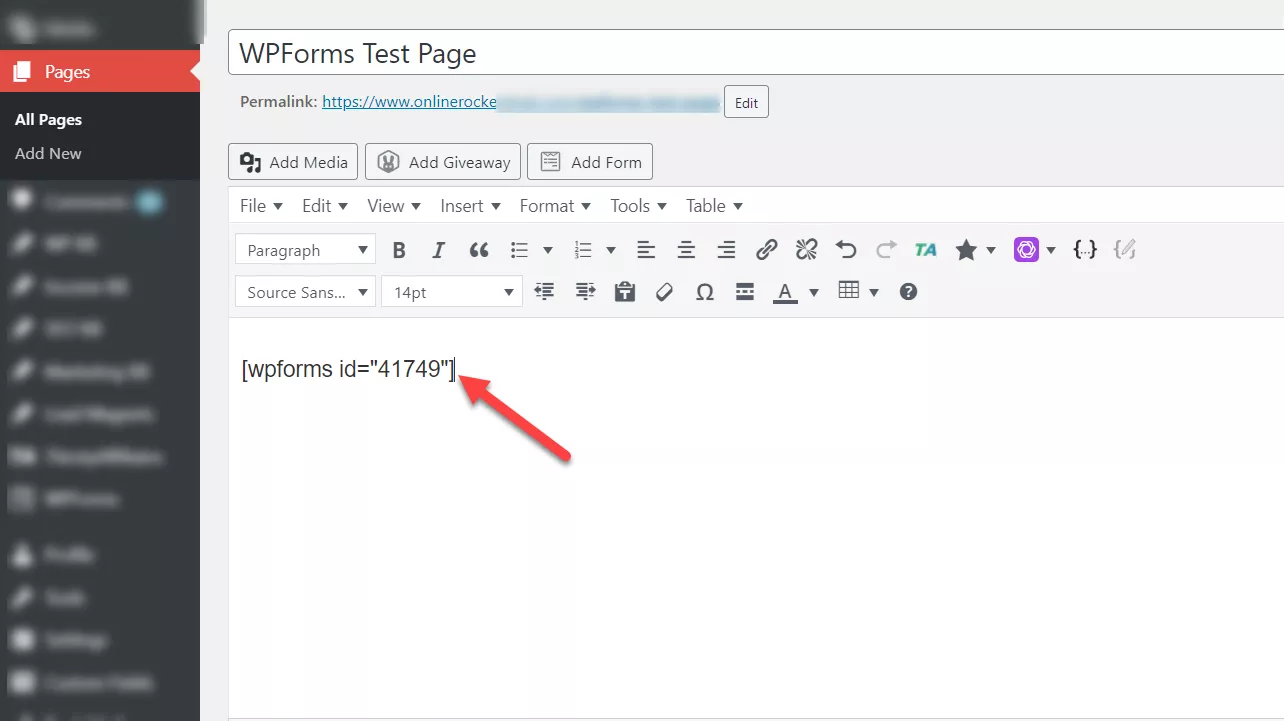
And publish or update the page. If you check the page from the frontend, you can see the changes. The form will be visible there!
So when someone sends you a payment, it will get deposited to your PayPal account.
This is how you can accept PayPal payments inside WordPress. There are so many available methods, and from those, this is the easiest, safest, and best practice.
Get Started With WPForms Premium
You can get the premium version of WPForms from below.
Get Started With WPForms
$This is an affiliate link
If you have any doubts, feel free to leave us a comment below. We will probably get back to you with a solution.
We hope you found this article helpful and enjoyed the read. If you did, please consider sharing this article with your friends and fellow bloggers on social media. For more WordPress tutorials, theme and plugin reviews, feel free to check out our WordPress archive.
