Are you stressing and wondering how to clean your sewing machine? Well then, you have landed on just the right page! This article can help you with that.
Today we will be taking some weight off of your shoulder and give you a guideline on how to clean your sewing machine properly.
Let’s get started!
Why Do You Need to Clean Your Sewing Machine?
A high-quality sewing machine can be worth quite a bit of cash, and you certainly don’t want to deal with issues with the equipment regularly or ever, in fact.

Regular maintenance is key for any equipment to be running smoothly without any hassle, and for sewing machines, you must be enlightened with the fact that they need to be cleaned periodically. Well, now you don’t want to suffer from a loss in your business just because you didn’t clean your machine properly, do you?
If you are an owner of a sewing machine, you most likely know that it consists of very detailed and small components that need to be handled with care. So, you will need to follow this step by step tutorial below to achieve the best results.
Step 1: Take a Proper Look at the Instruction Manual
What most people tend to do after buying any sort of appliances or electrical equipment is instantly throw away the instructions manual. DO NOT make this grave mistake, because the manual consists of many instructions that must be followed.
Trust us and read through the manual even though it might be a bit annoying, you’ll thank us later.
If you are guilty of throwing away the manual, then you still don’t have to worry because you can easily get hold of it using the help of the internet. Go to the manufacturer's website and entire the model and the serial number of your sewing machine. After that, you should easily get the manual and be able to download it.
Step 2: Take the Machine Apart
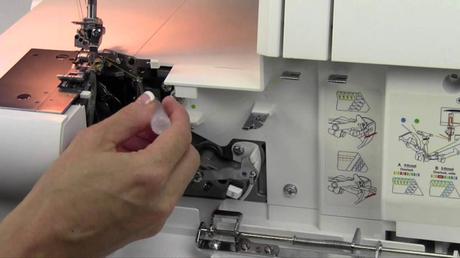
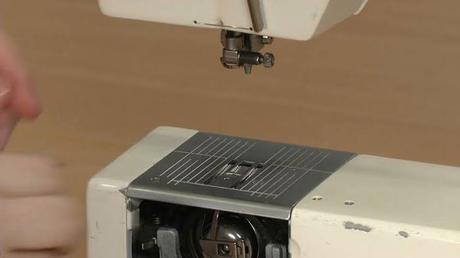
This is one of the most crucial steps of the entire process, and this is also where a lot of people tend to make some common mistakes. The first thing you should do before even beginning to take the machine apart is unplugging it. Then you should remove the bobbin casing, followed by lowering the race cover and taking the hook off.

Step 3: Get Hold of All the Tools
After buying a sewing machine, there are high chances that you will find three tools in the box along with the machine; they are a screwdriver, oil, and a handy tint brush. If these don’t come with your machine, then be sure to purchase them from hardware stores nearby.
You might be slightly surprised to know that even a paintbrush would do the job completely fine. Actually, quite a few things could be used as a substitute, such as a pipe cleaner or even a mascara brush!
Step 4: Begin Cleaning from the Bobbin Area
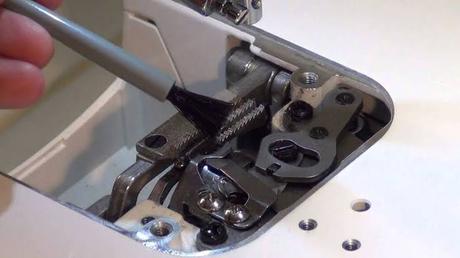
You should start by taking your fine brush and by brushing lint off the feed teeth. In order to clean the feed channel, you could also use an old needle, and tweezers may also come in handy for removing any chunks of dirt.

After you have completed brushing off all the lint, use a cotton ball to wipe the surface clean and remove any residue that may have been stuck.
Step 5: Move Below the Bobbin Area
So the first thing that you’ll have to do is take out the bobbin holder, a life hack would click of it before so that you can put everything back in place perfectly. After that, you will need to brush off the lint as described above.
One thing you should keep in mind is that when you’re cleaning the hook, stay very careful, you don’t want to cause any cuts. An alternative way of blowing out all the gunk is by using either canned air or a small vacuum. Keep a distance of about 5” between the nozzle of the canned air and race area to prevent any corrosion.
Step 6: Clean up the Tension Discs
Sewing machine issues are commonly associated with threat tension. However, this problem can be easily solved by cleaning and wiping the tension discs and the bobbin area.
The area in between the discs is often obstructed by a piece of broken thread, lint, or even dirt. You might find a side cover in the path of the thread; what you will need to do is open it up for the cleaning.
A well-known technique of cleaning the discs is to release them, which is done by lifting the pressure foot. You will then need to grab a thick thread or even dental floss and rub it to and fro, you will then be able to remove any of the leftover dust.
It might occur to you that why not just blow away the lint with your breath? Well, you actually can do it, but the problem arises due to the moisture of your breath, it may cause.
Step 7: Put the Machine Back Together
As mentioned above, make sure you have taken photos of the machine’s components before taking it apart so that you can use it as a guideline while replacing the parts.
To begin with, twist the doorknob to and fro until the bobbin case is fit in its correct place. After that, put the needle plate inside and attach the screws in the way they were prior to the cleaning.
Place the pressure foot back where it was and then fix in a fresh new needle. Since the nail has two sides, know which side it has to face by going through the manual. Then tug on the clamp of the needle as much as you can before securing the thumbscrew tight.
Step 8: Clean up the Outside
Finally, wipe the exterior of the machine to remove any sort of dirt that may strike your eye. We would suggest you use a soft cloth for this task. Keep in mind that you should squeeze out any excess water out of the cloth to avoid it’s exposure to the intricate parts.
Conclusion
To some of you, this process might be a bit of extra work, but really it’s not all that difficult. All you need to do is follow all the steps that we have provided you with, and that is pretty much it.
We hope you found this article to be helpful, but if you still have any queries, free to drop down questions in the comments section below.
