Buy Web hosting With Domain Name For Your WordPress Blog : eAskme
Other people are reading : BlueHost Review Shared Hosting for WordPressAs I have already shared the Review of Bluehost and I recommend this to everyone, So today I use Bluehost to show you step by step guide. BlueHost also give you a free domain name. Just make sure that you read it throughly.
Things You Need to Before You begin:
Domain name:
I have already talked about how important a domain name for a business or brand. Bluehost hosting provide you free domain but you can also use your own domain. BustAname is a good tool to get domain name suggestions.Also See: Bluehost WordPress Hosting Discount
Payment mode:
BlueHost accept payments via Credit card, few debit cards and PayPal.Now you are ready to buy a domain and webhosting for your new blog.
Guide to Buy Web hosting Server:
Click here to go to www.Bluehost.com and Click on "Get Started Now".
Now a page with three different packages will open.
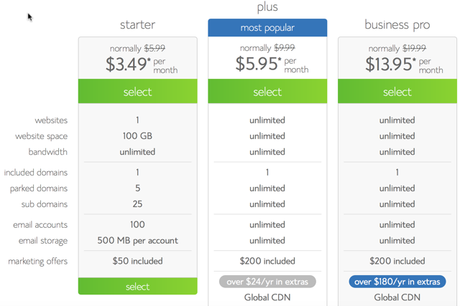
Webhosting plan
- Buy Starter Package : To run only 1 site
- Buy Plus package : To run more than 1 site :
- Business Pro package : If you Need SSL and dedicated I.P
Also See : BlueHost Vs Hostgator Vs Dreamhost
Free Domain or existing domain name:
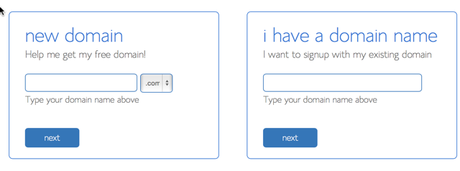
This page ask you to choose a free domain name or use existing domain name. If you want to use your existing domain then you can use free domain later.
To use existing domain name you have to change Nameservers of your domain name to
NS1.Bluehost.com
NS2.Bluehost.com
If you want to keep things simple, enter the domain name you wish to buy in “new domain” field and your free domain will be activated with the web-hosting. Click on next and from here the steps would be simpler.
Account details:
Also See : Best Cheap Web Hosting
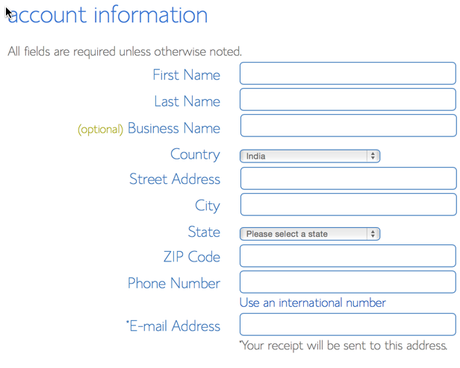
Enter your details and verify every details. you will get hosting and login information in your email address.
Package Information:
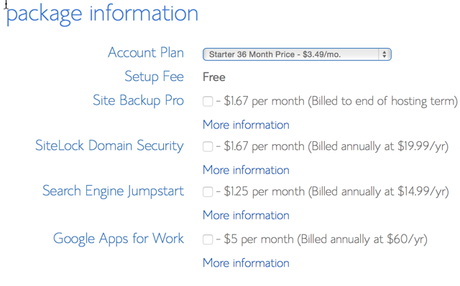
Pick a package for long term.
Also deselect the option “Sitelock Domain security” and “Site Backup Pro”.
Complete hosting purchase:
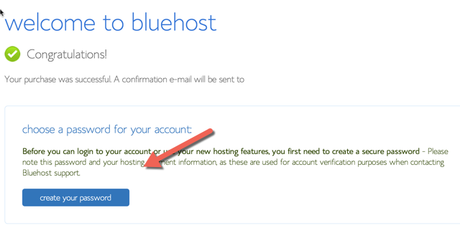
Now you will see a page which ask you to “create your password”:
Selecting the password:
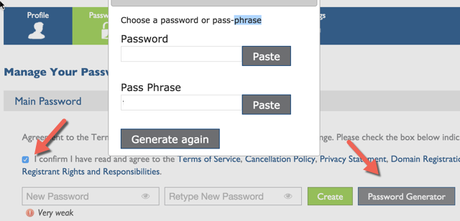
Now you just need to set the password for hosting login. You can generate comples password. Enter the password and click on "create" and it`s done.
Also See : Start Webhosting Company
Logging into web hosting cPanel:
You will see an email on your email address with confirmation and login information of web hosting.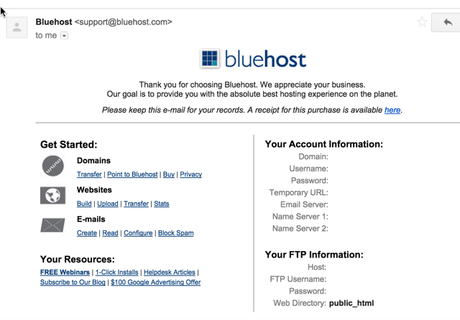
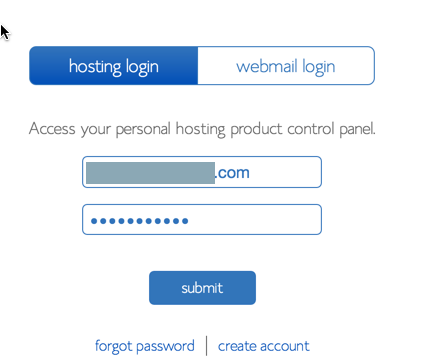
- Now open Bluehost.com
- Login with your id and password.
- Click on Home
- Bluehost cPanel will open.
Congratulation as you you have successfully purchased your first web hosting and domain name.
Here are tutorials which you need to follow to set up your WordPress Blog:
How to install WordPress Blog on Bluehost
Essential settings after installing WordPress
By following these steps, within just 30 minutes you will have your own WordPress blog running.

