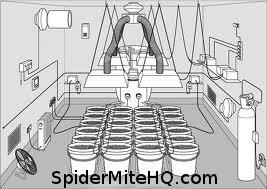
In this segment we will show you how to take your simple, Panda filmed room, and add proper Electrical sub panels and a . A grow room sub-panel will make it far easier to add circuits as well as reduce the chance of electrical fires. If you are not comfortable with electricity call a Licensed Electrician.
In our previous post, How to Build a Spider Mite Free Closed Grow Environment (CGE) Part 1, we went over how to Prepare our grow room to become a Closed Grow Environment. So far we have completed a few basic and simple steps:
- Removed everything from the room
- Used Panda Film to cover all walls, ceiling,and floor.
- Used a water proof tape to tape all seams in the plastic making it water and air tight.
- Built a small "clean room" to keep your dirty clothes and shoes separate from the grow area.
- Recovered all electrical outlets with cover plates.
How to Set up your Closed Grow Environment Sub Panel
- Figure out how much electricity you are going to need, in Amps. Use this as a guide. Examples of some items in a grow room:

- 1000w grow light
- 600w grow light
- Oscillating fan
- Humidifier
- Mini Split Air Conditioner Unit
- Exhaust Fans
- T-5 florescent lights
2. Turn off Power to Main Electrical panel
3. Insert Proper sized Breaker. into the main electrical panel. I prefer staying above 60 amps 220v
4. In your Newly Panda Filmed Closed Grow Environment. Mount and paint a Piece of 3/4" plywood where you want your sub panel to go. Make sure it is far away from water and up at least 48" above the floor. This will keep the chance of electrical shock down
5. Mount a New Sub Panel on the plywood. Make sure your panel has a MAIN breaker in the box and that it has more than enough slots for further expansion.
6. Going from above or below, which ever is easiest. Find/make a path for you main service wire to go from you main breaker to where your new sub panel will be..
7. Using the proper Gauge Wire, run the 3 wire Romex, or equivalent from you main breaker to you sub panel through the path you made earlier. Leave yourself at least 3 feet of slack on either end. This will give you plenty of room for cutting and mounting the wires.
8. You are going to want to use the knock outs that are just a little bit bigger than you lead electrical wire. You are going to use an adapter called a Clamp Style Romex Connector. Insert the Connector per directions then feed wire through. This will happen on both the main and sub panel side.
9. Next strip the Romex on Main down to individual wires. You will do this for Main And Sub Panels.
10. First, Mount the Ground to the Ground or Common bar which ever you have. I like to keep all grounds on one side and all commons on the other. You will do this for Main And Sub Panels.
11. Second, Mount your white wire to the common bar. You will do this for Main And Sub Panels.
12. Third . Mount your RED and BLACK wires to their respective mounts. With all Lugs Make sure you tighten to manufactures suggested torques. You will do this for Main And Sub Panels.
13. Finally, Recover the Sub an Main panels. Keep both the breaker in the main box and in the sub panel box OFF until you are DONE with ALL electrical.
After this you are still going to have to wire all of your circuits for each of your pieces of hardware, such as your lights, co2 generator, and fans. We will cover this in the next article of How to build a Spider Mite Free Closed Grow Environment (CGE).

