Are you someone who has very recently become interested in the art of applique, but isn’t sure how to do it?
Well, let me assure you first by saying that you are not the only one who is in a situation as such. There are many who are interested but have not been able to do much because they don’t know how.
Thankfully you came to the right place. Because here, you will receive all the help and information regarding how to applique with an embroidery machine.
So, without further ado, let us get started!
What Is Applique?
Before we learn how to applique, we must first know what it actually is. Well, the basic concept behind the task is to stick a pattern or a design of fabric on another piece of cloth. The design is fixed or attached using a type of stitching technique.
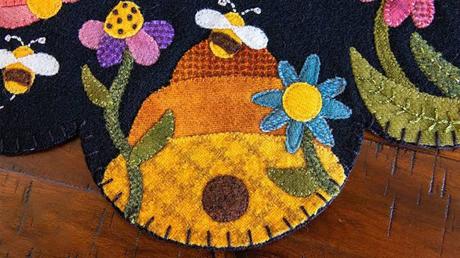
You will commonly find applique work on clothes or bed covers. They add new features and aesthetics to the garment. And most of the time, you will see that many different patterns and cut-outs are included to make a unique design, one you will not find anywhere else.
Applique work can be done by both hands as well as an embroidery machine. Both have their own uses and reasoning. But we will primarily be focusing on how you might use a machine to get the work done.
Things You Will Need for the Applique
Now, before we start off with any task such as this one, it is very important to jot down what we need and what are the things we need to do before. Because, if you don’t have all your supplies, then chances are you will have to stop what you’re doing and waste time finding the item.
So, there is a list of things you need to check off before you get the stitches on the cloth.
1. The Right Applique Design
If you want to use the embroidery machine to do your work, then you will have to pick a design to fill into the machine. And there are times when you will not be able to find the design that is suitable for the tool you are using for the job.
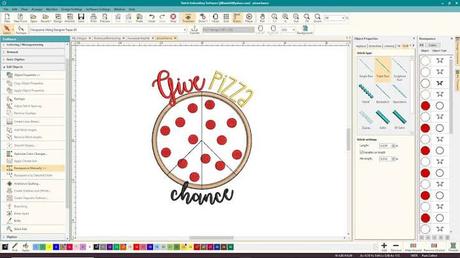
Therefore, you should be careful about what you pick out. Otherwise, you will have to go to the store again and get a new one. That is not the best option, especially if you have too many errands to run.
You can go to certain stores that have different types of embroidery files so that you can find one that goes with your tool. Stores such as Etsy, Planet Applique, and Embroidery Boutique will be your best bet when it comes to a wide range of designs and files.
2. Embroidery Machine
The machine you have or choose to use for this task is going to be an important decision to make. Well, these machines are not expensive, so if you think you will be using a machine for embroidery, then you should buy one for yourself.
But if you think that the project you are undertaking is a one-time thing, then you can just borrow the embroidery machine from someone.
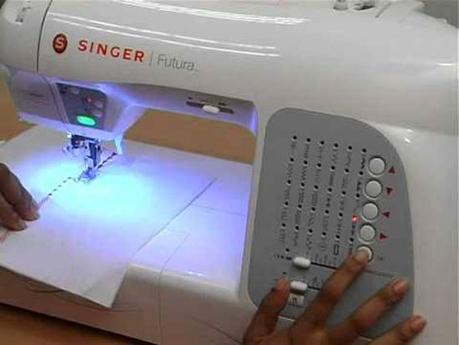
Now, we can move on to the actual choice. Well, Brother sewing machines are one of the most popular in the market, and they have made a name for themselves among those who are into sewing and embroidery because of the great output they produce.
There are a few models of machines produced by Brother that can work both as a sewing machine as well as an embroidery machine. That can be very useful if you want something that is two-in-one. Otherwise, you can just opt for one that can be used just for embroidery work. Either will work just fine for this case.
3. Needed Supplies for the Applique
Now that we have the design file as well as the embroidery machine ready, we can now move ahead and sort out all the other items you will need in order to complete the applique work.
Adhesive: It is required so that you can stick the pattern or design on to the garment you are working on. Make sure the glue you choose is compatible with the material you are going to use it on.
Embroidery Thread: This will be used for the filling stitches along the edges of the design you pasted in the garment.
Bobbin Thread: It is needed for the machine.
Garment: It is the piece of fabric you will be working on. And it can be a top, bed cover or even a towel.
Cut Out of Design: The design you will be sticking will also have to be prepared.
Scissors: You’ll need scissors for cutting the design as well as the thread whenever needed.
These are all the items you will be needing. However, if you use an applique pattern that needs some type of heat to bond with the garment, then you will also be needing an iron. This will create just enough heat needed for the adhesive to start working and stick the two materials together.
How to Applique with Embroidery Machine
There is a process that needs to be followed when you are doing arts and crafts such as this one. That is especially true if you are a beginner and do not know anything about performing the task in hand.
You should try to do what each of the steps tells you to, and when you know how to do everything, adjustments can be made for your ease and to your liking. But starting off without following the rules will just make it harder for you to complete the task and get something you like.
So, without wandering around the topic, let us get into the work itself!
Step 1: Load the Design into the Machine
By now, you should already have an embroidery design selected and bought according to your preference. Now you will need to load the design into your machine. Well, this is easier now because of the advancement of technology. You can hook the machine to your computer or laptop.
Through a USB cable, you will be able to transfer the data for the pattern or design you want on your fabric. You should be able to make any type of embroidery on the garment as long as the machine is able to support what you want to do.
Step 2: Set up the Hoop
Applique work is usually done on a specific spot, and then the design is continued on to other parts. And for you to make all the stitches on a garment is not easy if it is not held tight and secured into place. That is when the hoops come to help us out.
The hoop is made of two parts; the two parts are used to sandwich the fabric into place. You will find it easier to applique when the material you are working on is stretched and tightly held.
There is a screw on the side of the hoop that will tighten the structure further if needed. And finally, you are ready to place the hoop along with the garment into the embroidery machine.
Step 3: Make an Outline of the Pattern You Applique
When you have secured the hoop to your embroidery machine, you can finally start making some of the stitches, and the real work can begin. You have to make an outline of the object you are going to applique on to your garment.
And your machine will start working according to the design you have already loaded into it. This outline will make the placement easier for you. There is no need to be very neat or precise with this as no one will see it underneath.
Step 4: Attach the Applique Fabric on the Garment
This is a very important part of the whole process. You will set the design to place in this stage of the process. So, you have options, or rather techniques to choose from that will help you to stick the applique fabric to the garment.
Firstly, you can use a spray-on adhesive that has to be applied to the side of the fabric that will go over the outline. Just place it on the area that has already been outlined. The glue you have used should be strong enough to ensure the applique fabric stays in place while the machine stitches the two material together.
As for the second method, for this, some wonder under has to be applied to the underside of the applique fabric and placed over the outline. The whole time the machine makes the stitches, you have to hold it in place and make sure it does not move out of place.
At this point, you can run the stitches over the cloth again, so there is no chance of them being separated.
Step 5: Cut off Any Excess Applique Fabric
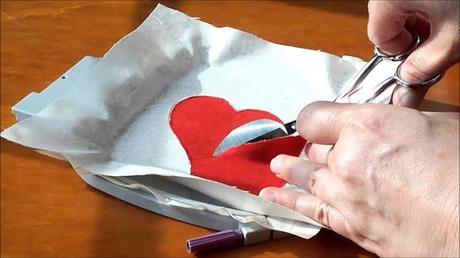
Now that you have stitched the two fabrics together and have made an outline of the design on the applique cloth, you can now take off the excess bit of fabric. For this, you will have to take the hoop out of the machine.
Once it is out, take a small scissor and carefully make little cuts along the outline. Make sure you do not take off any of the stitches. Then you will have to go back to the previous step.
Step 6: Iron in Case You Used Wonder Under
Wonder under is a type of adhesive that allows two materials to glue together when heat is applied. That is why you will need an ironing machine. If you did not use wonder under, then there is no need to worry about this step here.
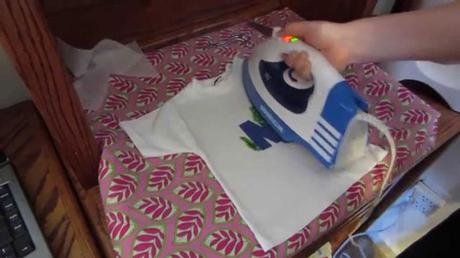
But if you have, then you have to iron it in place, as otherwise, there is a chance of lifting after the cloth goes in for a wash.
Step 7: Ensure the Color of the Applique Fabric
In the other steps where we had to make stitches, the color of the thread was not a big factor because no one was going to see it. But with the steps coming ahead, the color has to match with the color of the applique. Or else it will not look good. Just the embroidery thread matters and not the bobbin thread as it is not visible.
Step 8: Tacking Stitch and Satin Stitch
You have to click the hoop back into the machine now as there are more stitches that need to be made to create the perfect applique work. Once it is in place, you will have to start the work by pressing on the presser foot and switching on the green button.
With this, you should be able to make a tacking stitch. This is basically a foundation that points out where the satin stitches must go. And in most cases, the machine makes ‘V' shaped stitches that help to elevate the embroidery on the side.
As the tacking is complete, the embroidery machine will start to make the satin stitches over the edges of the applique fabric. At this point, all you have to do is make sure everything goes smoothly, and the machine will do the rest.
Step 9: Finishing up
Most of the work is now complete, and now you are mainly left with the cleaning and finishing touches before you are done. So, first, you have to remove all the lint of the fabric.
Then you must clean away all the stabilizer from the applique work. You might get the majority of them at the back as well as along the area you outlined.
And finally, all you have left is to iron the material together to prevent any type of lifting of creasing after a wash. With this last step, you are done! You deserve a round of applause for the hard work and effort you put into the task.
How to Applique with Hand
We have established before that you can do applique work using both your hands as well as an embroidery machine. So, before we move to the machine, we need to know a little bit about how you can do the same task using your hands.
Everything is going to be pretty much the same. The only exception you will find is in the stitching. You will have to do all the work by hand. Even though it is an excellent alternative if you don’t own an embroidery machine, it takes more than three times the time of a machine.
You must know how to stitch by hand first to make this mission a success. There are many video tutorials that might help you out to figure out what to do. How to make the tacking stitches as well as the satin stitches. If you know that then you should not be worried.
Final Thoughts
As a beginner, you should try to follow the steps by heart. If you do, then the chances of you making a mistake are very slim, and you can also ensure that your hard work doesn’t go to waste.
