My “official” portfolio is on my Facebook Page. Why there? Because it’s so simple. I limit
it to 20 pieces, and you can click thru the whole thing in slideshow format.
But I also have a portfolio on my LinkedIn profile. That’s because I include work samples. A LinkedIn work sample can be many things: image, video, document, presentation, etc.
I’ve noticed a lot of people on LinkedIn don’t have work samples on their profiles. I think that’s a mistake. You want potential clients to see what you can do.
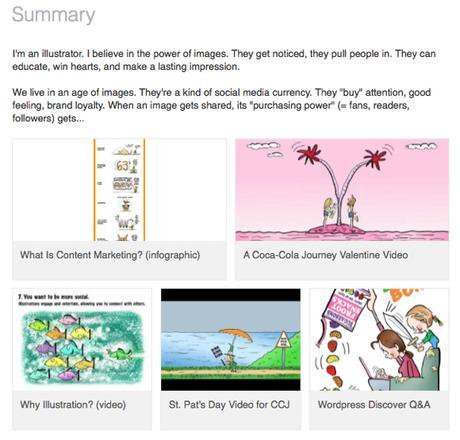
LinkedIn profiles are divided into sections: Summary, Education, Experience, etc. Here’s how the work samples in my Summary section are displayed:


When I checked the associated LinkedIn Help page, I found it was text-only and last updated on April 13, 2015.
It says you can add media samples to the Summary, Education, and Experience sections on your profile. Not true— at least not in my own recent experience.
You can only add work samples to your Summary section. Once you do, however, you can move them to another section.

Here are the steps:


Sign in to LinkedIn (if you’re not signed in already), and go to your profile. It may automatically display in edit mode. If not, click on Profile in the menu bar, and choose Edit Profile from the drop-down menu.
Scroll down to your Summary section, and hover your mouse over the upper righthand corner. You’ll see a tiny rectangle with a + sign in the corner. That’s the Add Media icon. When you hover over it, you’ll see a tiny display window: “Click to add a video, image, document, presentation…”


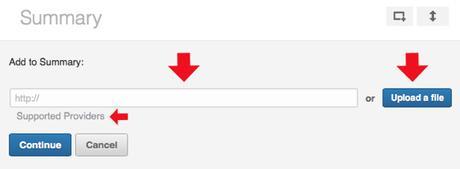
Some quick examples: YouTube and Vimeo are two of many supported video providers: just key in the URLs from those sites. Acceptable image formats are .png, .gif, .jpg, and .jpeg.
LinkedIn will accept most media files. Best way to find out: just go ahead and try to upload the file. If it’s not an acceptable format, you’ll get a message.




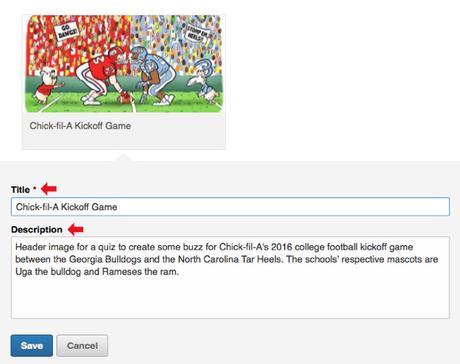
After the file finishes uploading, I’ll see a thumbnail image and a display window where I can enter a Title (required) and Description (optional), then hit Save.
Note: There’s no indication at this point that I can move the file from the Summary section to another section of my profile.



After saving the uploaded file to the Summary section, click on the thumbnail image.
An expanded display window will open.
Now, in addition to being able to change the Title and Description, you can also opt to move the file to a different section of your profile.
You can also opt to delete the file, now or at any future time.

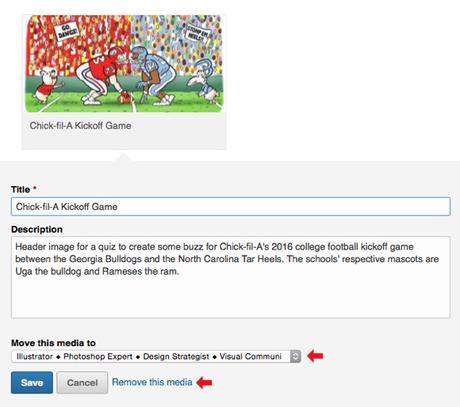

Clicking on the drop-down menu will display the full titles you’ve given to the available sections of your profile. In my case, the menu looks like this:


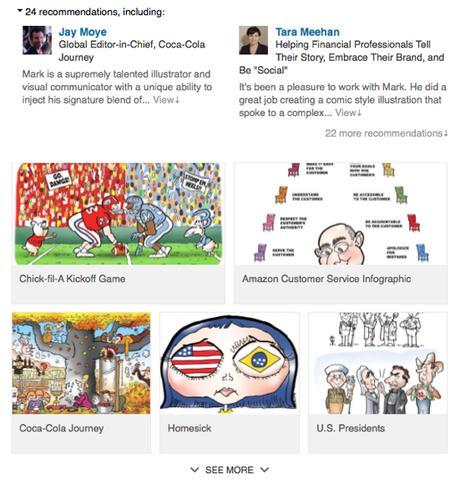
Here’s how they look (below). There are 20 images, total, but only the first 5 thumbnails display. Viewers can, however, click “See More,” to display the other thumbnails.


Work samples give your profile a dynamic look that plain text can’t match. Best of all:
they tell people you’re invested in your work and career.

If you found this post helpful, you might also enjoy 15 Tips On How To Build A Network By Leaving Comments That Add Value.

* * * * * * * * * * * * * * * * *


