MyFitnessPal (MFP) is a valuable & powerful tool in your arsenal to keep track of your nutrition. The interface is clean, the database of commercial foods and products is massive, and the interoperability between web & iOS is almost flawless.
But one of the best features is the ability to add your own custom foods & recipes. I have been adding the Racing Weight recipes as I make them to My Foods so that I can add their nutritional data on the fly in the future. If I encounter a recipe without nutritional data (like my buffalo hummus), I can recreate the recipe in MFP to generate the nutritional data (and also have it available for later).
Today, I will provide a step-by-step walkthrough of how to add a custom food & recipe to MFP. The first thing to mention before we get started is that creating a custom food or recipe can only be done from the web. The iOS app does not support this feature (and there is no indication that they are planning to add it). But since they integrate so well, it is a minor issue, at most.
(Click on thumbnails for larger version)
Creating a Custom Food in My Fitness Pal
Step 1: Log into MFP

Step 2: Go to the Foods tab

Step 3: Select My Foods in the Food Tab

Step 4: Select the Custom Food Button

Step 5: Enter Name & Source Information (Step 1 of 2)

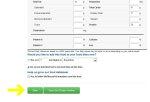
Step 6: Enter Nutritional Data Information (Step 2 of 2)


Creating a Custom Recipe in My Fitness Pal
Step 1: Follow Steps 1 & 2 from the Custom Food guide above to get to the Food tab.
Step 2: Select Recipes from Food Tab

Step 3: Click on Enter New Recipe Button

Step 4: Enter Name & Serving Info / Begin Inputting Ingredients

Adding ingredients to a recipe is just like entering foods into your daily food plan. You can add a generic ingredients, like “Bell pepper, green”, or specific brand name ingredients, like “Fage Greek Yogurt 0% Fat – Greek Yogurt” to the recipe.
Continue to add ingredients until you have input all of the ingredients in your recipe. The nutritional info will update as you do so. Once you are finished entering ingredients, click on the Save button at the bottom and you have your custom recipe saved. Congratulations, now you can use the nutritional data for your custom food or use the recipe itself!

