As anyone who follows me on Instagram will know, my hair colour is constantly changing. I am a veritable human sunset. At this moment in time, it's a kind of washed-out violet with dark brown roots, but for the most part of 2016, it was a neon, multi-tonal raspberry. I did it all at home - I don't really trust other people with my hair, so I bleach, colour, and cut myself! Even though I've moved on from this look, I still love it and wanted to share the how-tos with you all.
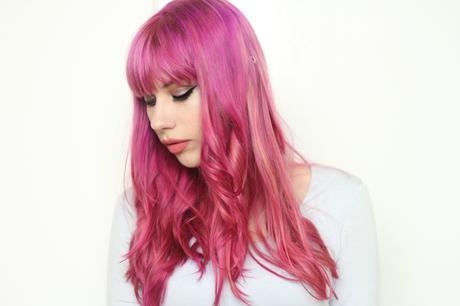
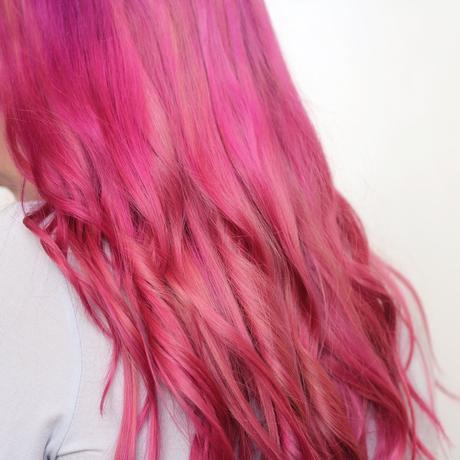
I used a blend of several dyes to get this look, some of them by Bleach London, Schwarzkopf Live Colour (this was before I went fully cruelty-free in my cosmetics - if you want to use a cruelty-free dye then stick with the Bleach pinks and purples) and a fair bit of Paul Mitchell conditioner. Paul Mitchell are truly my favourite haircare brand, especially when I'm colouring/maintaining dyed hair. I'll go into that more later, but for now I'll briefly walk you through the hair-painting process.
Prep: Get together some mixing tubs, a couple of hair dye brushes (I got mine in Poundland and they came with a free tub!), your dyes, a conditioner that is clear white, a Tangle Teezer, a ratty old towel that you don't need anymore, and whatever else you want with you.
Mixing The Dye: For this look, I wanted a blend of colours that resembled a sunset or a raspberry swirl in an Eton Mess. I wanted the shades to fuse together naturally rather than create a defined ombre. So, in one mixing tub I stirred 3/4 of a tube of bright purple, into 1/4 of a tube of bright pink. In the other bowl I did the exact opposite, and mixed together the larger bulk of the pink with the remaining quarter of purple. I put a little bit of conditioner in each one, to make the whole formula go further over my extremely long hair! You can add as much as you want to dilute the colour, or to cover more ground. Whatever colours you are using, mixing a little of each into the other makes everything more cohesive.
Application: I started with dry, unwashed, bleached hair. I might do a big post on how to bleach if anyone wants one (let me know in the comments) but for this post I'll stick with the actual hair-painting. First, I separated my hair down the middle, into two sections, and then into four by taking the upper layers of hair away from the lower ones. Going section by section, I took my brush and literally painted the mostly-purple formula from my roots down to the mid-lengths of my hair. Once all my roots were painted, I mashed them together with my fingers to make sure I'd reached everywhere. Then, I took my mostly-pink formula and started to paint the mid-lengths to the ends of my hair, making sure to really saturate the ends. Once all my hair was painted, I took my Tangle Teezer and brushed through all my hair, which helps to mix colours together where they meet and create a smoother look. Leave everything on for about an hour (or however long it says on the box of your chosen dye!) and you're ready to wash off.
Washing: I always wash out with cool water, not warm, and obviously you don't want to use any shampoo or conditioner - your hair is already done. Wash out until the water is getting kinda-almost-clear, but not completely clear. You don't want to wash out more than necessary, because from now on your aim when showering is to keep as much colour in your hair as possible!
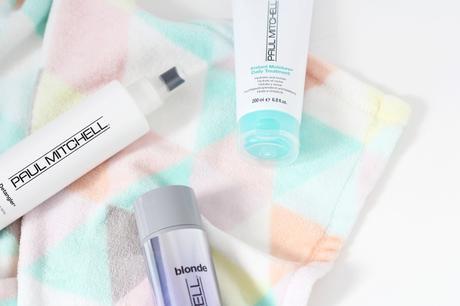
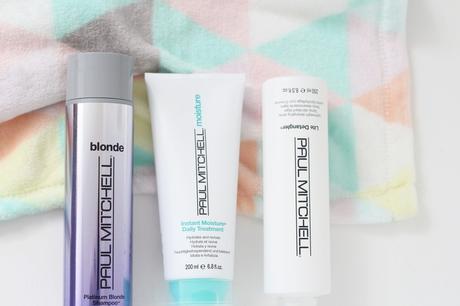
Maintenance: Once you have a full-on unicorn hairdo, you have to shampoo like it costs you a thumb. Cleansing your hair is what will strip all your pretty colour until you have to shell out more cash on dye, so use cleansing products sparingly, wash in cool water, and become really good friends with dry shampoo. I wash my hair maybe twice a week when it's coloured. By far the best shampoo I've ever come across for bright hair is this one by Paul Mitchell. It was given to me to try at an event by Salon Success, and I've used it ever since, it really is that good. I haven't dyed my hair in two months, and the gradual fading process provided by this shampoo has taken me really beautifully from a bright fuchsia to a pale, rosy violet. Once my hair is almost bare again, down to it's bleached and ratty roots, I love to clarify and tone down any brassy residue with a silver shampoo like this one before I go off on another colouring adventure. Detanglers are also super useful at managing bleached/coloured hair without breakage.
I know this post is PACKED with information but I hope you found some helpful nuggets and tips on how to create your own hair-painting! Everything I know is just trial and error, so don't be worried to experiment. As always, if you have a question about hair or any colour I've used, just hit me up on Twitter or Instagram.
This post contains PR samples sent for consideration, please see my PR page for more details
