I’ll have some more food-related features in the coming days but this evening, I’ve decided to share a walkthrough on how to replace the bulb inside a halogen oven, as there’s a good chance it may help someone else.
In all fairness, the manual for mine (Andrew James 12lt Premium) wasn’t too bad and in case you’re wondering; I believe I bought this back in March, around the time of my birthday and the original bulb has only just ‘blown’ this past weekend, meaning it’s lasted almost 7 months after fair usage (assuming it was new to start with).
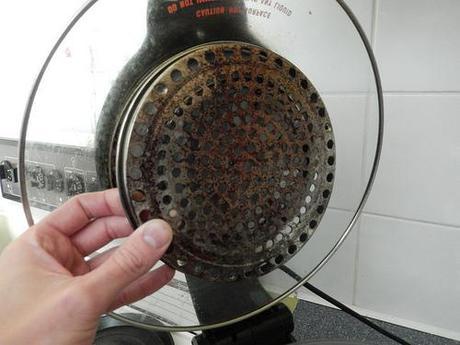
At the top, you can see the filthy cover that protects the heating element. This is held on by three Philips head screws. I found them to be secured rather tightly so be prepared to place your space hand on the outside of the lid so that you can the initial torque without slipping and chewing the screw head.
Of course, before you do any of this; you should disconnect the unit from the power supply!
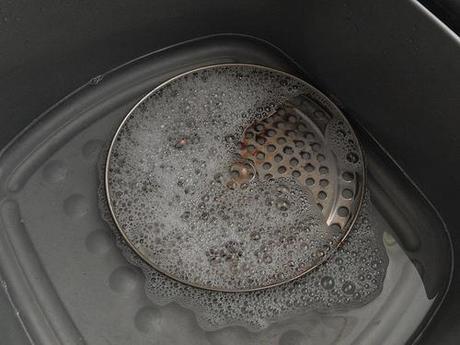
I’ve always been very cautious around cleaning this area and probably haven’t wiped it clean enough times; which may explain its grossly discoloured state. While I continued dismantling the product, I set the cover aside to soak in warm soapy water and before scrubbing it clean.
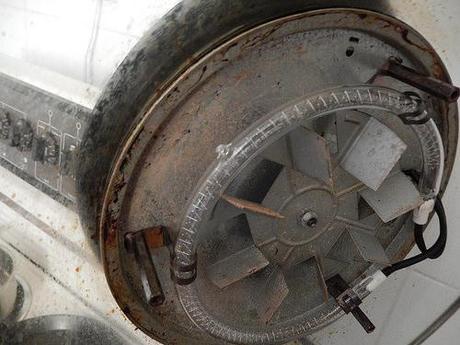
With the cover removed, you can see the circular bulb fitted around the central fan:
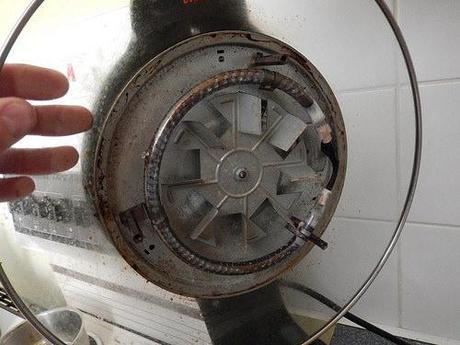
This wasn’t too apparent within the black and white images I had to work from by to the right of the lid, you can see a small rectangular cover, held in place by a single screw.
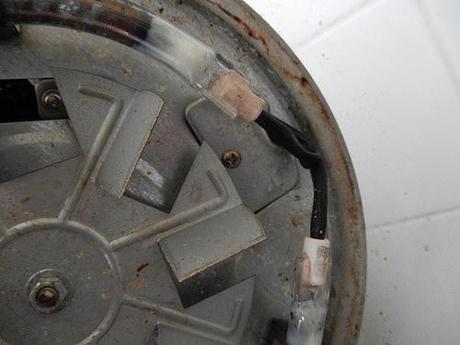
This needs to be removed so that you can carefully pull on the wires and disconnect the bulb (push down on the lever on one side and you should be able to pull the white connect apart quite easily):
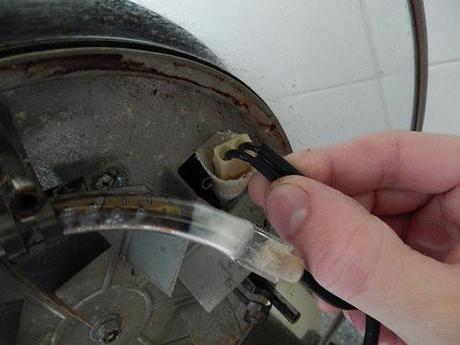
To remove the complete bulb, you’ll find it’s held in place by three clips made of bent, thin steel with a slot running down the centre:
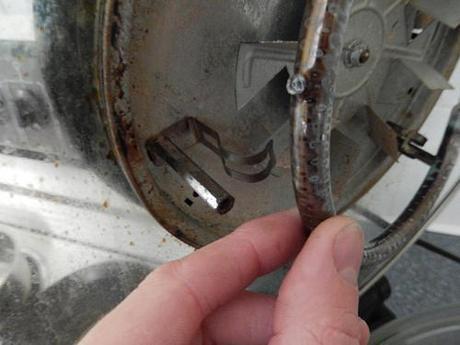
I’d advise you to do this carefully and not to bend it too far for risk of weakening the steel. I assume replacements are somehow available, should they be required.
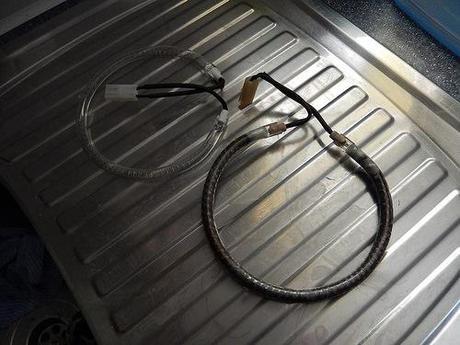
New and old.
Just like with a light bulb, you’ll find the old one (on the right, above) is discoloured. I binned it after wrapping it within the packaging used to contain the replacement. Fitting the bulb involves repeating the above but in reverse. I’d also advise you to ensure that the fan still spins freely (after fitting the new bulb) before re-fitting the cover, reconnecting the power and turning it on.
Are there telltale signs to look out for when a bulb may be dying?
You’ll know it’s not working when you’re oven runs (the fan) but there is neither any light or heat being omitted. In the week or so running up to last weekend, I noticed it seemed slightly dimmer than I’d been used to and I thought it even sounded ‘weaker’ as well.
New bulbs (for this model) cost around £13 and it’s important to check the wattage and to ask the seller whether the bulb you’re viewing is suitable for your oven – for example; I recently became aware that with my halogen oven, there are bulbs for the pre-2010 model and those for ovens released after that date (like mine). As always, watch out for cheap deals that may appear to be too good to be true.
If you have any questions, please do leave a comment below.
I cannot guarantee that this same method will apply to every make and model but I do hope it helps someone.
Thank you for reading.
PS. I end this post with one question on my mind… Whenever you replace the bulb in a car headlight (for example), you’re advised to prevent it from coming in to contact with your skin. Now, as these are also halogen bulbs, is it therefore essential (but unwritten) to only handle them using disposable gloves?
