In the era of selfies and portrait mode iPhones, you always want to look your best to snag the perfect snap. But as any makeup aficionado knows, getting your hands on the latest-and-greatest products can cost a pretty penny. So how do you achieve a flawless complexion without breaking the bank?
Lucky for you, there’s plenty of tricks and tips on how to look fresh-faced on a budget. Take a look at the advice below and you’ll be ready to walk the runway in no time.

Treat Your Skin Well
Before applying any makeup, you have to make sure you’re treating your skin well. Think about it this way: did Van Gogh paint Starry Night on a rough, damaged canvas? Or did he paint his masterpiece on a fresh, clean canvas? Makeup works much the same—you can’t achieve great results without the perfect blank slate.
Of course, it’s unlikely most women have impeccable pores and super-smooth skin—that would defeat the point of applying makeup to correct blemishes. But your makeup will look far more natural if you make an effort to keep your face as primed as possible. Gently wash with a cleanser every day and night, and exfoliate every other day as you rinse off on the shower. These healthy habits will prevent acne, dark spots, and dead skin from getting in the way of your glamorous glow.
Apart from cleaning, also be sure to moisturize. Hydrating your skin is essential for it to stay looking young and firm—prevent those crow’s feet and lip lines from forming no matter how well you think you’re aging! Skin care products with Vitamin A are also excellent for preventing wrinkles and can give dull skin a much-need boost. Creating a healthy base for your foundation will not only make the application process far easier, but it will leave you feeling confident about the skin you’re in!
Pick the Right Tools
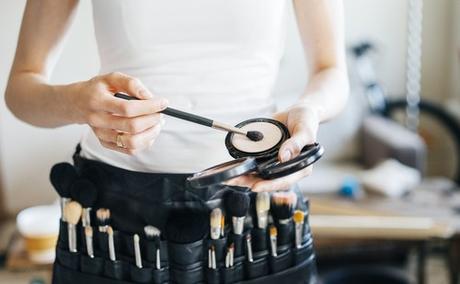
Before getting to work on crafting the perfect contour, you have to select your tools wisely. Knowing all the makeup brush names and uses is essential for achieving an air-brushed look without all the expensive equipment. A stippling brush has a different effect than a Kabuki brush or a Beauty Blender, so you need to figure out exactly what you’re working with. Here are some of the most common brush and product pairings:
- Tapered foundation brush is great for spot concealer
- Blending sponge is ideal for liquid foundation
- Stippling brush is what you need for blending foundation
- Powder brush is perfect for mineral foundation or setting powder
- Angled brush is used to achieve that Kim K. type of contour
- Fan brush is what you need to highlight those cheekbones
Don’t Be Afraid to Layer Products
So now that you have your arsenal ready for use, it’s time to put your face on. Many women are afraid to use multiple products out of a fear that they look “cakey” or clown-like. That couldn’t be farther than the truth! Using one product is more likely to look overly heavy because you have to layer on so much to achieve a decent end result. By layering complimentary products, you get better coverage without a thick coating. Just as multiple paint colors combine to make a beautiful painting, combining small amounts of different products will keep you feeling ready for a close-up.

Blend, Blend, Blend
When it comes to achieving an air-brushed look without the airbrush, it’s all about blending. After priming and moisturizing your skin, start with a colorized spot concealer to get rid of any redness or dark circles. Then, layer on your liquid foundation either with a silicone sponge or a stippling brush. These two tools do the best job at filling in your pores and delivering a smooth-as-butter finish. The next step is to start building your contour and highlight.
Brush the hollows of your cheeks, sides of your nose, apple of your chin, and hairline with a bronzer to get accentuate your bone structure. Highlight your cheekbones, tip of your nose, and divot in your top lip to reflect natural light as you wow everyone when you walk into a room. While this process can be done with powder, a cream contour kit will last longer and give you the smooth finish you crave.
Once you’ve painted on the product, blend and blend again! This ensures each product seamlessly melds into each other and you don’t end up with any jarring lines. Use a full, fluffy brush to achieve this luxurious look.
Setting Powder is the Secret Ingredient
The last step is setting powder. By covering your entire face in a layer of this translucent, light-diffusing product, you ensure that every picture you take is shine-free and soft-focused. Not only will your makeup stay on longer throughout the day, but any imperfections will be expertly hidden by the diffusing properties of setting powder. Marilyn Monroe has nothing on you!
With these tricks up your sleeve, you’ll be on the front page of a magazine in no time. With the right preparation, tools, and technique, your boring foundation routine will be upgraded to an air-brushed level without turning your wallet inside out.
Follow me on Pinterest

