I recently made reference to the fact that I spent a weekend working at a friend’s house in early October. This largely involved sanding the wooden floors in two rooms and attending to the near-disastrous state of alcove shelving in the living room (some people should be banned from owning hand saws).
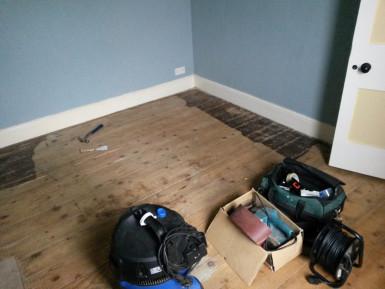
Let’s start by looking at the big job: sanding. Lots of sanding. Then again, downstairs.
With a few tools unloaded from my car boot, I set myself and started working upstairs, in the bedroom that had been cleared ahead of my arrival.
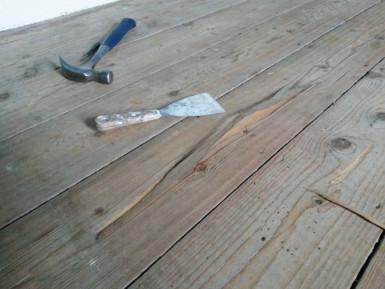
Before I would lay any abrasive sheet on to the surface, I spent probably an hour crawling around after every staple (this floor was previously carpeted) and punching in every proud nail. There’s a danger, as I found, that you can cleave away strips of timber from shakes and minor flaws in the surface of these pine boards. Fortunately, my friends weren’t looking for an ‘as new’ finish; simply to have the grain exposed prior to staining.
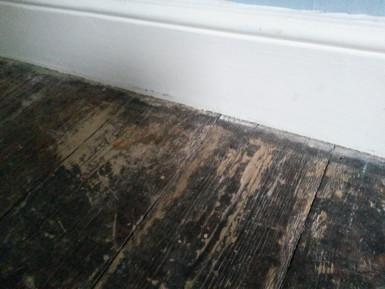
There was evidence of woodworm on several board ends along one interior wall. This was something my friends were already aware of, having found further traces in the loft above (which has also been treated to kill off any potential survivors).
You’ll notice a very dark stain in some of these photos… I very much doubt that Norm Abram was involved but it literally appears as though a previous owner of this property decided to paint around a large rug that would’ve occupied the floor space!
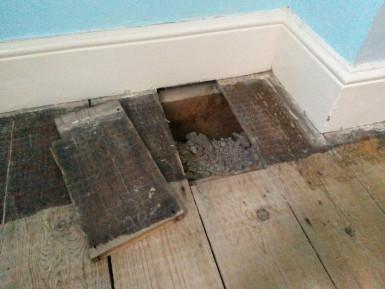
There was a short board near one corner of the room that wasn’t fixed down (…And still isn’t). My friend sprung it upon me, unexpectedly, that she would like the broken corner to be repaired… She returned five minutes let with a piece of timber from her shed, about 4ft long, at least 5in wide and 2in thick! I hadn’t packed the bandsaw I sold in 2014…
I would’ve presumed this board was loose for access purposes. Looking now, I wonder whether someone miscalculated when cutting and fitting the boards. Worst of all, it highlights one of my personal hates: builder’s who leave their s**t lying in unseen places. I’m guessing the stone and rubble once belong inside the former fireplace on the right. I wonder how much is actually under there, bearing down upon the plasterboard ceiling below.
Another irk I haven’t photographed – someone had not only screwed another short board in place but they chose to use drywall screws!
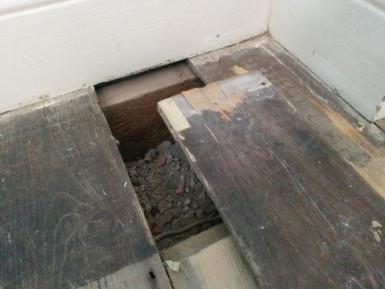
Putting all of that to one side, she was keen for me to fill in the damaged corner. She even left a handsaw standing next to the lump of timber – there was no way I was going to be able to escape from it! I made some pencil marks, hacked a rectangular-form off of one corner and glued in on… With a single screw (in to the board’s edge) to hold it. But it was still a good 15mm thick at this point. Five minutes with a could’ve-been-sharpened-first block plane and it was looking okay.
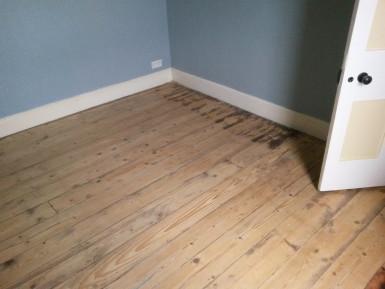
Procrastination over; it was time to get sanding.
Why was I using a 4in wide belt sander?!
During our initial discussions, we’d agreed that we’d hire a proper floor sander (and an edge sander for the hard-to-reach areas). But, in contacting the previous owners to determine which stain they’d used, my friend was told that they didn’t hire a floor sander because the boards were uneven… Apparently, they went to the extremes of hand sanding. I presume that still meant powered hand sanding as I like to have at least so much faith in mankind.
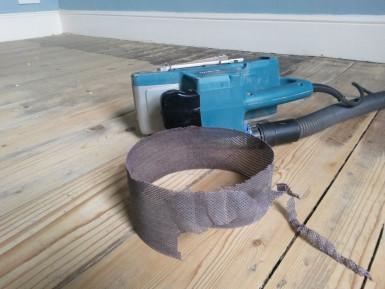
Past experience of sanding pine anything has taught me that the resin will build up and clog an abrasive sheet within no time at all. For that reason, I had a good look online and found that Mirka now produce an Abranet Max sanding belt – the kind of thing I would only dream of, when I last had a workshop. Used with a vacuum extractor, I thought this would work great (I’ve had similar success with the Abranet sanding discs). Most online retailers sell only in bulk (10 off, 25 off) but, I did find Axminster offering them (80g, 120g and 180g) in packs of two.
I bought two of the 80g belts and two at 120g. This was my first order with Axminster in over five years… I’m pleased to see that their delivery charge for low value, small quantity orders has come down in that time. Plus, as they used DPD for the courier service, I was able to arrange to collect it from a local pickup shop.
It was going so well… I would’ve preferred a 60g belt but the 80g was removing the surface of this pine with relative ease. I thought I might even get away with using only one belt for each room. It didn’t seem to be clogging up, either. But then, as the photo shows; I caught something and tore the edge off the belt (they are slightly more fragile than standard aluminum oxide belts). I tried to persevere but my sander didn’t like it. I couldn’t find a rogue nail or even a staple. It’s entirely possibly I caught a proud splinter of wood or approached one board edge from a bad angle.
Needless to say, I won’t be using Abranet again on a job of this nature. But for table tops, furniture and joinery items, I’m confident it’d be worth the investment.
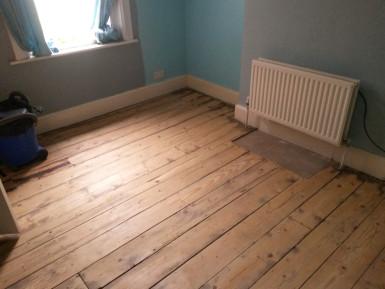
It must’ve taken me another couple of hours to finish sanding the bedroom floor. In my head, I have ‘three hours’… All I remember clearly was that it took much longer than I’d guesstimated.
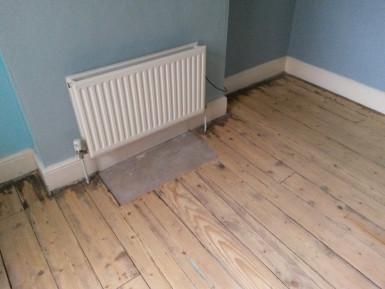
But, I did a thorough job, as I often try to. First, I sanded the entire floor with 80g paper in order to clean up the surface of each board. I wasn’t looking to level the floor, so it’s still in keeping with the Victorian age of the property. I then skimmed over it with a 120g belt (ironically, I didn’t tear that one) to prepare a surface that would be easier to paint or stain. Imperfections were welcome with this job and I only hand sanded around the edges where my belt sander couldn’t reach or would’ve meant sanding across the grain.
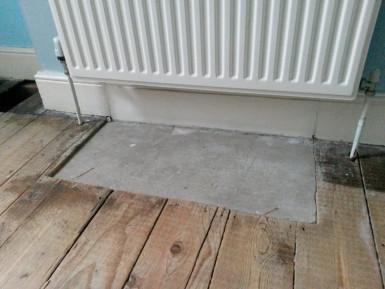
I’ll mention this former fireplace, with a large concrete slab that remains today. I wouldn’t know what to do, with regards to removing it as there is only a plasterboard ceiling below. My best suggestion was to make a feature of it… I’m thinking of a timber surrounded with some kind of mosaic or art pattern inside. We’ll see; I half-expect this issue to be raised in the future.
Downstairs
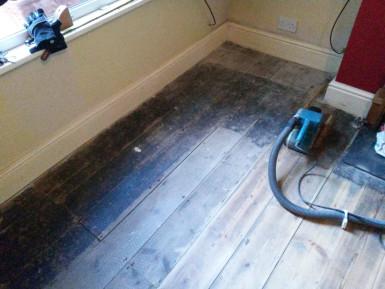
There’s a lot that I could show you in the living room… Everything we were aware of before I started working and then all I discovered during the job – some of which has not been photographed.
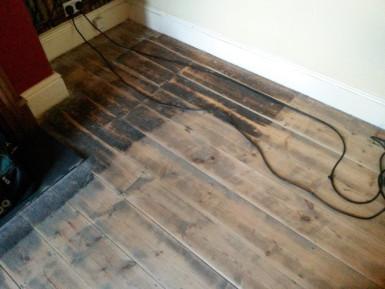
Again, there was strong evidence of ‘painting around the rug’… Just, why?!?
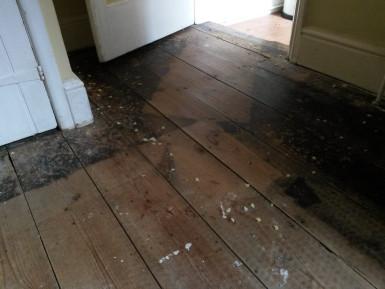
Worst thing about this floor was the shocking quantity of staples in one square. It was almost as if someone the carpet fitter was having a very bad day, didn’t like the underlay or his gun and had decided to take it out on the floor, there and then! I think it took me around three hours just to prepare and clear this floor before sanding!
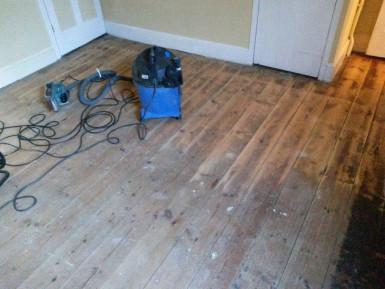
Eventually, it came out quite nicely. This was my second day, by this time and I’d fortunately remembered the pack the bags for my Nilfisk-Alto vacuum (on day one, I was working bag-less and having to stop and clean the filter far too often).
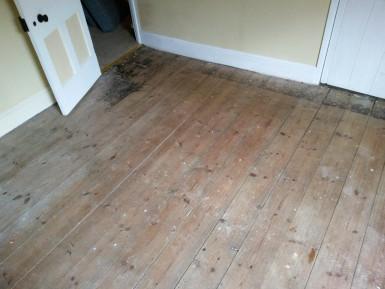
I know that the bedroom floor has been stained. I was impressed with how it was looking after one coat but haven’t even photographed it, let alone seen the finished job. As for this living room… Last time I was there, it was still half-empty while other jobs were on the go.
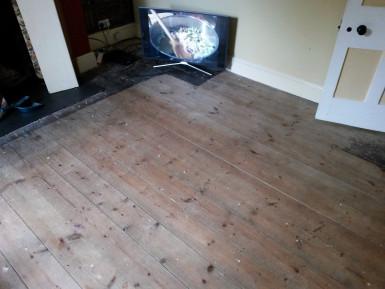
In this living room, I found several springy boards had been left unattached near the external corner. I was able to quite easily pry one of the boards free, only to find the joist nearest and parallel the south-facing wall was not parallel and ‘free’ at one end… I tapped it back into alignment, which helped; only to discover evidence of damp, mold and mildew on several of the joists, here. They’ve since had a specialist come around to treat the joists.
There are limitations to my knowledge and understanding in the world of construction and I’d rather be honest with people than to try and impress them.
I couldn’t quite figure out the arrangement of the joists underneath the floor, although they were sitting on wall plates on top of sleeper walls below ground level. Joists had been doubled up, about one third away from the wall and not apparently in support of the chimney breast… I can’t see it’s purpose.
At the foot of these walls (let’s say they were 4ft deep), was another mountain of c**p. Bricks, blocks, stone and the occasional roof tile… WHY? It would cost a small fortune to dispose of this now, as even recycling centres charge you per bag to dispose of hardcore and rubble. If they were to clear this space, there’s potential for a low-level basement or cellar (yeah, I’d love to trim out the floor, damp-proof and build a staircase for that).
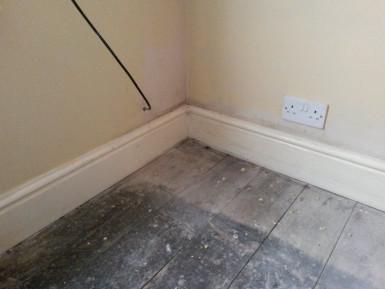
This is the damp corner I mentioned. Adjacent to that, on the other side of the chimney breast, I think we found more woodworm. Or, was it dry rot? But have decided to leave it for now. Interestingly, there’s a vent on the outside of the eastern wall [left, in the photo above]… It’s been clogged up with thick paint and, clearly, there’s no allowance for it to pass through the cavity wall and in to the living space. I’m really surprised The Damp Man didn’t make a reference to this… I firmly believe that ventilation is the key to resolving most damp issues. People talk about “heating” and installing dehumidifiers but, no. I think it can be much simpler.
Enough about floors. Needless to say: if I’m ever asked to sand a floor again, I’m hiring a proper machine and levelling the entire surface if necessary!
Shelving
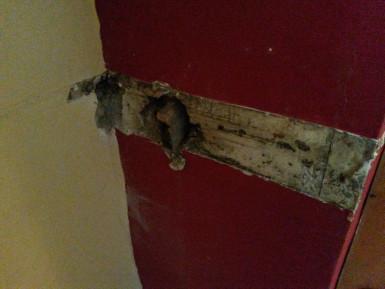
Either side of the living room chimney breast, there was once shelving on both walls. Ends of each shelf had been fitted in to the walls.
On the left (and I thought I had more photos of this), cleats were still attached to the wall but the majority of each shelf had been removed… Crudely, using a handsaw and leaving 2in long stumps sitting proud of each wall. Removing these was quite easy. I used a Stanley knife to trace around each section of timber and free it from the paint. Shelf ends could then be pulled away. Cleats were only nailed on (plus the odd shrivel off wood set perpendicular in to the wall) but required leverage to get them all out.
This has left some voids (maybe 1in/25mm deep – some are much deeper) in the wall that I’m unsure of how to fill. I think this kind of gap is too much for a powdered filler or plaster. I reckon a sand and cement render might work best but still, may need to be applied in layers. For the long and deep voids, I had wondered about initially using expanding foam but I’m not highly confident with that thought.
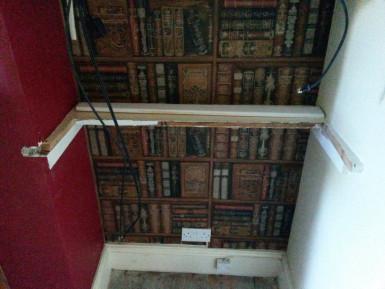
On the right hand side, just the one shelf had been “removed” (to make way for a TV, I s**t you not) and I was asked about putting it back together.
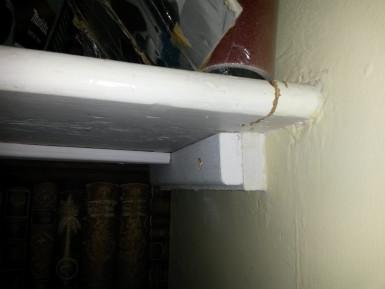
I had packed my biscuit jointer but soon decided against it. On the evening of day one, I needed to invest in a pack of new sanding belts and, at the same time, I spent £5 on ‘stripwood’ timber to make a slightly easier repair that all were satisfied with.
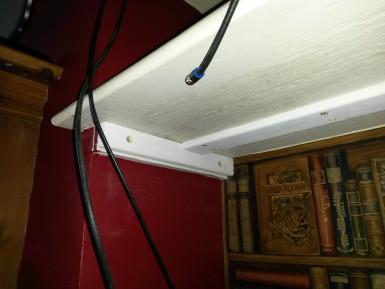
Basically, I increased the thickness of the wall cleats (so the cuts across the shelf are supported) and attached a full length strip around 60mm wide underneath the long join. A little glue and several screws. Holes have since been filled in, ready for painting, with a powdered filler. Memory tells me that these shelves were made from blockboard (narrow strips of pine, laminated side by side to create a wide board) and so, expansion and contraction may be less of an issue.
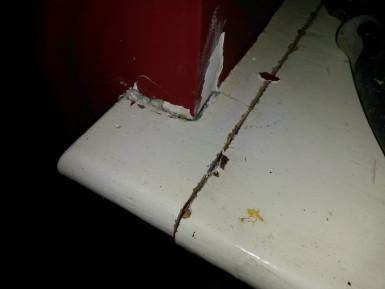
I’m pleased to say that my work is done here (for now). All parties are satisfied, I’ve been paid and I feel good for having been able to do this.
