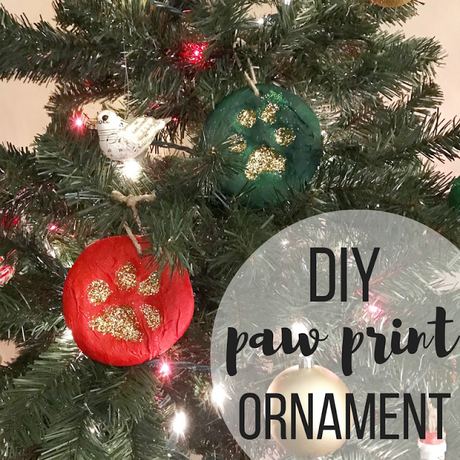
 If you know me AT ALL, you know that I am a crazy dog momma. I wanted to do a craft that included my pups and I knew these would be perfect! I made them last weekend, and I am so pleased with how they turned out :)
What You'll Need:
- 1 cup of iodized salt
- 1 1/4 cup all-purpose flour
- 1/2 cup of water
- Cookie sheet
- Aluminum foil
- Non-stick spray
- Cup
- Straw
- Twine/String
- Your pup's paw, of course!
What You'll Do:
- Preheat your oven to 200 degrees Fahrenheit.
- Mix the salt, flour, and water together. Knead the dough until it is a firm consistency.
- Cut out individual circles using the cup (I used a Yeti Rambler to get my size).
- Press your dog's paw into the dough (good luck with this part, haha!) then using the straw, poke a hole in the top so you can thread the twine through later.
- Put the foil on the cookie sheet and spray it with some non-stick spray. Add your printed dough.
- Bake for 2 hours and 45 minutes or until dry.
- Let cool completely. I put mine on a baking rack for about an hour. Once dry, thread the twine through the hole you poked.
- Decorate them! I used acrylic paint (red + green to be extra festive) and gold glitter.
Here is where I found the original tutorial. I had to bake fairly long - maybe because my dogs have giant paws? Anyway, let me know if you try this out! I'm sure it would work just as well with kids' hands.
Oh and this "recipe" was enough to make an ornament for both of my dogs!
xo, Jess
lovelylittlethingsblog.com
