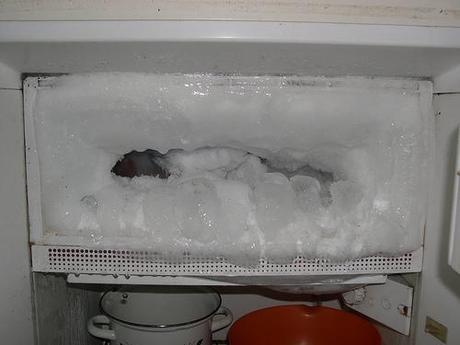
Time to defrost the freezer! Photo by Kate Sheets.
As fall harvest wraps up, it is canning and freezing are under way. Before you fill up your freezer with the fresh produce and foods for the long winter ahead, it is a good time to defrost the freezer if necessary.
According to the National Center for Home Food Preservation, your home freezer should be defrosted at least once a year, or when there is more than a quarter inch of ice built up on the shelves or other surfaces. It will need to be empty, which is why the best time to defrost is when your frozen food stores are low.
Step 1: Cut Power to the Freezer
You must turn off or unplug the freezer to defrost it, otherwise you will run up your electric bill, produce ideal conditions for more frost, and possibly damage your freezer.
Step 2: Take out the Food
Removing the food is another requirement to properly defrost the freezer. Put your frozen food into a cooler, or a plastic tub or cardboard box covered with a cloth. You can also use insulated bags if your local supermarket offers them.
Of course, you could also cook up some of the goodies you find in your freezer. Ice cream and popsicle will not refreeze well if they thaw, so have a little party as you defrost the freezer. Take special care with meats, perhaps moving them to a refrigerator or a friendly neighbor’s freezer.
Step 3: Melt the Ice
There are a lot of methods and theories out there on how best to remove the ice in your freezer. Some are dangerous, so here are some pointers:
- If you have the time, simply leave the door open and let the ice naturally melt. Put towels in the bottom of the freezer and under the unit to absorb the water.
- You can use a fan to move air through the freezer faster. Even in winter, the air in your home is warmer than the air in a running freezer.
- You may be able to use a pan or bowl of hot water to speed up the ice melting and catch dripping water and falling pieces of ice. Some manufacturers do not recommend this technique, as it could damage their evaporator coils, so consult your manual.
- You can also spray water in targeted areas of your freezer to create cracks and loosen chunks of ice. This video demonstrates a way to use a soap bottle to deliver targeted shots of hot water to the ice in your freezer.
- Do not use a hair dryer! Melting the ice creates a wet environment, which can be quite dangerous to operate a hand-held electric device. Also, the concentrated heat can damage your freezer walls.
- Scrape or pry only with a blunt plastic object. Do not use a knife to scrape ice, as you could puncture your freezers walls and even cause a refrigerant leak, which is not only expensive but very hazardous. There is also the possibility you could cut yourself while scraping with a knife.
Step 4: Dry and Clean the Freezer
Use some baking soda and clean water, wipe out the freezer and then dry the inside thoroughly. Any moisture left when you turn it back on will turn back into ice crystals.
Step 5: Back to Frost-Free Use
Restore power, shut the door, and let the freezer run empty for about a half hour. Then wipe off your food containers, remove any moisture or ice from them, and replace them in your freezer.
How to Avoid Frost in the Freezer
Frost forms when moisture and outside air get into the freezer. Make sure that the door is always closed tightly, and replace the seal if necessary.
Of course, you could always buy a frost-free freezer to replace your current one, and eliminate this messy chore once and for all!

